R Barbara
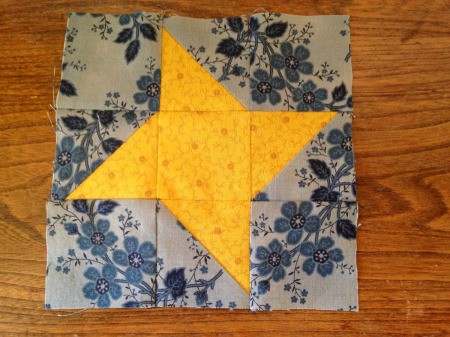
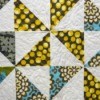
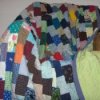
Bronze Post Medal for All Time! 190 Posts 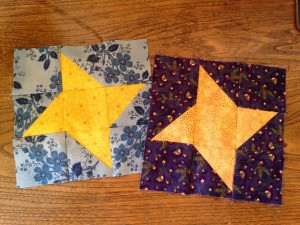 My new quilt is going to be a combination of 6 inch snowball blocks, see here, interspersed with friendship star blocks.
Total Time: 30+ minutes
Yield: one star block
Supplies:
- cotton quilting fabric in you choice of 2 colors
- square templates - 2 1/2 inches for the squares and 2 7/8 for the triangle squares
- gridded template material, for making your own templates
- pen or pencil
- ruler
- scissors
- thread
- pins
- rotary cutter
- self healing cutting mat
- quilting grid, non-slip ruler - for squaring up the triangle blocks (it needs to be at least the size of your unfinished block, including seam allowance)
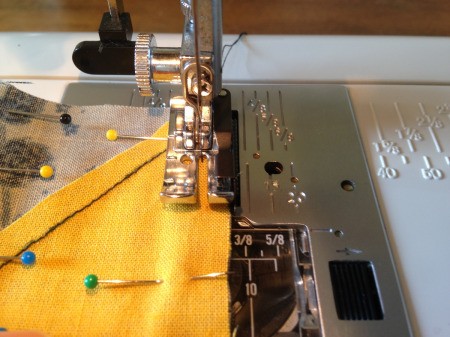
- 1/4 inch sewing machine foot, optional
- seam pressing tool
- sewing machine
- iron, optional
Steps:
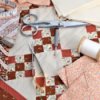
- Wash your fabric to preshrink. Iron.
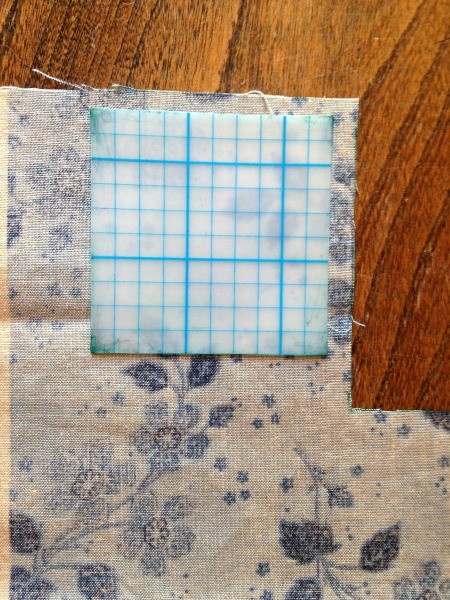
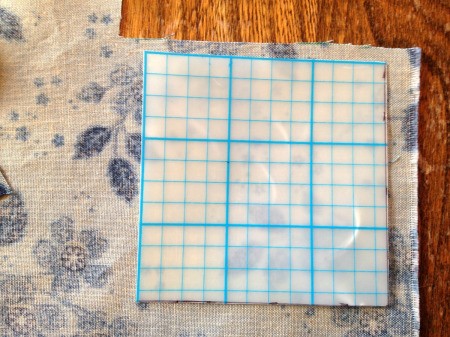
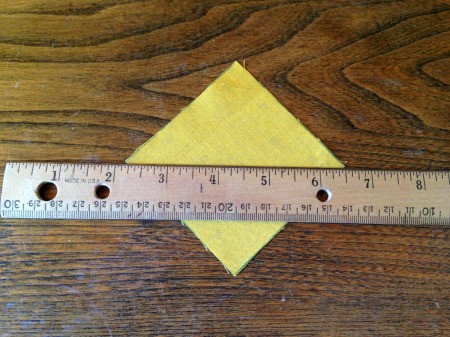
- Using your 2 1/2 inch template, trace onto wrong side of fabric and cut 4 squares from the background fabric and and one square from the star fabric.
- With the 2 7/8 inch template cut 2 background fabric squares and two star fabric squares.
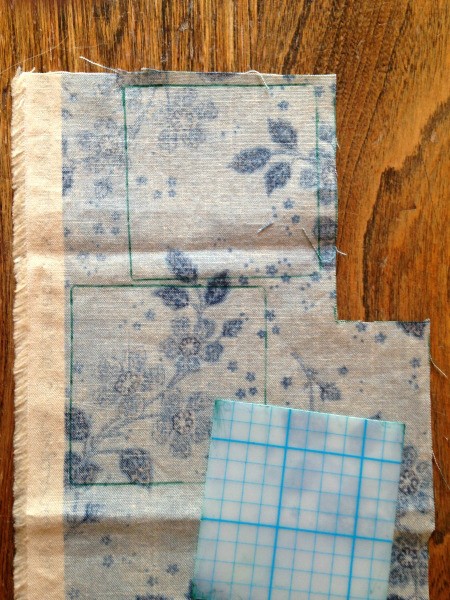
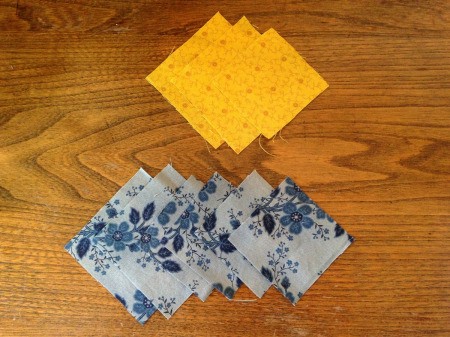
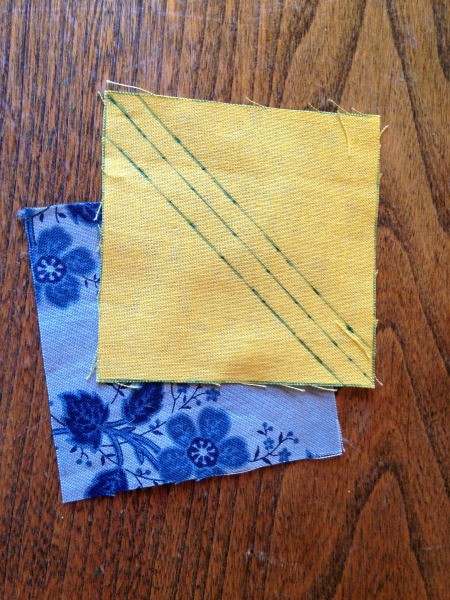
You will now have 3 squares total for the star (1 that is 2 1/2 inches and 2 that are 2 7/8 inches) and 6 of the background fabric (4 that are 2 1/2 inches and 2 that are 2 7/8 inches). - Using your ruler draw a diagonal line on the wrong side of the fabric on two of your 2 7/8 inch squares of either your star fabric or your background fabric. I marked the star fabric because it is lighter.
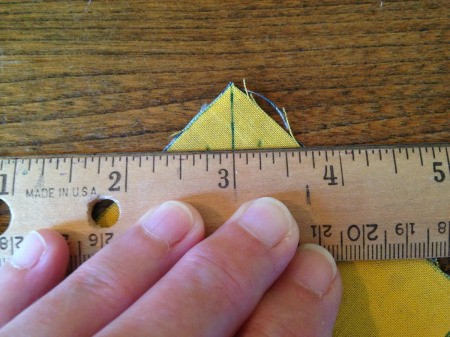
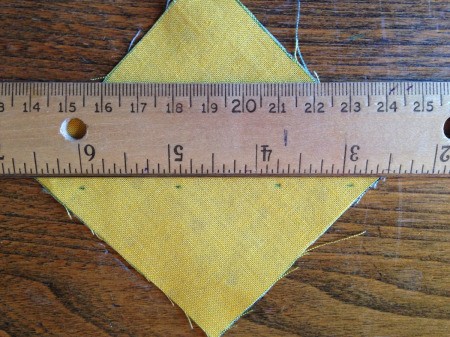
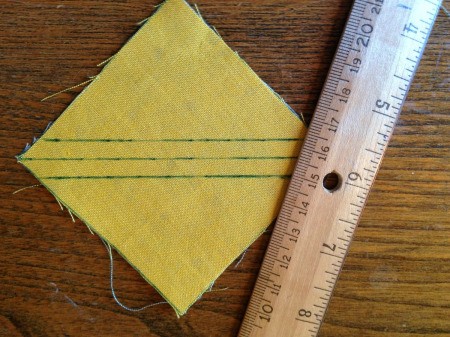
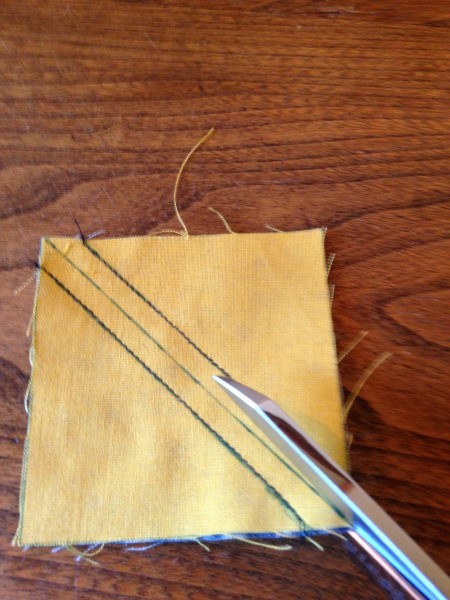
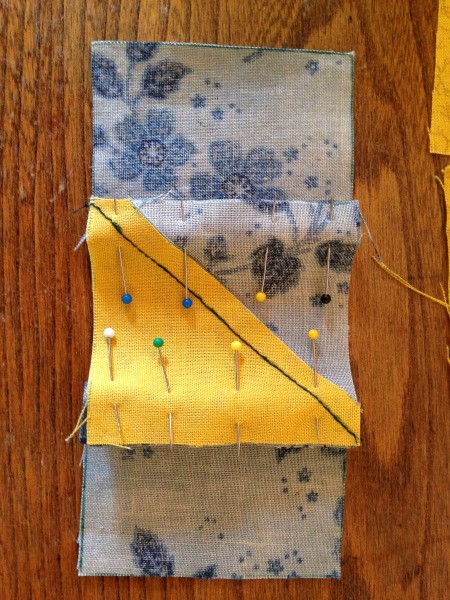
- Using your ruler mark two sewing lines, 1/4 inch wide, on each side of the dividing line.
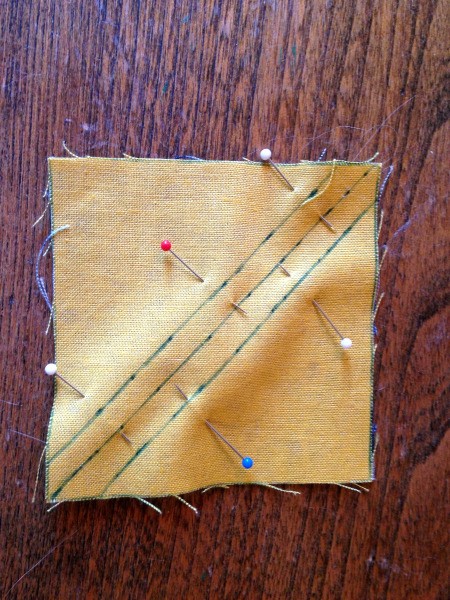
- Place the marked square on top of your second square, right sides together. You will be placing one star fabric square together with one background fabric square.

- Line up the edges of the squares and pin together.
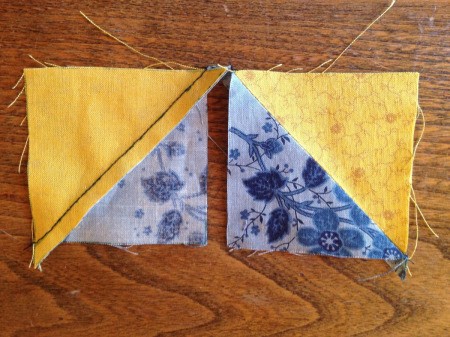
- Sew along the two seam lines to the right and left of the original dividing line. Tie the threads and cut off extra thread.
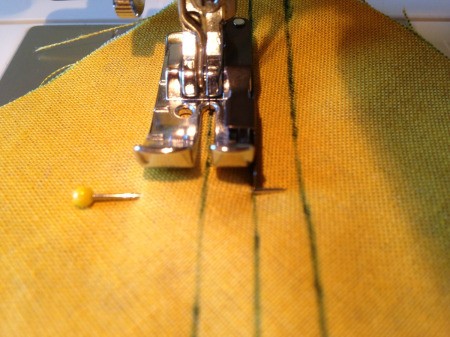
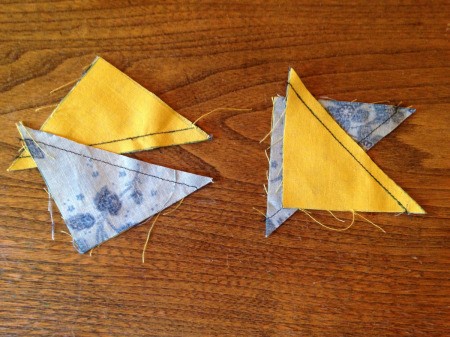
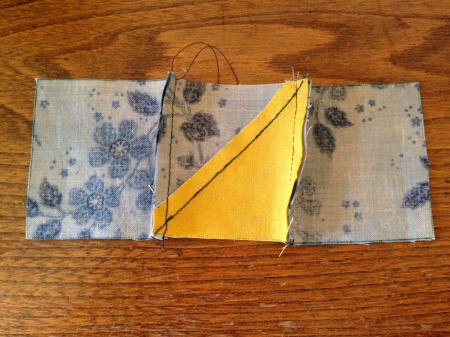
Note: An optional method of sewing the triangle squares is to use a 1/4 inch seam foot and line up the edge with your diagonal line, rather than marking the sewing lines on each side of it. In the photo I have attached the 1/4 inch seam foot, but am demonstrating on the square marked with the sewing lines. Tie threads. - Using your scissors or a rotary cutter cut the two layered square in half along the original dividing line. Repeat. This will give you 4 half square triangle blocks.
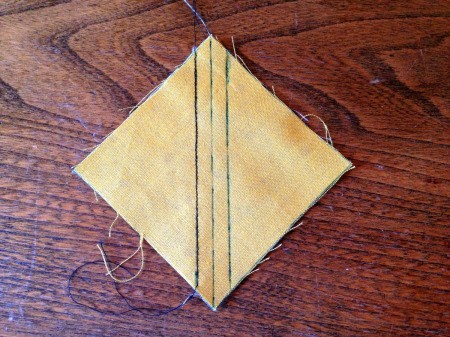
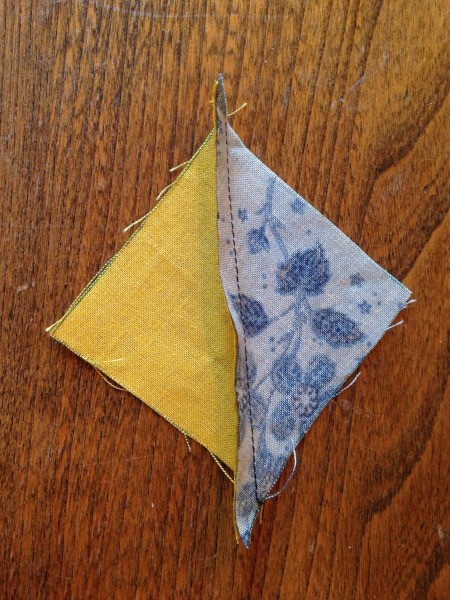
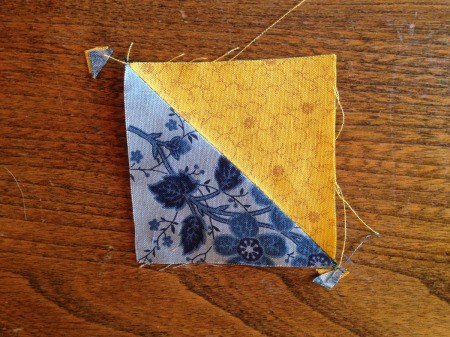
- Open your square and fold the seam towards the darker color of your block.
- Press the seam. You may finger press, use a seam pressing tool, or an iron. Do this step carefully so as not to stretch the seam.
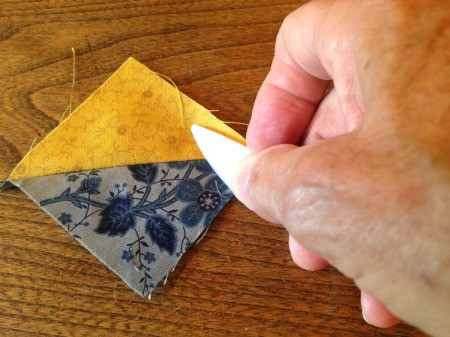
- Trim off dog ears and you are done with the half square triangle blocks.
- Once all of your blocks are complete, you will want to square them up. Click here: Squaring Up a Half Square Triangle Quilt Block.
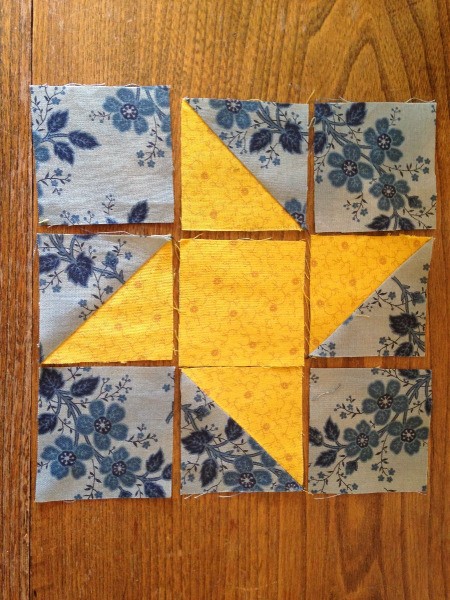
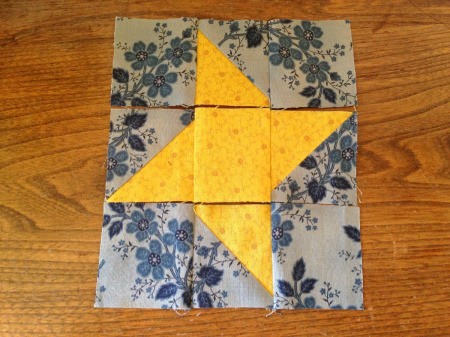
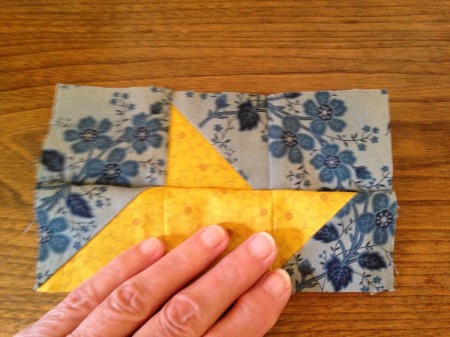
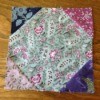
- You will be sewing the triangle, center star, and background blocks together in this arrangement.
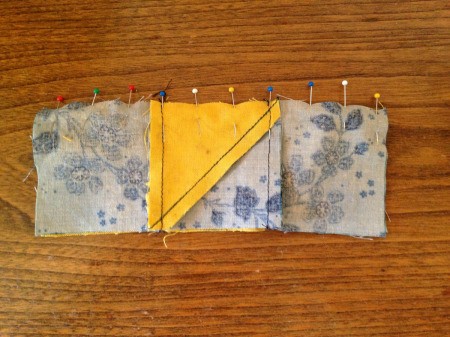
- Begin with the top row of two background blocks and one triangle block. Pin and sew the two seams. Tie threads, press seams toward the dark blocks when possible. Continue on with the two remaining rows.
- Now you will pin the three rows together, matching the seams as closely as possible. Sew.
- Press the long seams as before and you are done. I typically will use an iron on the blocks right before I begin piecing the quilt top.
Add your voice! Click below to comment. ThriftyFun is powered by your wisdom!
September 2, 20160 found this helpful
This pattern is so beautiful. I am considering enlarging the blocks and making everyone a potholder out of this pattern. Thank you for your clear instructions and photos.
Lizzyanny
Bronze Feedback Medal for All Time! 226 Feedbacks September 2, 20160 found this helpful
Your explanation and pictures are wonderful! It is so hard to describe quilting procedures effectively. If you have written a book I would love to hear about it. In any case thank you for this...I am inspired.
January 18, 20180 found this helpful
I inherited the contents of my grandmother's craft/sewing room. I found 8 completed squares and pieces for 8 more. Thank you for this tutorial. It will be so helpful in finishing of her last quilt.
Add your voice! Click below to comment. ThriftyFun is powered by your wisdom!