social

Day and Night Spinning Card


Silver Post Medal for All Time! 449 Posts

Day and Night Spinning Card - night sceneLooking back on my elementary days, I used to watch Disney channel's Art Attack. This is one of my greatest memories of the old times Art Attack show.

Advertisement

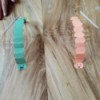
This doesn't look like a professional artist's work, but it is a great idea to teach kids to play with their imagination.
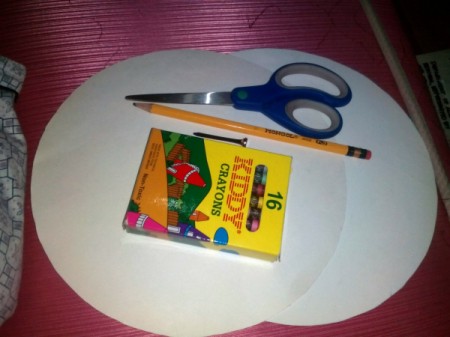
Supplies:

Day and Night Spinning Card - supplies
 

Steps:

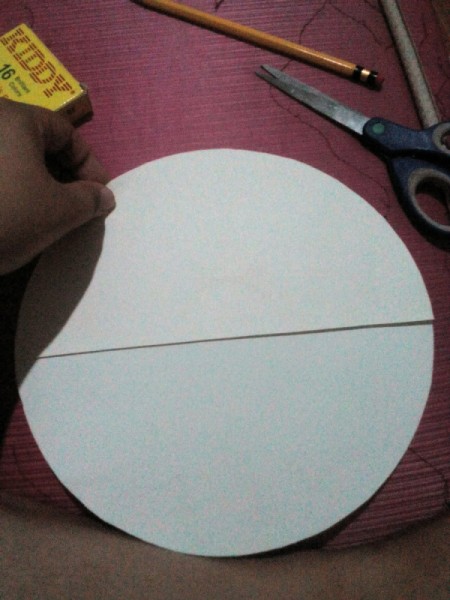
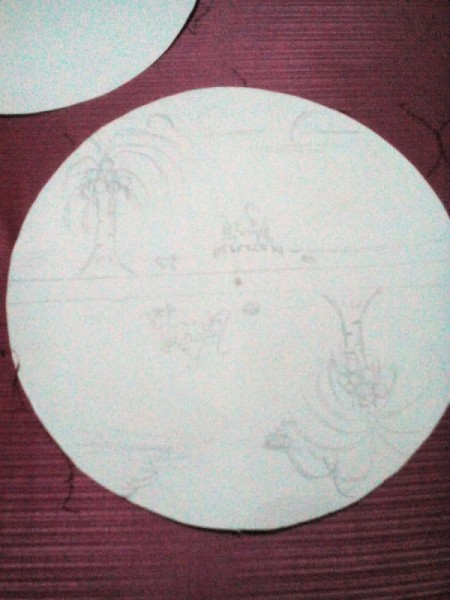
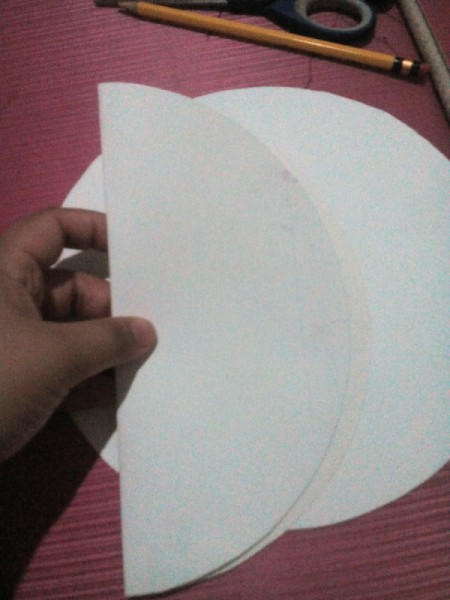
  1. Get a piece of round cardboard. Fold it with one side smaller than the other. Cut the cardboard and keep the bigger side.
  2. Day and Night Spinning Card - fold paper circle not quite in half, cut and keep larger side
     
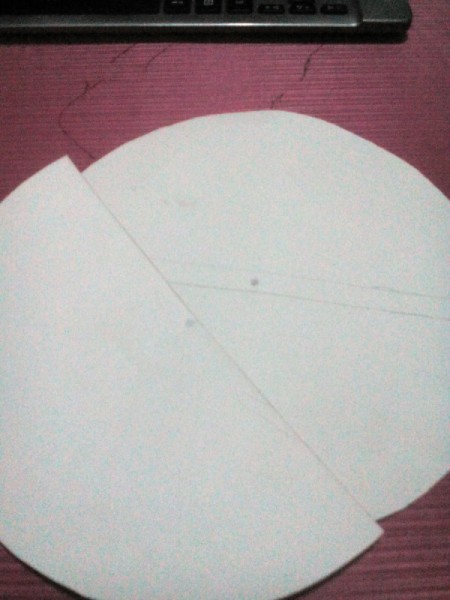
  3. Position the cut out piece onto the second round cardboard. Trace the middle edge. Then place it on the opposite side, trace again. You will then create a small horizontal space in the middle of the round cardboard.
  4. Day and Night Spinning Card  - put the cut piece on the full circle and trace the horizontal line
     
    Day and Night Spinning Card - place on other half of the circle and trace again, leaving a center space
     
    Advertisement

  5. Mark the center of the pieces of cardboard.
  6. Day and Night Spinning Card - mark the center of the pieces of cardboard
     
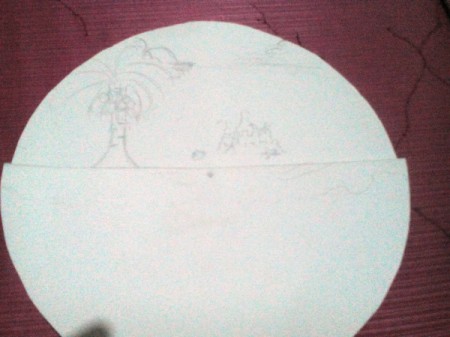
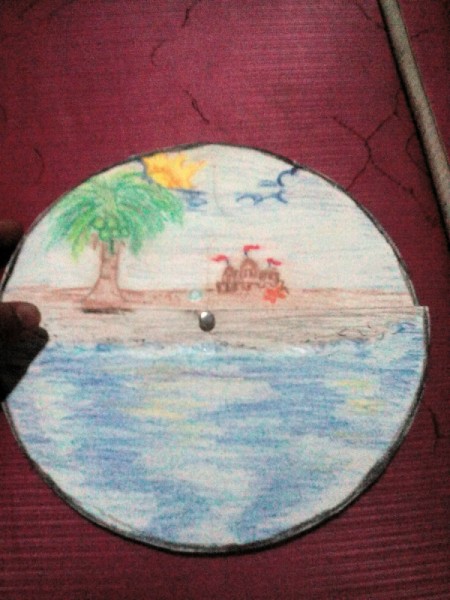
  7. Start drawing your design on the first side with the half cardboard positioned on the opposite side.
  8. Day and Night Spinning Card - with half piece in place begin drawing your scene
     
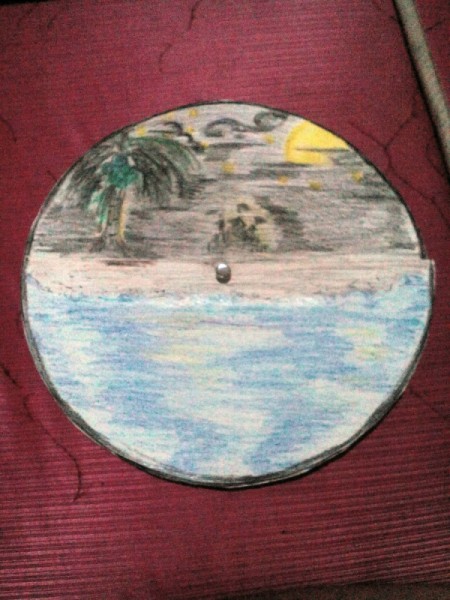
  9. Do the same on the opposite side. Draw the same view on it and you can add a little more detail to create movement on the art.
  10. Day and Night Spinning Card - repeat the drawing on the other half
     
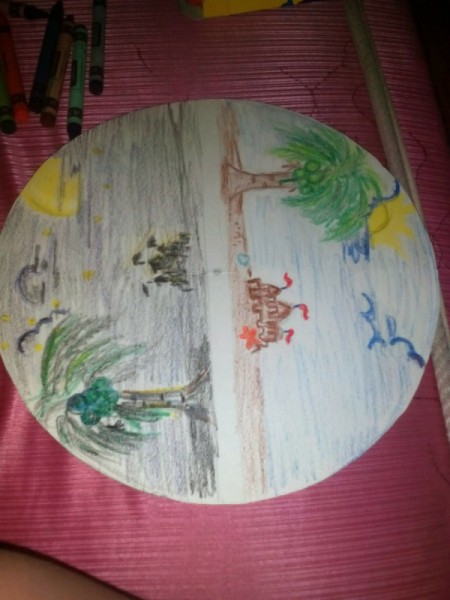
  11. Color your work. On one side, day and the opposite will be night time.
  12. Day and Night Spinning Card - color your work, with one side day and the other side night
     
    Advertisement

  13. Choose a design for your half cardboard piece. Find a view that might not affect the day and night concept.
  14. Day and Night Spinning Card - create a design for the half piece that will work for both day and night
     
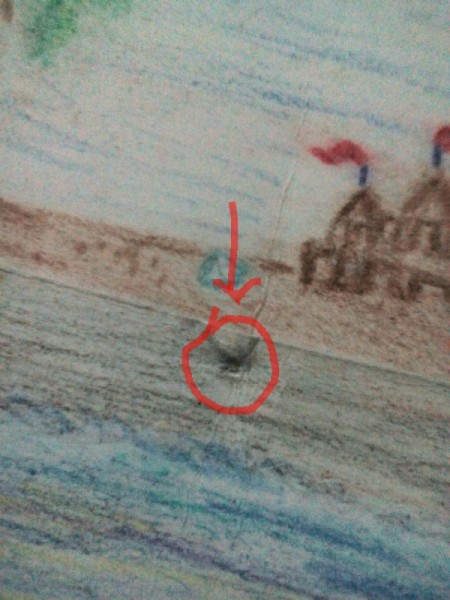
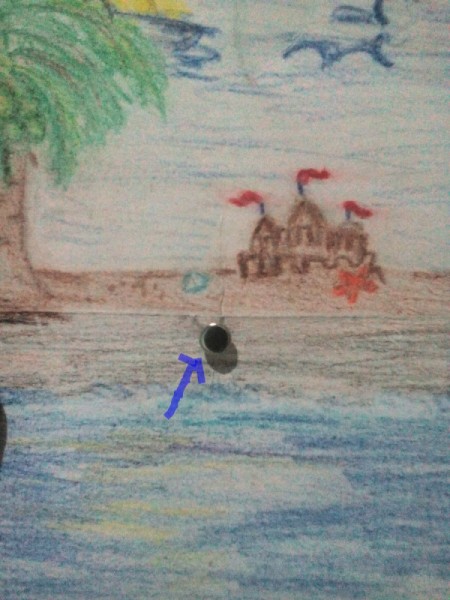
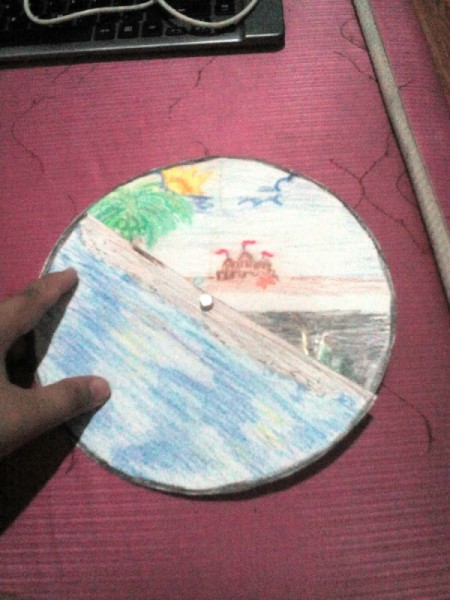
  15. Place half over the round card. Make a hole in the marked area.
  16. Day and Night Spinning Card - place the half piece on top of the full circle and mark a spot for the brad hole
     
  17. Carefully insert fastener. Secure the back portion.
  18. Day and Night Spinning Card - insert fastener and secure the back
     
  19. Spin the half cardboard to see the simple, but amazing effect.
  20. Day and Night Spinning Card - spin the smaller piece of cardboard to see the change from day to night
     
    Day and Night Spinning Card - night scene partially seen
     
    Day and Night Spinning Card - night view
     
    Advertisement

Add your voice! Click below to comment. ThriftyFun is powered by your wisdom!

Anonymous
August 8, 20170 found this helpful

What a great idea! Definitely on my to do list!

Reply Was this helpful? Yes

Add your voice! Click below to comment. ThriftyFun is powered by your wisdom!

Categories
Crafts Crafts For KidsAugust 7, 2017
Pages
More
👒
Mother's Day Ideas!
🐰
Easter Ideas!
🌻
Gardening
Facebook
Pinterest
YouTube
Instagram
Contests!
Newsletters
Ask a Question
Share a Post
Categories
Better LivingBudget & FinanceBusiness and LegalComputersConsumer AdviceCoronavirusCraftsEducationEntertainmentFood and RecipesHealth & BeautyHolidays and PartiesHome and GardenMake Your OwnOrganizingParentingPetsPhotosTravel and RecreationWeddings
Published by ThriftyFun.
Desktop Page | View Mobile
Disclaimer | Privacy Policy | Contact Us
Generated 2023-04-03 01:09:46 in 1 secs. ⛅️️
© 1997-2023 by Cumuli, Inc. All Rights Reserved.
https://www.thriftyfun.com/Day-and-Night-Spinning-Card.html