social

Dyed Coffee Filter Wreath


Bronze Post Medal for All Time! 172 Posts

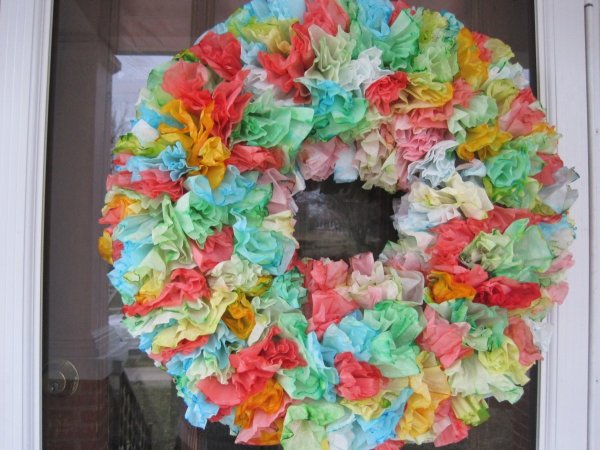
This colorful wreath is made from coffee filters that have been dyed with food coloring. Coffee Filter Wreath Finished


Approximate Time: 4 hours, depending on how large you make it

Advertisement

Supplies:

  • coffee filters (at least a 100 ct. box)
  • foam wreath
  • glue gun
  • glue
  • ribbon for hanging
  • food dye
  • oven for drying (opt)
  • strips of cloth to wrap wreath
  • cookie sheet or something for them to dry on
  • pencil with eraser

Instructions:

  1. First wrap your wreath with strips of cloth if you might want to reuse the wreath again for anything else. The cloth helps to make your filters stick better too. Attach a ribbon hanger to the wreath (it is easier to do this now than later).

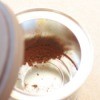
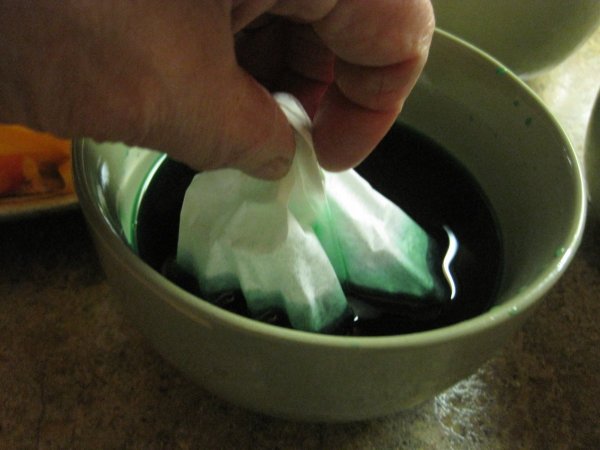
  2. Separate the coffee filters and make dye with food coloring. Start out with just a few drops and put about 1/2 cup water in a bowl. If it is too light, you can always add more. If you find it is too dark, add more water. You can make all kinds of combinations of color.
    Advertisement

    Just look on the outside of your dye box and it will tell you how much to use of what.

  3. Pinch the filters at the bottom, dip each into food dye. Lay on cookie sheet. You can overlap them somewhat and it doesn't matter if the dye runs into each other. It looks kind of pretty that way. Dying Coffee Filters for Wreath
     

  4. If you care to dry them faster you can put them in the oven at the lowest heat possible (mine is 170 degrees) to let them dry. They get a little brown at the tips, but it makes it look more interesting, I think. Otherwise, it takes a long time for them to dry.

    Creating the Shape for the Filter
     

    Advertisement

  5. When completely dry, you are ready to assemble your wreath.

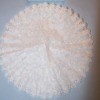
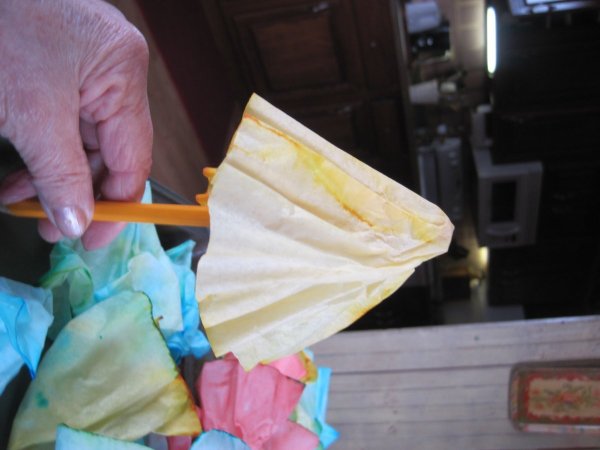
  6. Take a filter and with a pencil put it inside the filter as shown in photo, use your glue gun and put a dot of glue on the tip.

    Dyed Filters for Wreath

     
  7. Starting from the outside of the wreath, begin gluing. This takes quite awhile, but then I put them pretty close, too, so if you want a sparser wreath, it won't take so long.

You can make it look more springy by not adding so much dye to the water. Here is the second one I made using less dye.

By Elaine from Belle Plaine, IA

Add your voice! Click below to comment. ThriftyFun is powered by your wisdom!

 
April 5, 20110 found this helpful

Clever idea and disposable eventually, without much regret.

 
April 6, 20110 found this helpful

What a beautiful wreath! I'm sure you could sell alot of them.

 
April 6, 20110 found this helpful

I love this idea! Thank you for sharing.

 
April 6, 20110 found this helpful

Cool, I really like them both, you made it look simple and beautiful.
Thanks for this.

 
April 7, 20110 found this helpful

Wow so pretty!


Bronze Post Medal for All Time! 172 Posts
April 9, 20110 found this helpful

Thank you all, I had fun making them!

 
October 17, 20111 found this helpful

I really like this. I'm thinking I'm gonna try this for different holidays as well.

 
July 29, 20130 found this helpful

What a great wreath. Thank you for the idea!


Silver Post Medal for All Time! 433 Posts
August 17, 20130 found this helpful

I love it thanks for sharing.


Add your voice! Click below to comment. ThriftyFun is powered by your wisdom!

 
In This Page
< Previous
Categories
Crafts Home Decor DecorationsApril 5, 2011
Pages
More
🍀
St. Patrick's Ideas!
🐰
Easter Ideas!
🌻
Gardening
Facebook
Pinterest
YouTube
Instagram
Categories
Better LivingBudget & FinanceBusiness and LegalComputersConsumer AdviceCoronavirusCraftsEducationEntertainmentFood and RecipesHealth & BeautyHolidays and PartiesHome and GardenMake Your OwnOrganizingParentingPetsPhotosTravel and RecreationWeddings
Published by ThriftyFun.
Desktop Page | View Mobile
Disclaimer | Privacy Policy | Contact Us
Generated 2024-02-24 19:22:17 in 3 secs. ⛅️️
© 1997-2024 by Cumuli, Inc. All Rights Reserved.
https://www.thriftyfun.com/Dyed-Coffee-Filter-Wreath.html