social

Easy Christmas Decoration Sewing Projects


Bronze Post Medal for All Time! 190 Posts
October 8, 2012

Yo Yo Christmas Garland
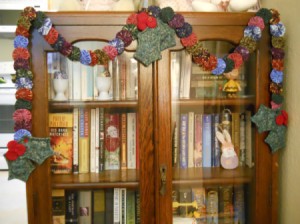
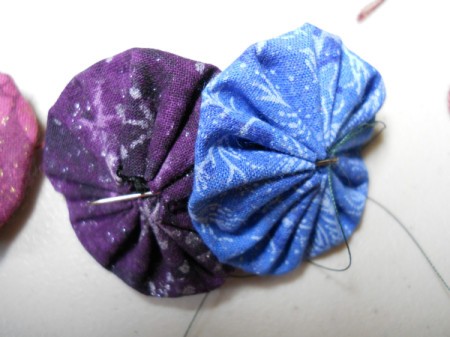
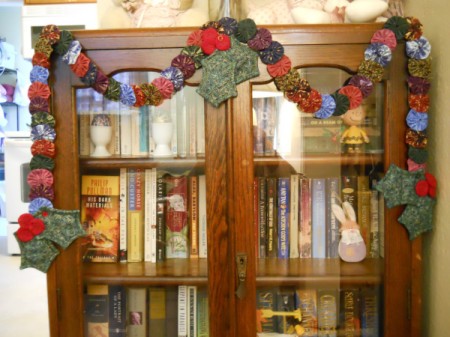
I wanted to make a yo yo garland that could be used not on a Christmas tree but rather over a doorway or window.

Advertisement

Total Time: Approximately 5 hours

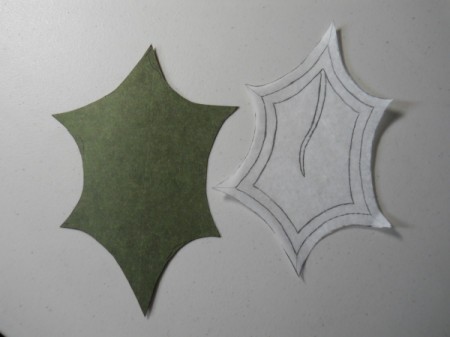
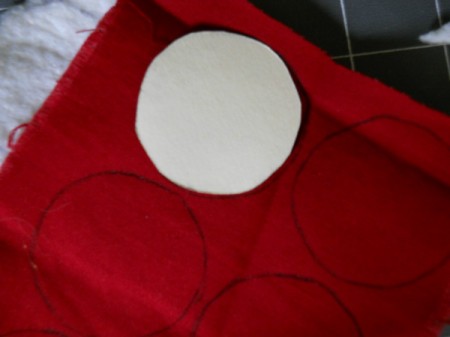
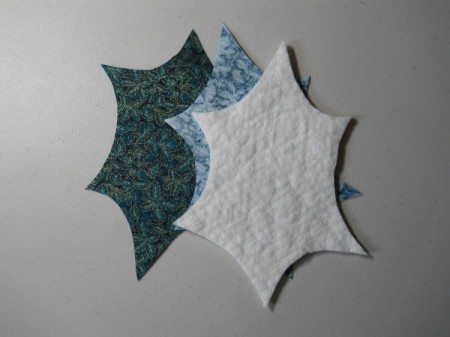
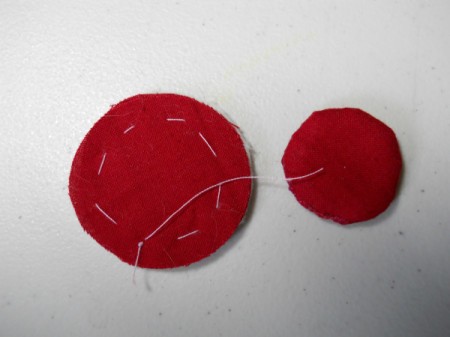
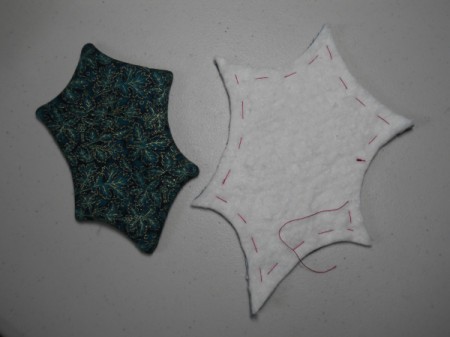
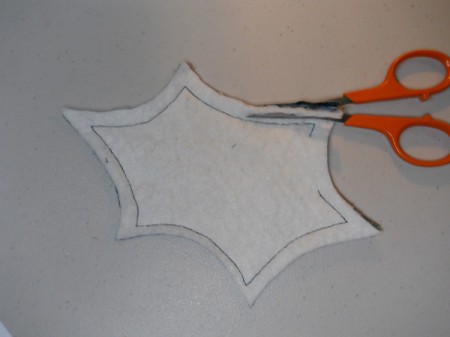
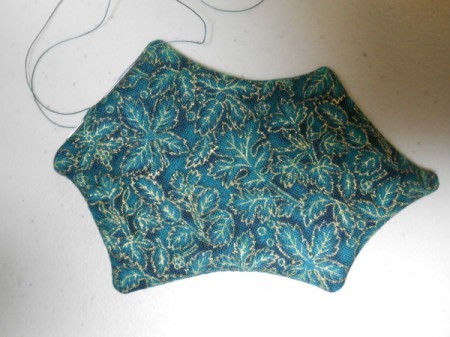
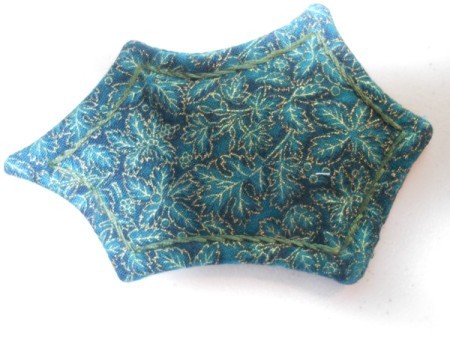
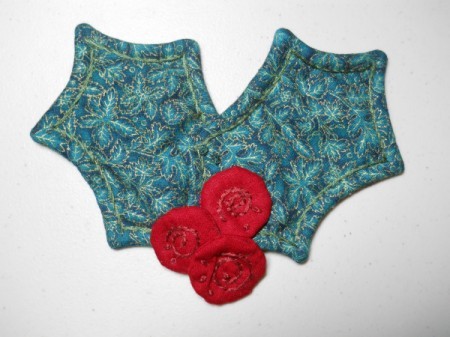
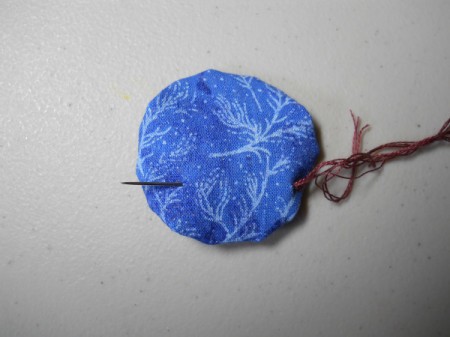
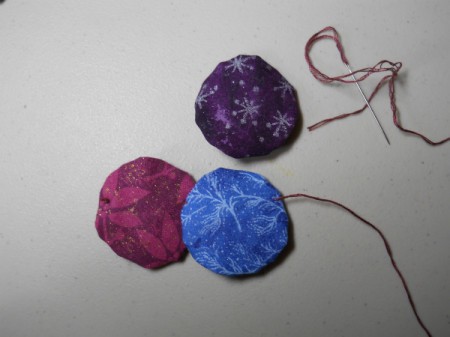
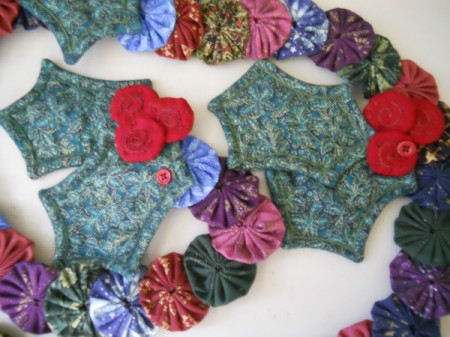
Yield: 3 sets of leaves and berries and 52 yo yos

Supplies:

  • various cotton Christmas fabric scraps
  • remnants of cotton batting
  • embroidery floss in green and red
  • sewing thread
  • needles
  • buttons, optional
  • scissors
  • sewing machine, optional
  • cardboard or in my case old file folders for templates

Steps:

  1. Create templates for holly leaves and berries. I used quilting applique templates and traced with tracing paper and then copied the outline onto pieces of old file folders.
  2. Leaf tissue pattern and template.
     
  3. Trace your templates onto the fabric you have chosen for the leaves and berries.
  4. Closeup of tracing berry pattern onto fabric.
     
  5. You will need to cut two pieces of fabric for each leaf and berry as well as a piece of batting. Make sure that you cut the fabric with it folded together, or turn your template over to get an opposing leaf shape.
  6. Sewing grid board with cut out leaves, circles of batting for berries and a pair of scissors.
     
    Two fabric leaf pieces with one of the batting.
     
    Advertisement

  7. Baste the two pieces of red fabric, right sides together with one batting circle. Leave an opening for turning. Now you can sew by hand or machine. I sewed the berries by hand. Turn and sew opening closed.
  8. View of berry stitched and turned.
     
  9. For the leaves I stacked the three layers together, pinned, basted, and machine stitched. Again leave an opening for turning.
  10. View of leaf basted and also of a turned leaf.
     
    Basting leaf.
     
  11. After stitching the leaves, trim the seam allowance and square off the points for easier turning. Turn.
  12.  
    Advertisement

  13. Stitch the turning space closed.
  14. Sewing turning opening closed.
     
  15. Now if you like you can embellish the leaves and berries with some embroidery. I did a backstitch out line stitch on the leaves and a swirl on the berries, see photo.
  16. Outline embroidery stitching on leaf.
     
  17. Arrange the leaves and berries to your satisfaction and stitch together, using a needle and thread. I also added some embroidery French knots through all thicknesses to further decorate and hold the parts together.
  18. Individual leaf and berry cluster, closeup.
     
    Advertisement

  19. Now it is time to begin stringing the yo yos. If you have not made these fun little fabric gathered circles before click here for a tutorial: Making Fabric Yo Yos

    To make my garland and help to keep the yo yos from flopping forward if suspended in a doorway, I stitched them together by inserting the needle at 10 and 2 o'clock and slightly overlapping each new yo yo with the previous one, see photo. I used embroidery thread for the step for added strength.
  20. Example of three yo yos attached to begin garland.
     
    Stringing yo yos at 10 and 2.
     
    View of back when stringing garland.
     
  21. To further reinforce the garland, because I sometimes tend to overdo, I also ran a thread through the hole on the first yo yo, out the backside and through the following yo yos. This step is absolutely optional. I did find that it did help me to cinch up the chain of yo yos and keep my spacing the way I wanted it.
  22. Sewing center string through yo yos.
     
    Advertisement

  23. I attached the leaf and berry clusters to each end and the center, by stitching to the first and last yo yos and one in the center. I added a button for decoration and added strength for the attachment, the button is optional.
  24. Closeup of center and end leaf and berry cluster.
     
  25. This is the finished garland. It is approximately 67 inches long from the tip of the uppermost leaf to the other end. The yo yos are 1.5 inches finished, berries are 1 1/8 inches in diameter and the leaves are 4 inches long.
  26. Entire completed garland coiled for photo.
     
  27. Here is the finished garland decorating the front of an antique bookcase. Being early fall in the northwest I couldn't get a good photo of the garland suspended across the doorway as I intend to use it. However, it does look nice on the bookcase too.
  28. Garland hanging draped on antique wooden bookcase.
     
    Advertisement

Read More Comments

More Solutions

This page contains the following solutions.


Gold Post Medal for All Time! 969 Posts
November 14, 2008

Three years ago, I made about 450 ornaments, hoping to sell them at the local Holiday show in Turner, OR. I think I still have oh...about 425 left! Not a great show and definitely my last.

tree ornament made from two heart shapes

Read More...


Gold Post Medal for All Time! 969 Posts
November 19, 2008

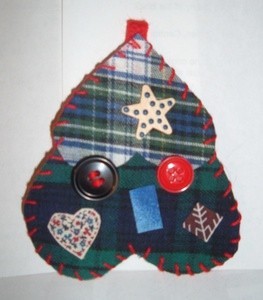
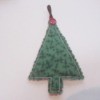
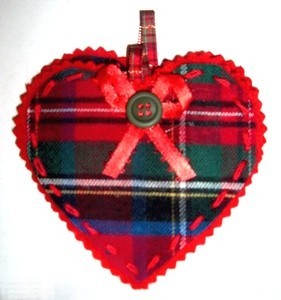
Here is another ornament I made and am sharing with you. This one is a Plaid Heart.

heart ornament

Read More...

7 Questions

Here are the questions asked by community members. Read on to see the answers provided by the ThriftyFun community.

November 15, 2008

Does anyone have ideas for simple Christmas decorations for a beginner at sewing and simple crochet. I am on a fixed income and would love to have ideas to help pass time too!

God bless and Merry Christmas!

Answers

November 15, 20080 found this helpful

Its not decorations exactly, but my family uses fabric gift bags. These are as simple as you think to make... Just remember to have a deep "hem" at the top to make it pretty when you gather it. You can use lots of things as the "ties" and trimming... use your imagination and remnants.

 
November 15, 20080 found this helpful

There is many ideas on this web site if you look through the craft projects. I do a newsletter for several crafters that are pen pals with myself, we connect through this with many ideas, sharing. If you are interested please feel free to send an email requesting the newsletter & I will be glad to send you some simple ideas as well. piwacket AT myway.com


Bronze Feedback Medal for All Time! 153 Feedbacks
November 17, 20080 found this helpful

One very easy Christmas tree decoration is to get a ring such as the plastic ones that hold soda cans together or a bone ring, and single crochet all around them. You can add a second or third row of single crochets. Be sure the stitches completely cover the ring. Glue on some sparkly beads or glitter glue dots if you like. Then add a bow with ribbon and glue. I suggest using any color but green or black, because they disappear on a green tree. Gold is fantastic! Hope this gives you an inspiration.

 
By pghgirl40 (Guest Post)
November 17, 20080 found this helpful

Hello, I crochet pairs of ice skates using a paperclip as the skate. You single crochet across the top of the clip. Then single stitch 4-6 rows (depending on the thickness of your yarn). Then starting from what will be the heel of the skate, crochet half the length of the foot part of the skate. Finish by single crocheting as many of the boot part of the skate (another 8-12 rows depending on how deep high you want your skate to go.) When you get the skate as big as you want it chain stitch on the top of the heel side to make the lace. Crochet the second one to match the first and tie them together. I will try to scan and post a picture of one of these. They turn out very cute and are very inexpensive to make. You can dress them up and make them any color. I have also used this same "pattern" came out of my head, as baby bootie ornaments to tie to baby gifts (just don't use the paperclip).


Gold Post Medal for All Time! 969 Posts
November 17, 20080 found this helpful

I make a lot of ornaments, and you will see them all coming by the end of the month. Some are sewn, and most are crocheted.

I like to make a chain of about 8 using a fairly nice sized hook, like an "N".
Slip stitch to join. Then, chain two and make enough double crochets in the ring to make it full and firm. Then, chain 4 and make a loop to every other stitch.
Brake off the chain and weave in or cool glue in a loop for the hanger. With a small ribbon bow that you can make ahead of time or buy about 25 of at the DT, cool glue it to any top, with a half gem or miniature ball, holly berry, sprig of fake greenery, etc.
You have just made a minature wreath for your tree.
The other lady is right, use colors that can be seen well like red, purple, gold, silver or blue.
Sometimes, mixing two colors is cool, too.

Here's a sample of what it should look like, and works out to be about 3" round.

IDEA: Make the center larger, say chaining 12, and when you are done, cool glue a childs, pets, or friends photo inside!


By (Guest Post)
November 19, 20080 found this helpful

Thanks for the great ideas!

Pat V in Michigan

 
Answer this Question

December 6, 2016

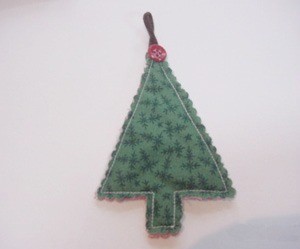
This is a page about making fabric Christmas tree ornaments. Crafting fun and easy Christmas tree ornaments from fabric is a great craft for kids and adults alike.

Fabric Christmas Tree Ornament

November 13, 2016

This is a page about making fabric door bells. Using new or scrap fabric you can make these pretty bell shaped door decorations for the holidays.

Fabric door bells.

May 16, 2016

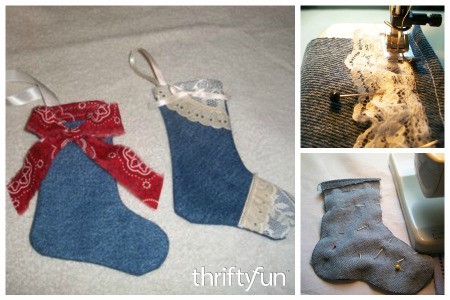
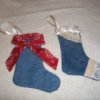
This is a page about making mini denim Christmas stockings. Recycled fabric from denim jeans is perfect for making a lot of craft projects.

Making Mini Denim Christmas Stockings

Categories
Crafts DecorationsSeptember 24, 2014
Pages
More
🎂
Birthday Ideas!
🍀
St. Patrick's Ideas!
💘
Valentine's Ideas!
Instagram
Sub-Categories
AdviceBaking TipsBooksBoxing DayBudgetCardsCharitiesChristmas RecipesCleaningCooking TipsCraftsDecoratingDietingGamesGift WrappingGiftsHelpful HintsHosting TipsLinksMiscellaneousMy Frugal HolidayOrganizationParentingPartiesPhotosPlanningSanta TipsShoppingStocking StuffersTraditionsTravel
Published by ThriftyFun.
Desktop Page | View Mobile
Disclaimer | Privacy Policy | Contact Us
Generated 2024-02-02 14:37:50 in 12 secs. ⛅️️
© 1997-2024 by Cumuli, Inc. All Rights Reserved.
https://www.myfrugalchristmas.com/Easy-Christmas-Decoration-Sewing-Projects.html