Ann Winberg Silver Post Medal for All Time! 306 Posts
February 23, 2010
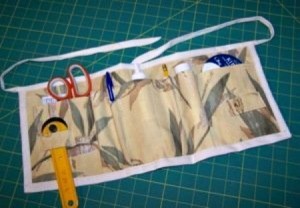
Keep those tools handy at classes or out of the way of little fingers at home with this simple apron.
Approximate Time: 2 hours
Supplies:
Advertisement
8 inch x 19 inch sturdy fabric
6.6 inch x 26 inch sturdy fabric
2 yards for tying strap
1 pkg double fold seam binding
1 set velcro dots
6 inch ribbon
sewing machine
pins
tape measure
Instructions:
First of all fold under and make a seam across the top long edge of your front apron piece, the long piece is the front piece.
Working the front of your apron, you will make several pleated pockets to hold pencils, stick glue, etc. How many you want really determines the length you cut this piece. You may want to cut it 30 inches, make your pockets of pleats then cut it down to match your back piece.
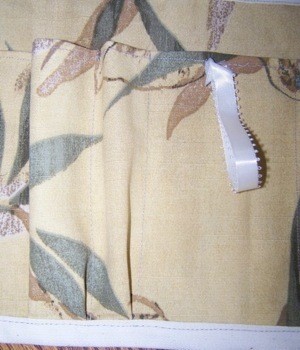
With a 6 inch strip of ribbon or your tying strap, attach one end of the ribbon to the top center of your front panel (see second photo). Sew half of a Velcro dot over that stitching and the other half on the other end of the strip; this will go through the hole in a roll of ribbon or several to keep them handy.
Advertisement
Take two 3 inch pieces of the strap you are using for your tying straps and fold 1/2 inch under on both ends. Sew down those folded ends placing one piece on each end of your apron front to hold scissors, pliers, or other tools. (see photo one)
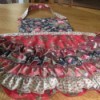
With the front piece of your apron measure 6 inches from each end and pin a 1/4 inch pleat folded toward the end. Measure over 1 inch and pin another 1/4 inch pleat going the opposite direction. Repeat on the other end of the front piece of your apron. No need to pin the top of the pleats. This makes a pocket large enough for rolls of ribbon or a small notebook.
Now place the front of your apron over the back piece of your apron both with right sides facing up.
Match the ends, pin only the ends together. Pin just inside your pleats on each end.
Advertisement
Make more pleats between the two sets of pleats taking in the extra fullness. I chose to make one pleat beside either already make pleat for two smaller items such as pens, leaving one more nice size pocket in the middle.
Depending on how long you made your apron front you may want more larger pleats for another glue stick if you are a scrapbooker and like more that one kind of glue stick. The two-sided tape dispenser would be handy, just lay it on your fabric where you want a pocket for it and make a pleat to form that pocket.
You can see how adjustable this apron can be.
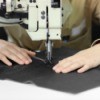
When you are satisfied with your pockets, it is time to sew the two pieces together. With the two layers carefully pined on both ends and the bottom, make a narrow 1/4 inch seam down the ends and across the bottom.
Advertisement
Now you need to sew in those pleats. It will help if you either press the pleats down or pin the top of the pleats down because you are going to sew right at the edge of each pleat making sure not to catch the folded edge in your seam, back stitch several times at the end for extra strength.
Attach your seam binding down the end, across the bottom and up the other end covering your first seam.
Attach your tying strap encasing the top edge and you are ready to use your handy craft apron!
 Keep those tools handy at classes or out of the way of little fingers at home with this simple apron.