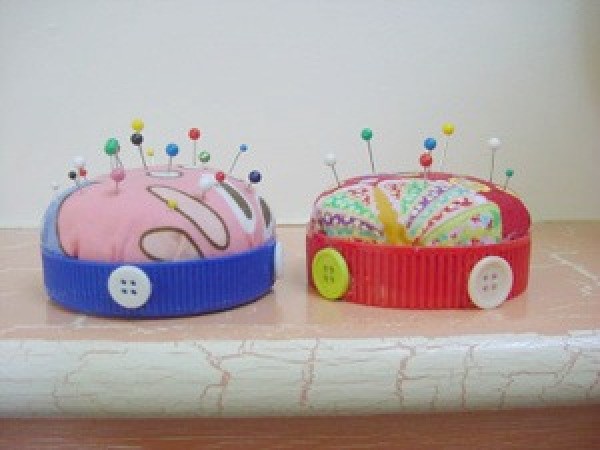
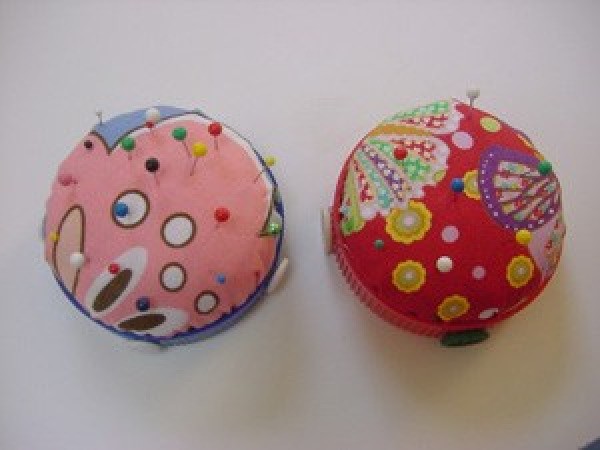
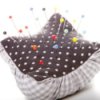
Handy little pincushions made with quilt batting, fabric and a jar lid or small metal can.
Approximate Time: 45-60 minutes
Advertisement
Supplies:
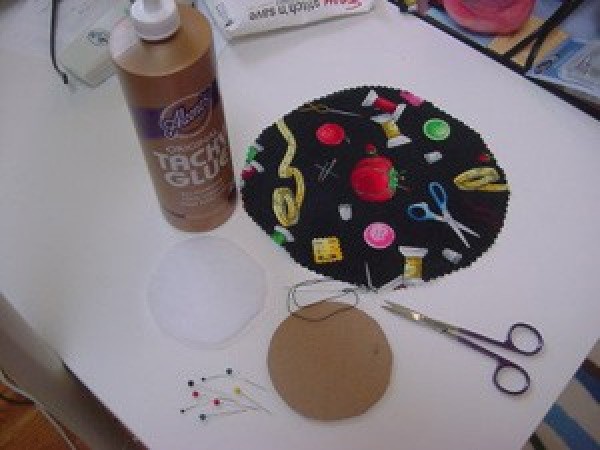
plastic jar lid or small metal can
cardboard
needle
glue
fabric circle
quilt batting
thread
Instructions:
Measure the width of your lid/can.
Cut a cardboard circle just a bit smaller than this measurement. For example, if your lid measures 4 inches, cut a cardboard circle to 3 3/4 inches inches so the cardboard will fit inside the lid.
Cut 6-8 layers of quilt batting using your cardboard circle as a template.
Cut a fabric circle two inches larger than your cardboard shape (4 inch cardboard means a 6 inch circle of fabric). Try to pick a fabric that coordinates well with the color of your lid.
Thread your needle with some strong thread. Use a length long enough to do a running stitch around the outer edge of the fabric circle. Be sure to knot your needle before you start so the thread doesn't pull through.
Advertisement
After stitching all around the circle, spread the fabric flat and insert the 6-8 layers of quilt batting and lastly the cardboard circle. Be sure the wrong side of the fabric is facing you when you insert the layers.
Hold the layers and cardboard in the center of the fabric circle with fingers of one hand. With the other hand, pull the thread taut encircling the batting/cardboard. (Check the top of the fabric and be sure you like the print design. If something you planned to have on the top has shifted, move the layers a little to one side or the other to adjust.)
Use the needle and thread to do a couple whip stitches on the backside to hold the fabric circle closed.
Clip the thread once the circle is secured.
Place glue in the bottom and sides of the lid. I use a tacky craft glue for this. Place the padded fabric circle into the lid. Use a pointy object (like a chopstick) to push the puffy fabric circle into place.
Advertisement
Allow the glue to dry for a few hours and insert your pins.
Enjoy.
Make one for your sewing table, one for your cutting table and one to use wherever you sit to do your hand sewing projects.
For this project, I like to use peanut butter or mayonnaise jar lids.
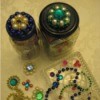
When using cans, tuna or cat food cans work well. The outside edges of the lid can be decorated with buttons (as shown), beads, paint, etc.
So Cute! I love looking at other people's ideas. I was thinking of using a tin which you could cover with same or complimentary fabric to the top. Great.
Pam, just learning to sew-at 68yrs. I never thought to use a plastic lid to make a pin cushion. I would have kept on pinching my fingers, picking the pins out of it's plastic box.
This idea is impressive. I wanted to have a pin cushion, but I have never liked those silly tomato-looking thing. Your project is great and even looks as though I can do it. Thank you so much. I can use some of the fabric I love for the pin cushion!!
Thank you for sharing this adorable and easy idea. I was thinking about the various tin containers I have collected over the years. I use them for storing all kinds of stuff. I wonder if I made the pin cushion from an extra tin lid and then glued it to the top of a lid cover which matches the bottom of a container where I store some of my sewing items.
Advertisement
What kind of glue would i use to cement the two tin pieces?