Here are the best step by step tips as suggested by the ThriftyFun community for painting over your old laminate countertops. Do you have any advice to share? Post it here!
Be sure to check the feedback at the bottom of the page if you have a specific question regarding this process. There is a lot of good information there.
I did this last year and absolutely love it and it was easy as pie just plan to eat pizza a few days.
My counters were terrible with cracks and holes in them. Being a renter I did not want to invest a lot of money either. I think the whole thing was around $25.00. This is what I did
Be sure to use water based paint and such because of the chemicals in the oil based are not good for food prep. Good as new and have had no chips or problems. Would not recommend putting hot pots or pans on it.
By Tami
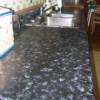
For a Great Blackstar granite look, use Rustoleum black metallic spray paint, 3 coats (sand with 400 grit with block sander after each coat). Next finish with 4 or 5 coats of Varathane Waterborne Floor Poly (found at Lowes) sanding with 400 grit block sander between coats. The last coat do not sand. I used an HVLP sprayer for the poly - it worked much better than brushing it on. This will give you flawless "absolute black" granite look. Much cheaper and more beautiful than any laminate, but of course not as durable.
Note: don't use standard polyacrylic in lieu of the floor poly it won't be nearly as scratch resistant.
By Marc Hauge
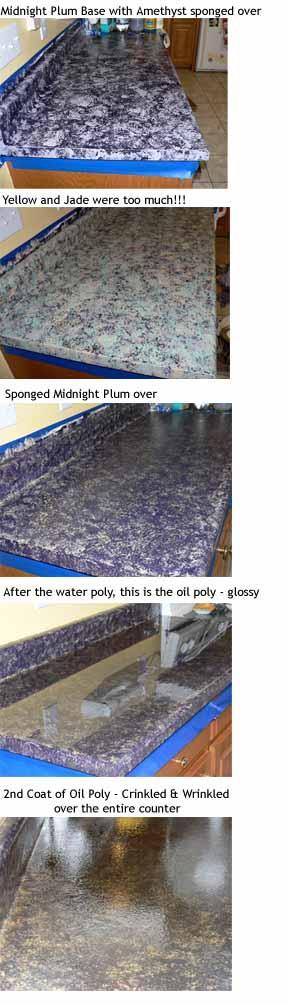
I used 5 colours including black. When you get your black paint done, make sure you ask for straight black rather then a black from a paint chip. Some of those chip colours have tints of blue or purple, etc.
Here's what I did step by step:
I removed the existing caulking (rubber lining) from around the counter with a sharp knife. note: this left little rubber bits that were hard to remove off the counter.
I rolled on one layer of black, but had rubber bits in it so I sanded them out when dry. I then used a tack cloth to pick up the dust but this left little hairs in my next coat of black paint and I ended up sanding again. I then used a damp rag and rolled on another layer of black, therefor having solid black counters.
I then sponged on 4 other colours from dark to light, the colours I used were as follows:
I bought a sea sponge from a local hardware store and ended up breaking the huge sponge into smaller pieces that had nice looking (not so spongy looking) textures. After all the layers were sponged on they actually looked very light. I ended up sponging a light layer of black over everything again to get the granite look that I was going for. (note: don't be scared if it doesn't look very good after your first couple coats of sponging, mine looked a lot like camo!).
After everything was painted I covered it with Enirotex Lite. This is a pour on finish that I spread over the countertops with a black sponge brush. Make sure that you clear your work area of any dust before applying. You'll have to monitor the counters for a couple hours and touch up any runs on the sides and back splash. This product is self leveling and can be poured on even up to an inch thick and will deliver a crystal clear, hard finish. Hope this helps, good luck to all!
By Jesse
After painting with Envirotex and experimenting with it I decided to share my findings with those of you who may have thought about trying this. Don't try using a light coat of Envirotex. Too thick of a coat leaves massive little imperfections and lots of bubbles. Even Envirotex done right still leaves some small imperfections - it is impossible to get a perfect finish.
If you have a large area to cover you really should get a torch to take out the bubbles - a straw is really tedious, gets condensation "spit" build up in your straw which can get on your finish leaving imperfections you cannot remove. You really should use a mask when using Envirotex and using a straw to remove bubbles exposes you to the fumes. I think the Envirotex look is really a preference thing. After doing both a kitchen area in Envirotex and a bathroom using oil based poly I prefer the look of the poly - it just looks more natural. The Envirotex is really thick and almost looks like a thick coat of plastic.
If I had to do over - I would skip the Envirotex and use poly. Again - its a preference thing. Good luck with your projects. I will post a picture of the kitchen next week after I fix my mess up on the application that was too thin.
By Dfairchild
Just thought I'd check in and thank you for all the posts. I just redid my bathroom countertop and used the Envirotex. It was a scary thing to do but all these postings and ideas encourage me so much I just went for it and now I've got a few tips to share.
If your laminate is peeling up in places and cracked. It can still be done! I re-glued the laminate and used finishing nails but it did not hold well enough hold so I had to use larger nails. Don't drive them in too hard or you will crack the laminate like I did. I filled in cracks and made sure to caulk around the nails and along the seams.
Since I had all this damage I couldn't do a faux finish with regular paint and instead used Valspar textured spray paint in granite (at Micheal's and Lowe's). Thank you to the poster that suggested it. It worked great and covered everything up.
Thank you to the lady who posted to use at least a gallon of Envirotex on the bathroom vanity. I took her advice and am very glad I did. The instructions on the box are not enough for covering an average bathroom vanity. My vanity is approximately 5' with a sink in the middle and it took 64 oz. of Envirotex for each pour.
Covering the back splash with Envirotex is a challenge. I took another posters advice and continuously spread the Envirotex that pooled on the countertop from the back splash back up onto the back splash. I didn't do this for the first pour and the coverage ended up being too thin. I also continuously added Envirotex to the side of the counter because that also ran off too soon. This is the only way to get good coverage and took up the bulk of my time during the pour. It worked. As the Envirotex set up it ran off slower and more of the product stayed put.
I had some air bubbles and rough spots from the first pour. I simply sanded them down and you can't even tell they were there after the 2nd pour. I used a small butane pin torch from Home Depot which cost under $10.
I didn't use an Exacto knife. When I paint walls I always take the tape off when the edge is wet. I figured the same would work here. The challenge was working with the thick Envirotex. I taped around the wall just above the back splash with overlapping the tape so I could pull it off in one continuous step. I did the same for the sink. I overlapped extra wide painters tape around the sink top (I have a stainless steel edge around the sink which I originally taped off but decided to let the Envirotex cover it the second time) After my first pour even though I taped it all off and covered with plastic, I had a mess in the sink because the Envirotex seeped through from the back splash. I learned from my mistake and the scrubbing and for the 2nd pour I turned the side of the tape up and made a damn. This stopped the Envirotex from leaking into the sink.
When the Envirotex had set up to a gel, I carefully mopped off the excess on the tape and then carefully pulled up the tape (remember to overlap the tape in one direction so it comes up continuously). This left me with a clean sink. Any excess that seeped off the edge to the sink top I carefully mopped up with a wet rag. This worked great and I didn't have to use an Exacto knife. Wow, what a job but it looks great. I'll try to post a before and after picture.
Thank you to everyone that posted. I couldn't have done it without your help. Now it looks brand new! I'm painting the linoleum next and I'll be sure and look for tips on this website.
Prep the surface by sanding with very fine sand paper. Wipe the surface with a tack cloth. See your hardware store. They are inexpensive, and leave the surface immaculate.
Paint: You want a melamine paint. Any brand will be fine.
Roller You want a small (3 to 4 inch) dense sponge roller
Mask off any areas you do not want painted. Apply the paint rolling evenly, finishing in one direction. Let this dry for 12 hours. Then apply the second coat. Let this dry for 12 hours.
This step is very important: Lightly sand the surface, smoothing over with your hand, checking for any "bits". Wipe down with a clean dry lint free cloth, NOT the TACK cloth.
Then apply your final coat of paint. Let it dry for 24 hours to cure properly.
My kitchen counter and cupboards held up almost like new for 8 years, no kidding.
How good your paint job looks and lasts, depends entirely on your prep work. Follow these steps and you will not go wrong.
Have fun!
By lesley
In making a granite look, can you alternate the upper sponged colors with polyclear? I was thinking it would give more depth. Maybe even add glitter in there too. (02/03/2009)
By Bob
Just finished putting up a backsplash in my second kitchen, I painted the counters a few weeks ago. (02/12/2009)
By In2Paint
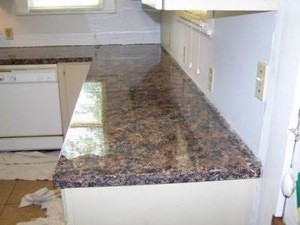
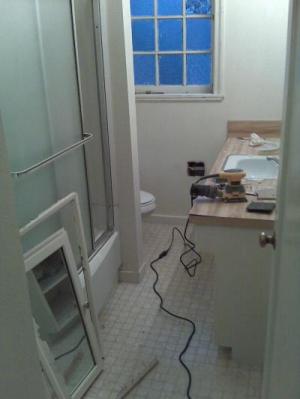
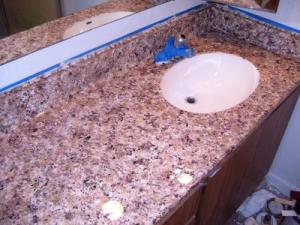
Here are some before and after pictures finally. I used Valspar Granite spray paint for the countertop and Envirotex. I also painted the vinyl floor using pinstriping tape for the grout. I primed the floor then used a white basecoat of eggshell. I painted the light blue and blue squares all with regular eggshell paint and the acrylic glaze I used on the walls. I went over the squares with a pearl glaze and then put several coats of Diamond Finish Floor Varathane. It has held up well and it did not yellow. I used Rustoleum "Hammered Metal" on the toilet roll, lightfixtures switch plates and knobs. Good luck to you all and thanks for all your help. I'm off to the next project. (02/17/2009)
By Tillee

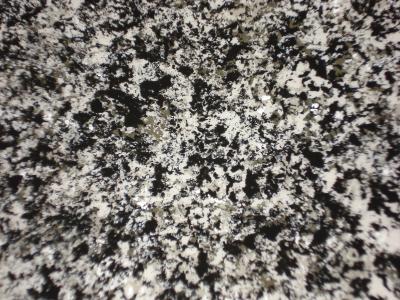
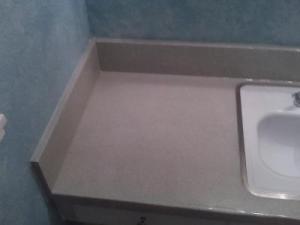
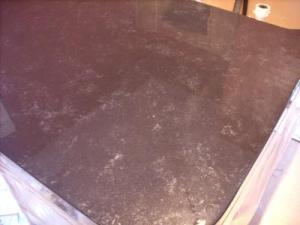
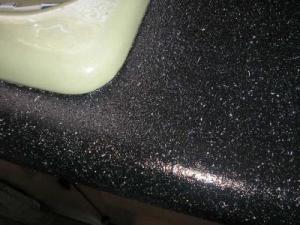
Here is a close up of the countertop. Sorry the picture isn't all that clear. I don't know about using the Varathane on the counter top. I did use it on the floor but I think the Envirotex is well worth the trouble on the counter. I have a surface that is hard as glass and I also put a couple of coats of carnauba car wax on it and the water just beads up. So far it's holding up well. (02/17/2009)
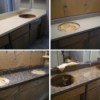
I've finally had a moment to post my before an after. I used granite spray paint on the counters and Envirotex lite over laminate. I also painted the dull vinyl flooring. On the floor I used primer and the same eggshell paint and glaze I used on the walls. I put down two coats of primer, followed with two coats of basecoat. I then marked the squares with 1/8 inch width pinstriping tape (can be found at stores selling auto paint or on line). I also used a pearl glaze over the squares after I painted the faux. This gave them more depth. I covered the entire floor with Varathane Diamond finish. This doesn't yellow. I've used it many times in the past on floor projects and it holds up very well. Because the Varathane covers so nicely and holds up so well it really isn't necessary to use special "Floor" paint under it. Well off to another project. Thanks to all the posters for introducing me to the Envirotex. I can't wait to do a decoupage project with it. (02/17/2009)
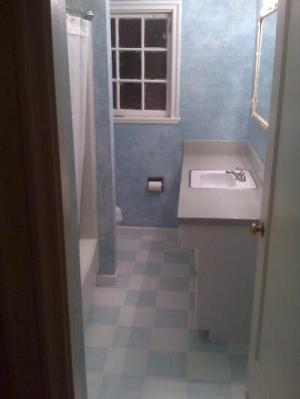
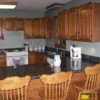
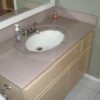
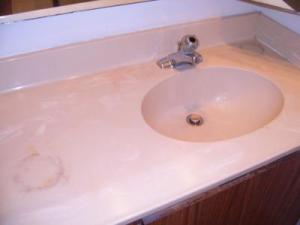
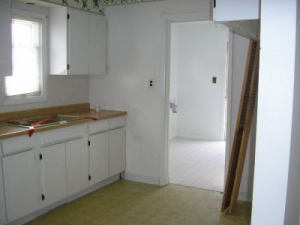
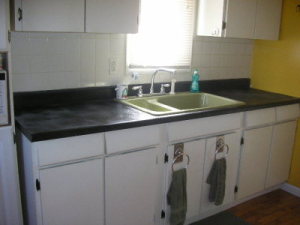
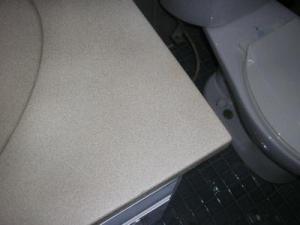
Here was my before! (02/17/2009)
I'm a resurfacing owner. I use to use to paint and different gloss depending on type of look. However, most recently to get a genuine granite look, I have switched over to staining, instead of painting. I get my chemicals from Midwestchemicals.com. Great people, fast shipping. The color pallet is great.
Prep your countertop with 220 sandpaper, and wipe with M.e.k to remove deposits. You simply (recommend spraying) apply the primer of your choice to the whole counter top, pick 2+ colors depending on the look. Apply your coats with a sea sponge by hand to get the natural non- patterned look. Wait 15-20 min apply second coat and so on. Once dry you may apply whatever type of gloss you want. The gloss from Midwest chemicals, gives a satin finish more than a natural glass finish. It's all a preference. You can use this process for tubs and porcelain sink tops. (02/19/2009)
By Ian
Just wanted to say all the counters are so beautiful and I was extremely inspired by this site last summer when I started painting my counters. I did all of the countertops in my house and everyone thinks they are granite, kitchen and bath. They all came out great - just wanted to share a few tips that I used that, I didn't see in any other post. I used Envirotex Lite and found it extremely easy to spread it with a comb from the drugstore, worked so well.
It goes on very evenly and I felt I stretched it out more. The other thing was try using metallic paints from Michael's, it gave me a more natural look that the glitter. Just use it last - I also found that if I took my time and looked at it a couple of days before putting the Envirotex on I could see areas that looked unnatural. - My paint held up well.
I tried black countertops but did not like it at all - it looked extremely cheap and you can see every little scratch. I definitely recommend doing a mixture of colors if you're using Evirotex. Lastly, when I repainted over the black, I just primed and painted over that. I do recommend letting all of your paint dry between coats - it takes longer but it is so worth it in the end. Good luck everyone! (02/21/2009)
By Amazinggreyson
For the bumps try some wet sanding before you apply your final 2 or 3 coats. (02/23/2009)
By Joe
Let me begin by saying that all these posts were the most helpful information I found or my project. I've lived in my house for 13 years with country blue countertops that I've hated since day 1. Not having the funds to renovate and not wanting to paint the kitchen a color that went with country blue, I left the kitchen the color it was when we bought the house. Recently a decorator/friend suggested we paint the countertops black with the "fusio" spray paint and top with polycrylic. She did this for us and the change was inspiring. No more blue. However, this treatment was very fragile. The polycrylic clouded when damp and the paint scratched easily.
After reading all of this discussion I decided to use the Envirotex Lite product. I rolled on satin Krylon black latex, waited 1 day, mixed acrylic art paint, metallic pewter and metallic black, dibbled on with a large art brush, and immediately sponged over heavily with the metallic black again. I topped it all off with black "fairy dust" glitter. I had about 35 sq. ft. of counter, used 1/2 quart of Krylon laytex, 1 2oz. bottle of pewter and 2 2oz. bottles of black acrylic, and less than 2 tubes of fairy dust. We used a total of 4 32oz. Envirotex kits. I gathered 40% coupons from Michael's and Hobby Lobby and kept the cost of all materials under $100.
I waited one more day and prepared to apply the Envirotex. I was a bit intimidated. I re-read all the postings, re-read the directions and made my husband read them too. It wasn't nearly as bad as I had anticipated! Working with another person and having a plan made it pretty easy.
A few pointers that I believe were helpful:
After I finished I turned on oven on to promote faster/better curing. I removed the sink and recommend doing so. The end results are stunning! I am beginning to use the countertops and find them very durable. I am being very cautious, but believe the end result will be durable in the long run. No scratches yet and this is much better than the polycrylic finish.
I'm not sure why I waited 13 years to take care of a color I hated. I encourage anyone reading this to go for it! Thanks for all the great advice! (02/24/2009)
By Beth
Thanks to this forum, I have beautiful painted countertops. The last step, however, may have ruined my week long project.
I went online and read what happened. Apparently the first coat of the oil based poly was not completely dry. Therefore, the wet/dry poly was reacted with one another. Is there any way that I can fix this without starting over? The other aspect that bothers me is that the oil poly turned the counters an amber color. The backsplash still appears clear, but the top is amber. I'm ok with the crinkling now - I guess. Any options? I have one counter remaining to do and not sure what to do. Help!
(03/07/2009)
By kathleen
Hi, Jared. You may want to try LIGHTLY sanding the paint to remove the texture, but leaving it alone may actually work to your advantage... stone is not uniform in appearance. Plus, once you add your sponged colors, I think it will add some depth and you won't feel it once you have sealed it. (03/17/2009)
By Pamela Scire
Well, I did it! I started with an upstairs bath that no one would have to see if it turned out really ugly, but I am just tickled. Couldn't have done it without you guys. Thanks for all the advice.
For those still contemplating it, get the Torch! I let someone talk me out of it... big mistake. I nearly hyperventilated trying to get the bubbles out, finally resorted to my hairdryer, then decided to give up, let it dry and sand them out before the next coat. Before and After pix follow. I used an epoxy paint from Home Depot on the sink. Hard to work with, but worth the end result.
A couple tips:
By Pamela Scire
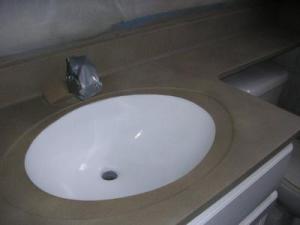
After. (03/17/2009)
By Pamela Scire
I posted picks of my bathroom first, although I haven't yet started that project, I did complete my kitchen counter. The first picture is a before.
Tracie B (03/20/2009)
By Tracie
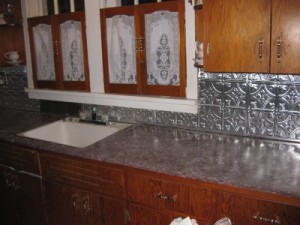
Here is the finished kitchen! The top coat was still drying when I took picture. (03/20/2009)
By Tracie
Close up of kitchen counter.
I can't wait to do the bathroom.
Tracie B (03/20/2009)
By Tracie
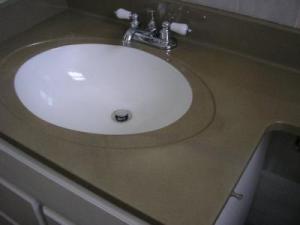
I still have to pour the Enviro, but I'm very pleased with my bathroom counter top, and am excited to share it with you all.
Tracie B (03/21/2009)
By Tracie
picture #2
Tracie B (03/21/2009)
By Tracie
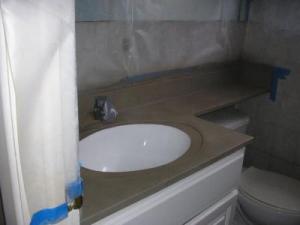
picture #3
Tracie B (03/21/2009)
By Tracie
Wanted to post a pic of the bathroom after Enviro. It looks good, but there are good points and bad points of Enviro. I will have to sand down and re-coat. A few tips I found were, wear a bandanna or something over your hair. Keep a bottle of alcohol handy to clean off messes. Enviro is alot more messy than you imagine. Use twice the amount of plastic and taping you think will be needed. Make sure you use new containers rinsed only with water for mixing and pouring. Any leftover residue will form a oil on the Enviro. Pour more Enviro than you think necessary and don't over scrap it.
I wouldn't suggest blocking your sink hole, the Enviro will just build up on the bottem of the bowl, put an old empty pitcher under the opening and remove in 15 minutes and place outdoors. Container will heat up. Last but not least wait at least 24 hrs before attaching faucets and drains or they will never come out again.
Tracie B. (03/23/2009)
By Tracie
Oh my, sigh. My entire counter for the most part is sticky. Guess I am headed out to Hobby Lobby for some more Enviro. I will definitely make sure this batch is good and mixed. I hope it takes over the other stickiness. (03/25/2009)
By Christy
RE:Post by CPalmer72 (2) | (03/25/2009)
I would definitely wait a few weeks before trying to apply another coat, if it doesn't harden up by then you will have to scrap it off. A third coat will just be sticky also, if the other coat isn't cured. Tracie B (03/26/2009)
By Tracie
Add your voice! Click below to comment. ThriftyFun is powered by your wisdom!