 I've got a faux leather sofa and a footstool, both require repairs to the stitching. I intend to do this by hand because I've never used a sewing machine; both are fairly small repairs; and I'm a complete novice to this so please help me with advice on how to repair these items and what with.
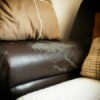
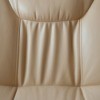
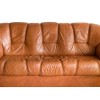
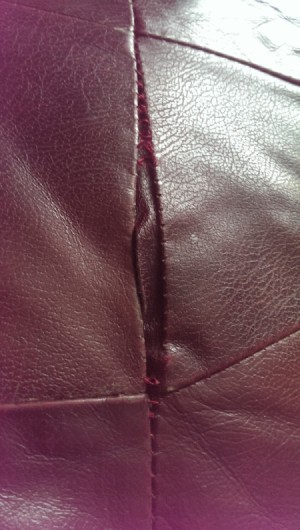
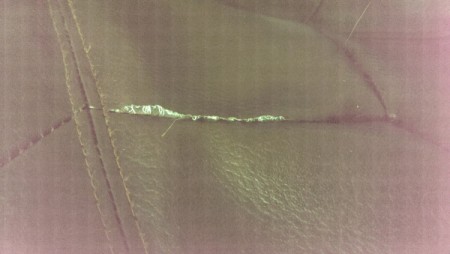
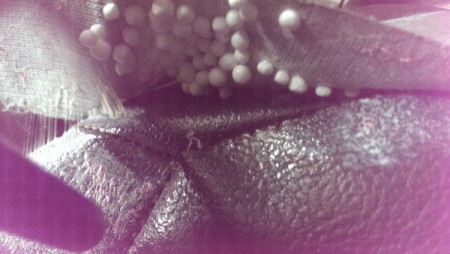
I've included photos, 1st is the sofa, and the other 2 are of the footstool. The colour of thread on both is different so I realise I'll need to purchase two different threads to minimise the obviousness of the repairs. I can actually get to the stitching on both from underneath, what needle and thread do I need?
I need to make both of these pieces of furniture last for some time into the future so your help and advice on a long lasting repair would be very much appreciated. I have some other up cycling projects in the pipeline, so I'll be a regular here looking for help and ideas!
Thanks a lot for your help and advice.
Add your voice! Click below to answer. ThriftyFun is powered by your wisdom!
You need thick upholstery thread and 'circular' needles - they usually come on a card with other heavy duty needles, the ones you need are shaped like a half moon and I strongly urge you to practice using the needle and thread on some scrap fabric before trying to do your sofa as the circular needle is a bit tricky to handle at first. It is doable, it just take a half-hour or so of practice to become comfortable with. Also, buy a waxing wheel (should be on the same display area you'll find that card of needles) and wax your thread heavily before and after threading it through the needle. Be sure to cut the thread at least three times the length of your opened seam so you have enough to work with and fasten it off when you've closed the seam back down. If you pull the thread through your upholstery fabric in short lengths instead of trying to pull it all through at one time, you should be able to avoid tangles, and the heavy pre-waxing will help make untangling easier in case you do tangle up during the sewing.
Now, looking at your photos (excellent ones, I must add!), it looks as though you have a clear stitching path to follow once you have 'the hang' of the needle. Your 'path' is the line of holes in the fabric. Just bring your threaded and knotted (fat, tight. Trust me. I teach Sewing 101:) needle and thread up from under the 'raw edge' of the fold - look at the fold that should tuck under your stitching - see it in your 1st photo where the seam has come apart? Start your stitching there from under that folded bit - doing that will 'catch' your fat tight knot and anchor your stitching. Guide the needle up through the first hole, then across to the one directly opposite on the other side of the opened seam going in from under the fold on that side, then back over to the next hole on your starting side, then to the opposite one...and keep going until you reach the end of your opened seam.
Then pull it all tightly, test it for strength by poking and pushing the newly closed seam.
If it's strong enough to withstand wear, weave your needle through several of the exposed stitches then double back weaving over where you've just come from - do that at least three times, each time beginning the return one stitch shorter than the previous one. Now, this is the tricky part - you can either simply cut the thread and understand under wear it WILL work out and begin to unravel, or you can try tying a 'jeweller's knot' using a pair of slanted tweezers to work the knot down as close as possible to the seam. It will show eventually under wear but if you've got it tight enough, it shouldn't open.
This sort of repair is actually best done by removing the entire piece and using a heavy duty sewing machine - but you'll be happily surprised to find if you do it by hand the seaming won't be as obvious as you first think it is as long as you match the colours closely. Take a snippet of the existing thread, or your excellent photos to the shop so you get a good match.
Good luck - you CAN do this! Please post a photo of your finished repair and any tips you come up with to help the next upholstery repair newbie:)
Add your voice! Click below to answer. ThriftyFun is powered by your wisdom!