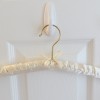
I was wondering if anyone could tell me how to make "yarn wrapped coat hangers". It's an older form of "tying" kind of, but by wrapping and going through is all I can remember. Can someone please help?
Pat from Plainville, CT
o.k., I'm going to take a shot at this.
1. cut off a good sized length of yarn.
2. holding the hanger in front of you, tie the yarn onto the hanger down in the lower right hand side.
3. let your piece of yarn hang down.
4. holding hanger in front of you bring the yarn up and over the horizontal wire,(so that uour yarn goes down behind the wire) forming a loop. Bring the end of the yarn thru the loop so that the piece of yarn is now back in front of the hanger.
5. Pull the yarn tight and it will form a knot. As you go along and make more knots, covering your hanger, you can easily adjust the knots so that they form a straight line. I'm not sure but I think I remember from my macrame' days that this is called a half hitch knot.
6. When you have about an inch of yarn left, wrap it tightly several times around the hanger and glue.
Start another piece of yarn in the same way you started the first piece.
7. Keep going, looping and knotting until the entire hanger is covered and then just glue the ends of the yarn to hold them tight.
8. You might find it easier to "practice" first by looping and knotting on a pencil.
Hope this helps. Also, instead of using just a single length of yarn, you could use double strands. It would give your hanger a thicker covering. Just make sure when you cut your yarn peices that they are of equal length. You could also use contrasting colors and make your hanger covers pink and white or black and white, black and grey. Anything at all. (11/09/2006)
By Louise
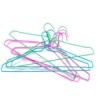
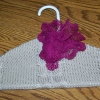
My girlfriend and I made a ton of these for gifts one year! If you use wire hangers, put two of them together...It makes for a thicker hanger. You only need one if you use the plastic hangers. We didn't cut the yarn, though, as instructed below, we just used the whole skein of yarn rolled into a ball. Tie a knot in the lower right corner...wrap yarn around hanger...grab it to make a loop...bring ball of yarn through loop and pull tight. Do this until you go around the entire hanger. Then tie off the yarn when you're done. We also tied yarn bows at the top of the hanger, below the hook section. Have fun! Once you get the hang of it, you can make them really fast. You can even do this with two different colors...just tie them both together when you start and follow the above directions. It's harder to use two colors, though, until you get used to doing this with one color. (11/10/2006)
You can crochet a strip about 8-10 stitches single crochet wide and then measure the hanger. then you can sew with a yarn needle or crochet them on to make a tube. I hope that's not too confusing. (11/11/2006)
Add your voice! Click below to comment. ThriftyFun is powered by your wisdom!