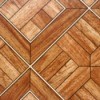
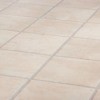
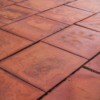
Does anyone know if it is possible to paint old ceramic floor tiles? My kitchen floor is covered in really ugly old tiles and I would like to freshen the room up in an economical way. Thank you
Add your voice! Click below to answer. ThriftyFun is powered by your wisdom!
MAKE SURE YOU'VE USED A STRIPPER TO REMOVE ANY OLD WAX OR CLEANER BUILD UP. THEN SCRUB WELL AND RINSE WELL. ALLOW TO COMPLETELY DRY. USE A GOOD OIL BASED LATEX PAINT AND APPLY TWO THICK COATS ALLOWING EACH COAT TO DRY WELL. USE A WATER BASED POLYURATHENE. APPLY THREE OR FOUR COATS ALLOWING A DAYS DRYING TIME BETWEEN EACH COAT.SOUNDS LIKE ALOT OF WORK I KNOW BUT I DID BOTH BATHROOMS AND MY DININGROOM THIS WAY AND IT WORKS.ALSO DID THIS TO MY PATIO.TOOK OVER A MONTH BECAUSE I DID PATTERNS BUT I LOVE IT.
KELLY
Can this method be used for bathrooom wall tile. Mine looks terrible but I cant afford to have my bathroom done yet.
Thanks
Hi!
I don't recommend using paint on ceramics but if you feel you have no other choice, then I would go for a Super White Rust Paint such as Tremclad. Either that or several large cans of Industrial strength Car Paint.
Here's an awesome article I found that I did on a project and looks amazing - it's now a service my business offers...
Decorating and adding accessories can only do so much when it comes to updating a room that has a particularly nasty color of ceramic tile. We all remember the harvest gold, avocado green, and burnt orange that adorned so many kitchens and bathrooms 30 years ago. For many, the prospect of removing and replacing this tile is not financially feasible, and painting it may seem like it would be counter productive.
It is true that paint does not like to stick to the slick, shiny surface of tile. With a little bit of extra preparation, though, you can paint your tile and create a durable surface that is much more visually appealing than the outdated look you may currently have.
First, let's talk about what you can and cannot paint. I would not recommend that you paint any tile surface that gets wet repeatedly. If you try to paint your shower surround or even your tub itself, you will be cleaning paint chips out of the bottom of your tub within a matter of weeks. It just won't stick. There are professional services available that will paint your ceramic appliances and fixtures. Things like your antique claw foot tub, your toilet, and shower stall can be painted with a highly specialized product that requires a good deal of skill to use. What we're talking about in this article is painting wall tile that sees everyday use but doesn't get soaking wet all the time.
Preparing the Tile for Paint
As with most painting projects, preparation is the most important part. The goal is to create a surface that the paint will stick to. Since we have already established that most paints will not stick directly to the slippery tile surface, we need to get rid of that shine. The first step is to clean the tile vigorously with a commercial tile cleaner. Make sure you use one with a mild abrasive. Not only will this remove all of the buildup from the tile and make it nice and clean, but the abrasives will begin to break down the shiny surface.
At this time, also make sure that anything that might deteriorate underneath your paint job is addressed. Crumbling grout, mildew stains, and cracked tiles should all be taken care of now. You can't go back and address them after you paint unless you want to repaint the entire thing.
Once you are confident that the surface is clean, you need to get a little more aggressive about taking that slippery shine off of the tile. The best way to do this is with a hand held orbital sander. Use a 220 grit sandpaper. This will be course enough to remove the gloss, but still fine enough to prevent you from leaving any marks that may show later through your paint. If you don't have an orbital sander, you can do it by hand - it will just take a little longer.
After every surface that is going to be painted has been sanded, including the corners, make sure that all of the dust is thoroughly removed. I know sanding is tedious and is generally not very much fun, but I can't overemphasize how important this step is. If you skip the sanding or only do it half-heartedly, the paint simply will not stick.
Prime and Paint
Now that you have a freshly sanded surface that is dry and free of dust, you have the perfect foundation for a good paint job. By using a high quality and high adhesion primer, continue to build the base that your paint will be applied over. This is not the project where you want to skimp on paint costs. Don't buy the cheap primer - you need a strong bond in order for this to stick to the tile. Use an oil based product, as you will be using an oil based paint for the finished coats.
Apply the primer using a brush to cut in the corners and then a short napped roller (1/8") to apply the primer to the flat surface. Go slowly and make sure you don't leave any lines caused by paint squeezing out of the edge of the roller cover. These will show through later when you apply your finish coats. Allow the first coat of primer to dry for the amount of time recommended on the can, and then apply a second coat.
Once the primer is dry, take a fresh sheet of 220 sandpaper and make a very light pass over the primed surface. You are not trying to remove the primer, you simply want to remove any small burrs that may have risen out of your roller cover and make sure that the surface is perfectly prepared to receive paint.
Some people suggest that you can use latex paint for your top coat. I, however, would recommend that you use oil. It is messier, takes longer to apply and longer to dry, but when it dries it provides a very durable finish. Latex paint often dries with a fairly soft, rubbery feel. If you were to bump it with something hard, the chances that it could peel right off are pretty high.
Use an oil based semi-gloss or high gloss alkyd for your top coats. Apply several thin coats instead of trying to do one thick one. You want to build up the strength of the paint adhesion by adding multiple lightweight layers, not one heavy one.
You will need to have paint thinner on hand in order to clean up the oil based primer and paint, as well as a pretty good sized supply of rags. Though it may be a little extra work, using the oil based product on your tiles will give you a much higher quality finish and in the long run, you will be glad that you did.
Dear Ryan Gibbons, Thank you so much for posting your article, it was interesting and informative. I have both floor tiles as well as wall tiles that need some freshing up but as I live in a rented flat I don't want to put lots of money into someones elses place.
Lisa
Add your voice! Click below to answer. ThriftyFun is powered by your wisdom!