How do I sew a front center zipper? I need instructions for a beginner.
By louise from Wilmington, NC
Add your voice! Click below to answer. ThriftyFun is powered by your wisdom!

Instructions comes with a zipper,here's more info.
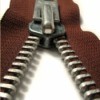
Before purchasing a zipper, read the pattern instructions to determine what type and size of zipper is required. There are several types of zippers currently on the market including the standard zipper with plastic teeth which is used in most women's and children's clothing. There is also the metal or heavy duty zipper, which is used in jeans and with heavyweight fabrics. The invisible zipper is used when the main purpose is to conceal the zipper within a seam. There are also separating and reversible zippers used in coats and jackets and multi-directional zippers which can be zipped up or down, used primarily in jackets and sweaters.
The first instructions will cover installing a centered 22 inch standard zipper in the back of a woman's dress.
Preparation: Locate the zipper foot that came with your sewing machine. The zipper foot looks very different from the basic presser foot. It has an L shape with a thin base. It enables the needle to be positioned to the left or the right of the foot thus making it possible to sew very close to the zipper teeth without the presser foot bumping up against the zipper teeth, causing uneven and crooked stitches.
Following the pattern's instructions, prepare the back of the dress for sewing the zipper. On the back of the dress, measure from the neck of the dress 22 inches down and mark. Set your sewing machine at stitch length 3.5 or 4, or the basting stitch using a 3/8 seam allowance. Begin at the neck, sewing the back of the dress with the basting stitch until you get to the 22 inch mark. Reinforce this mark by backstitching for 1/8 of an inch. Change the sewing length to 2.8 or whichever length is appropriate for the fabric you are using and continue sewing the back of the dress according to the pattern's instructions.
Install the zipper foot. At no time during installation is it necessary to open or unzip the zipper. Most zippers have a sewing stitch guide. I recommend basting the zipper before actually sewing it in. Please reset your machine to the basting stitch. You can also use wash-away basting tape if you desire. Position the zipper (teeth and zipper pull facing down) beginning at the top of the back of the dress, pin one side of the zipper to the corresponding side of the seam. Repeat for the other side of the zipper and seam and baste in place using the sewing guide on the zipper if available. Sew the zipper to the seam allowances only. Do not sew the zipper to the front of the dress. Finger press (smooth in place).
To sew the zipper in place, line up the zipper teeth with the back seam (re-pin the zipper if necessary). Topstitch the zipper in place using a 2.8 stitch length with a 3/8 inch seam allowance. When you reach the zipper stop, sew three to five more stitches, turn the fabric, square off the bottom and sew the other side of the zipper.
On the right side of the dress, carefully remove the seam basted stitches, leaving a half inch seam from the squared off bottom of the zipper stitch. You have easily and successfully installed a zipper into the back of a dress.
These instructions will cover installing an eight inch flapped or lapped zipper into women's pants.
Flap zippers are most commonly used in women's skirts or pants. The zipper is placed on the left side of the garment and is concealed by a flap facing the back of the garment. This style of installation is very professional and easy to complete.
Following the pattern's instructions, prepare the garment for the sewing of the zipper. At no time during installation is it necessary to open or unzip the zipper. Measure 8-1/2 from the top of the garment and mark. Using a basting stitch (see above) with a seam allowance of at least 5/8 inch, sew the garment, backstitching at the mark and change the sewing length to 2.8 or whichever length is appropriate for the fabric you are using and continue sewing the side seam of the garment according to the pattern's instructions.
Pin and baste the zipper (teeth and zipper pull facing down) to the right side of the seam allowance with the zipper edge as close to the seam as possible about a 1/8 inch seam. This allows most of the zipper to be sewn to the other side of the seam allowance thus creating the flap effect. Line up the zipper with the raw edge of the left side seam and sew the other side of the zipper to the seam allowance. Finger press the zipper in place. Beginning at the top of the garment, topstitch the zipper in place using a 2.5 length stitch. When you reach the bottom of the zipper teeth, round off the stitching, ending at the seam. You have easily and successfully installed a flapped zipper into the side of a garment. Good luck.
I suggest that you go to the Google Search area. Use the google math just type in Instructions and sewing zippers. Up will come the pages with graphics and every thing showing you how to install all kinds of zippers.
Add your voice! Click below to answer. ThriftyFun is powered by your wisdom!
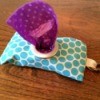
Please tell me how to sew a zipper in my Kool aid pouch purse.
Bonnie from St. Petersburg, FL
Well what I would do is double up the string first so that It won't break when you use the zipper. You do this by stringing the string through the hole in the needle and making it even with your other end. Cut it and make a knot at the end. Unzip the zipper and sew it to the purse back and forth not over the top for both sides of the zipper. Make sure that the other side of the zipper is straight across from the other or else it won't zip right. I hope that I helped. (04/06/2007)
By Soriya
.