How do you get rid of bad smell from a freezer. I had a vacation for six weeks, when I came back my freezer had stopped working. There was some meat in there which was rotten and I can't get rid of the smell. It smells like dead carion.
Add your voice! Click below to answer. ThriftyFun is powered by your wisdom!
My niece had the same problem. She scrubbed with bleach, aired it out, filled it with newspapers, put pans of baking soda, pans of cat litter. What FINALLY worked for her was to place a large container of fresh ground coffee beans on the bottom, close the door and let it sit for a week, closed up. You need to use fresh, dry, unused coffee grounds, not the wet grounds left after you brew coffee!
I made the mistake of plugging my freezer into a GFCI outlet. The outlet tripped and it was about a week before I noticed. Needless to say everything in the freezer had to go. The smell was over-powering. I took everything out of the freezer.
I had a similar situation with a chest freezer of mine. I moved out of an apartment that I was sharing with two other guys and I decided to be nice and let them borrow it (since it was full of frozen food that would never fit in their smaller freezer). A fuse went out one day and the freezer lost power. They didn't notice until WAY later. The smell was horrid. I tried using hot water and soap, Comet with Bleach, and a bunch of orange scented surface wipes. The smell seemed to be gone but it quickly returned the next day. So, I had just now tried the following:
- One bowl of water and charcoal
- One bowl of cat litter
and last but not least...
- One peach scented car air freshener
I've also heard to use pure vanilla extract but I didn't have any. I will report my results tomorrow.
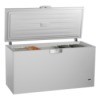
OK Nobody here is specific about their freezer. A 'chest' freezer typically has a single plastic 'tub' inserted into the cabinet and unless it is cracked or punctured, cannot leak blood or other fluids into the insulation. Warm it up, use chems and should be OK. If you have an upright freezer, everything goes to the bottom, where there may or may not be a plug and drain tube, depending on the mfg. So, just as a chest freezer, there is a solid 'tub' that encompasses the back, sides, top, and bottom, with a few small openings for Freon tubes to enter the tub. BUT..... and this is a big BUT.... most units have separate pieces all around the opening that 'finish' the areas around the door opening. This could be one single piece (unusual) or separate top bottom and side pieces. These have no visible fasteners, clips screws, etc, and simply 'snap' into place. Under the bottom piece is where you'll find the smelly saturated fiberglass insulation. If you look at the components, they are oriented like roof shingles, where the side pieces overlap the up-turned flanges of the bottom piece.
Never heard back on your post
Been waiting years!!
I would submit your question directly to our members. Posting a question as feedback is likely to be missed by the people who may be able to help.
www2.thriftyfun.com/
Good luck!
Eons ago I was a refrigerator/freezer service technician. If liquids like blood leaked into the insulation you have two options: pull the liner out of the freezer and replace the insulation, which takes two people who really know what they are doing, or replace the freezer. If you pay to replace the insulation the cost will equal or exceed the cost of a new freezer.
How do you know if the blood is in the insulation?
I am sharing a house with randoms at the moment, and I had been away for a week and got back to find a horrid smell as soon as I walked in the house. They said the smell was the bin then I opened the freezer to get food out and the smell knocked me over. They turned off the freezer at the wall and all my food was brown and soggy.
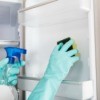
I cleaned out all the food and blood then used hot soapy water. Then drained that out and let it air out for a couple of days outside and it still stinks. So I poured in a bottle of white vinegar and it still smells. How can I get rid of the smell?
Charcoal let set for 24 hours door closed an done smell gone
OK Nobody here is specific about their freezer. A 'chest' freezer typically has a single plastic 'tub' inserted into the cabinet and unless it is cracked or punctured, cannot leak blood or other fluids into the insulation. Warm it up, use chems and should be OK. If you have an upright freezer, everything goes to the bottom, where there may or may not be a plug and drain tube, depending on the mfg. So, just as a chest freezer, there is a solid 'tub' that encompasses the back, sides, top, and bottom, with a few small openings for Freon tubes to enter the tub. BUT..... and this is a big BUT.... most units have separate pieces all around the opening that 'finish' the areas around the door opening. This could be one single piece (unusual) or separate top bottom and side pieces. These have no visible fasteners, clips screws, etc, and simply 'snap' into place. Under the bottom piece is where you'll find the smelly saturated fiberglass insulation. If you look at the components, they are oriented like roof shingles, where the side pieces overlap the up-turned flanges of the bottom piece. After the plastic is at least 'room temp' (use a hair dryer if necessary - NOT a heat gun, which could deform the plastic) simply insert a flat screw driver under the side piece near the bottom, working from the inside out, and pull or pry until your fingers fit under it , then pull gently and slide screwdriver upwards until the clips release. You only need to loosen enough to allow removal of the bottom piece, but once started they come out easily. I removed both entire side pieces. Do this to both sides, paying attention to any light switches etc and corresponding wires. Pop out the bottom piece and there's the mess. Remove all the wet stuff, dab all dry with paper towels and hair dryer, replace it with new insulation which is very cheap, then snap-in panels in the reverse order of removal, pounding them into place with the back of your hand. The back of your hand won't crack plastic like a mallet or other 'beater', and is more than enough to re-seat the pieces. Close the door, come back in a few hours, and if odor-free, you're good to go.
Add your voice! Click below to answer. ThriftyFun is powered by your wisdom!