Here is how to take a table frame that is plain and/or broken and make it into a usable table with plenty of storage.
Approximate Time: About 5 hours to complete.
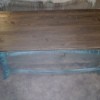
First, taking your table frame, put it on the cardboard and newspaper in a well-ventilated area (preferably outside on a clear day) and paint it the desired color. Let dry.
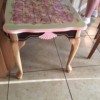
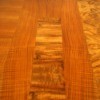
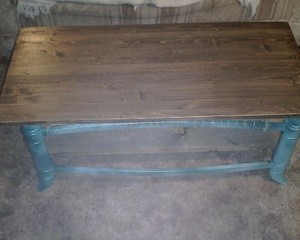
Cut your boards or have them cut for you to the desired size. We decided to make one wooden bottom shelf in addition to our top because of the frame design, so we prepared two wooden boards.
You will need to sand the wood, then stain and varnish it if you desire. Be sure to wear goggles if you are cutting the wood yourself, and wear gloves if you choose to stain and varnish it. The best way to apply stain is with an old cloth. Use a foam brush to apply varnish. Let dry.
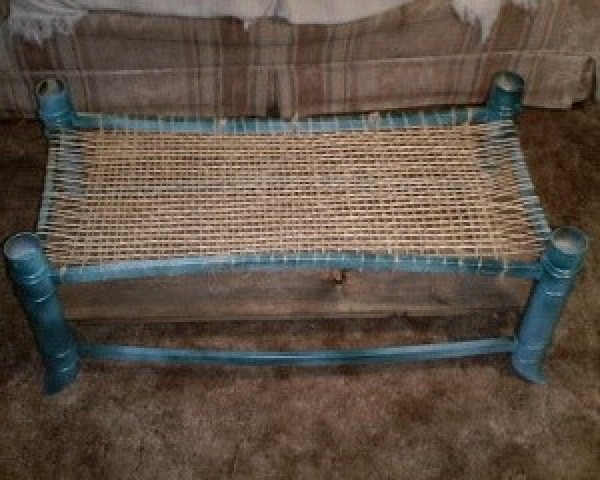
Another option, which we chose for our top shelf, is to weave a shelf right into the frame. Wrap the jute/twine around the bars opposite each other, making lots of rows going one way all the way across the shelf. Then, wrapping the jute/twine around the other two sides, weave it into the first rows by going "over, under, over, under, etc". It is easier to cut a length of jute to weave, rather than trying to drag the whole ball with you. Place your boards on the table and you're done!
If you desire to anchor the boards more, you could nail or glue small pieces of wood to the undersides to keep them in place.
We received the table frame for free because its glass top was broken. The frame color left something to be desired with its chipped "gold" feet and bars, and its black legs. We are much happier with our table!
By Bonnie from Spokane, WA
Add your voice! Click below to comment. ThriftyFun is powered by your wisdom!

Do you have any before photos? I would love to see what it looked like.

Sorry Stellaluna, we don't have any before pictures, they were too ugly! : )
Add your voice! Click below to comment. ThriftyFun is powered by your wisdom!