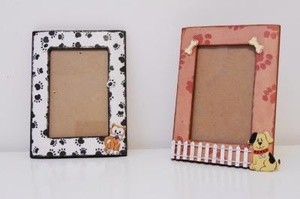
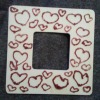
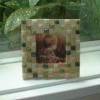
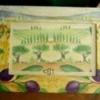
This is a simple cute picture frame that can be used to decorate your home or to be given as a gift. I made a few for my house and gave one as a gift.
Approximate Time: 1 hour
Supplies:
- scrap paper
- glue
- modge podge
- paintbrush
- paint
- craft knife
- wooden picture frame
- embellishments
- sponge (or just use your paint brush)
- wax paper (opt.)w
- popsicle stick (opt.)
- glue
Instructions:
First thing you are going to need is a wooden picture frame, either one laying around the house or one from your local craft store.
- Take your scrap paper and place your picture frame on top and trace all around the frame and the inside of the frame onto the paper.
- Then once you have completely traced the outside and inside of your frame, take a craft knife and carefully cut along the lines you've done. When you're all done, the paper should be the same shape as your picture frame.
- Next you're going to need to chose a color paint that'll match or go good with the scrap paper. When you've found a good color paint, paint your picture frame. Remember to take the glass out and to paint the back. Let the paint completely dry.
- Once your paint is dry, take the piece of paper you cut out earlier and use some white glue to lightly cover the back of the paper. Then match the corners and stick the paper on your frame. Once your paper is on the frame you can put wax paper over your frame and use a Popsicle stick to smooth out any bubbles in the paper.
- Once you are done smoothing out the paper on top of the frame and it's dry, you can go on to paint the edges of your frame. I used a little piece of sponge and dipped it into some paint (the same color paint that was used earlier) and just gently ran it all around the outside edges. I did this to kinda hide the paper edges and to make everything kinda blend well together.
- Once the paint around your edges has dried, take some modge podge (or watered down glue), and go over your frame to seal and protect the paper. You might want to do a few coats depending on the paper you use. For mine, only one coat was needed. If you use watered down glue, I suggest around 3-4 coats.
- After the protective coat is on and dried, you can use some little embellishments to add to your picture frame. I found some little wooden cats and dogs to glue onto mine at Michaels for 4/$1.
I hope you enjoy this craft project!
By Jennie from Las Vegas, NV