social

From Freezer's Floor to Garden's Door

Someone's trash is another woman's treasure! I found these freezer floor grates at a local salvage yard for $5.00. They were just the right height (about 2 feet) for keeping the bunnies from their breakfast! (My vines!) A recycled fence made from freezer floor grates.


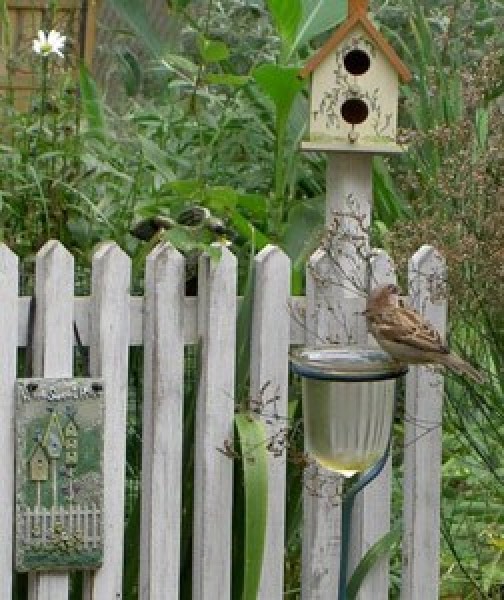
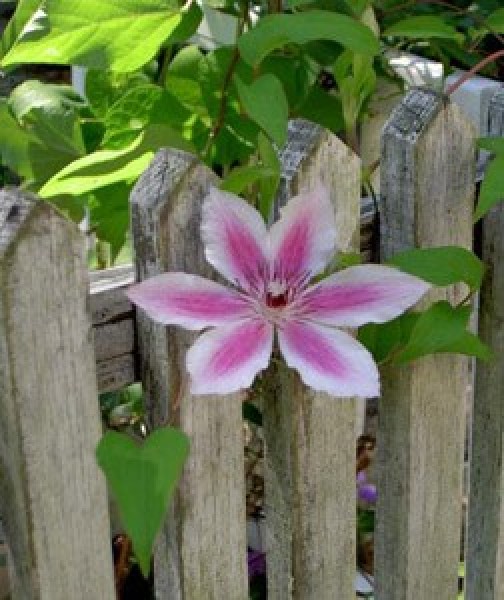
They also camouflaged the chicken wire that protected the vines, and at the same time dressed up my garden doorway. The picture of the clematis poking through shows the fence after 5 years. An arbor with recycled fence pieces in a garden.

 
A flower growing through the fence.
 

I would guess that freezer floor grates are hard to come by, but with imagination and creativity you might envision a fence in an old wooden ladder or railing. If all else fails, buy the wood and build your fence from scratch. If you do decide to buy the wood, I would recommend the treated lumber. My fences lasted only about 6 years, but the posts that I used were treated lumber and they withstood the elements.

Advertisement

Approximate Time: 3 hours

Supplies:

  • 2 freezer floor grates for 2 fences
  • 2" x 2" treated lumber (about 12 ft.)
  • rubber gloves
  • 8- 2 1/4 in. screws
  • screwdriver
  • jigsaw
  • circular saw
  • drill
  • drillbit (smaller than width of screw)
  • white acrylic craft paint
  • paint brush
  • sandpaper
  • small piece of thin cardboard
  • pencil
  • birdhouses (optional)
  • wood glue to attach birdhouses

Wooden freezer floor grates.


Instructions:

  1. Sand the grates if needed.

  2. Make a template (pattern) out of a small piece of thin cardboard for the pickets, this way all the points ^ will be uniform. Place the template at the top of the picket and draw the lines with a pencil. Continue onto all the pickets. Next, cut along your lines with a saw. I used the jigsaw because the pickets were close to each other.
    Advertisement

  3. For the posts, (use rubber gloves when working with treated lumber) using a circular saw, cut the 2 x 2 lumber the height of your fence plus 10 inches to go into the ground and if you intend to put the birdhouses on you'll want to add another 2-3 inches. Make sure to cut the bottom of the 2 x 2 at an angle, so you have a sharp point to push the finished fence into the ground.

  4. Pre-drill 2 holes in each post (lining it up to where the cross beams are). But remember if you decided to go with the bird houses, the tops of the posts should extend past the top of the fence about 2-3 inches. Screw through the posts and into the cross beams.

  5. Time to paint! I thinned my paint a bit with a little water to give it that white washed look. After the paint dried I sanded it to give a worn look. Whatever suits your taste.
    Advertisement

  6. I waited to glue the birdhouses onto the posts until after the fence was in the ground, this way you could use the post to push or use a rubber mallet to hammer the tops of the posts. You can use a spare piece of lumber to start the hole in the ground first, thus not putting a lot of pressure on your fence.

  7. Once the fence is in place, glue the birdhouses on top of the extended posts. If you chose small decorative birdhouses you might want to block the holes to keep wasps from getting in.

*Just a note: This sounds harder than it is. If you lay your pieces out and just position them to the way you want, you'll see what you have to do. Measurements are approximate, as your fence size will differ from mine. Have fun!

By Deb H. from East Brunswick, NJ

Add your voice! Click below to comment. ThriftyFun is powered by your wisdom!


Bronze Feedback Medal for All Time! 149 Feedbacks
May 21, 20090 found this helpful

It makes your garden so inviting. I actually never heard of these freezer crates, we have lots of wooden pallets that are easy to come by for free they may work for your idea as well. Those you used looks very sturdy and I bet could be used to make smaller kids or one person porch swings.

Advertisement

This is my first vote since thriftyfun has started letting the members be the ones to pick winners from the top vote and I give you my 1st thumbs up on your idea! It's lovely, great job!

 
May 22, 20090 found this helpful

Don't use the treated wood for vegetable gardens. It could poison you. it is treated to prevent insects from gnawing at the wood.


Add your voice! Click below to comment. ThriftyFun is powered by your wisdom!

 
In This Page
Categories
Better Living Green Living ReusingMay 21, 2009
Pages
More
🌻
Gardening
🐛
Pest Control
👒
Mother's Day Ideas!
Facebook
Pinterest
YouTube
Instagram
Categories
Better LivingBudget & FinanceBusiness and LegalComputersConsumer AdviceCoronavirusCraftsEducationEntertainmentFood and RecipesHealth & BeautyHolidays and PartiesHome and GardenMake Your OwnOrganizingParentingPetsPhotosTravel and RecreationWeddings
Published by ThriftyFun.
Desktop Page | View Mobile
Disclaimer | Privacy Policy | Contact Us
Generated 2024-04-03 20:20:43 in 3 secs. ⛅️️
© 1997-2024 by Cumuli, Inc. All Rights Reserved.
https://www.thriftyfun.com/tf77971481.tip.html