Benetta
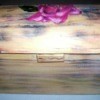
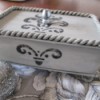
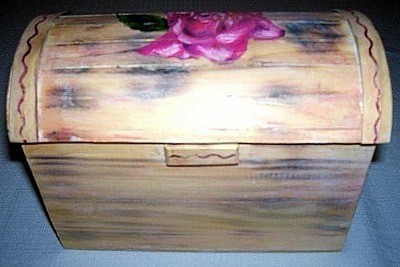
Silver Post Medal for All Time! 408 Posts By using paint techniques and a heat gun, give an ordinary wooden jewelry box an antique look.
Approximate Time: 2 hours
Supplies:
- wooden box, available at most craft shops
It need not be made of an expensive or very durable type of wood. The one shown in the example was made from inexpensive pine wood.
- pink felt
- any type of fast drying glue suitable for use on wood
- heat gun
- a thin paint brush
- fine sanding paper
- acrylic paint in several colors
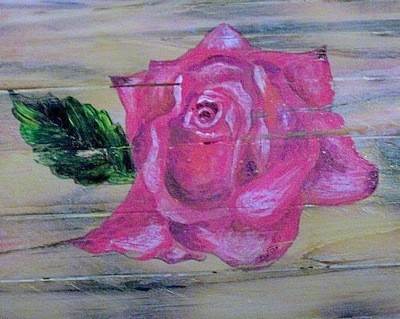
It will be used to paint a flower design on the lid. In the example a rose design was painted, but any other design will be suitable.
- HB pencil to sketch the design on the wood before painting it
- 1 old rag for final painting technique
- turpentine
- two colors of acrylic paint for the final painting technique ~ in the example gold and light pink were used
- furniture oil
Instructions:
- Sandpaper the whole box thoroughly inside and out.
- Burn the outside of the box, as well as the lid, with the heat gun. Also burn the inside of the lid. Be careful not to linger for too long on any one place with the heat gun, or to bring the heat gun too near the wood, this will cause damage to the wood.
- Once again sandpaper the whole box. The grain and the knots of the wood will now appear darker than the rest.
- Draw a flower design on the lid of the box.
- Paint the design with the acrylic paint.
- Allow the paint to dry thoroughly.
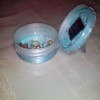
- Crumple up the old rag, wet it in the turpentine and then dip it into the gold paint. Then make light circular movements with the rag over the box, so that gold paint will be applied unevenly all over the box.
- Dip the rag into the turpentine again and then wipe off some of the gold paint. Concentrate on the areas where one would expect wear and tear to take place in the everyday handling of the box. This will give the box a weathered look.
- Repeat steps 7 and 8 with the pink paint. Allow to dry thoroughly.
- Paint a border design and allow to dry.
- Use the sandpaper again and sand away some of the paint on the places where one can expect the box to be touched during everyday use. Also lightly sand the border design and the floral design to add to the weathered look.
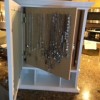
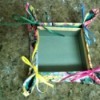
- Cover the inside of the box with felt. Make sure that the felt is glued thoroughly to all the edges and corners.
- Lightly rub furniture oil on the whole outside of the box.
By Benetta from Pretoria, South Africa
Add your voice! Click below to comment. ThriftyFun is powered by your wisdom!

May 13, 20110 found this helpful
Very pretty, nice job!

gem
Bronze Post Medal for All Time! 163 Posts May 13, 20110 found this helpful
This is beautiful and your instructions are fabulous. I love antiqued items and this gives me so many ideas.
Thanks for sharing.
Gem
Add your voice! Click below to comment. ThriftyFun is powered by your wisdom!