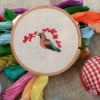
Advice for cross stitch beginners from the ThriftyFun community.
To protect the edges of your Aida cloth, I put narrow masking tape around the edges of my cloth, it keeps the cloth firm and is easy to remove when you get through.
By Pat Giles
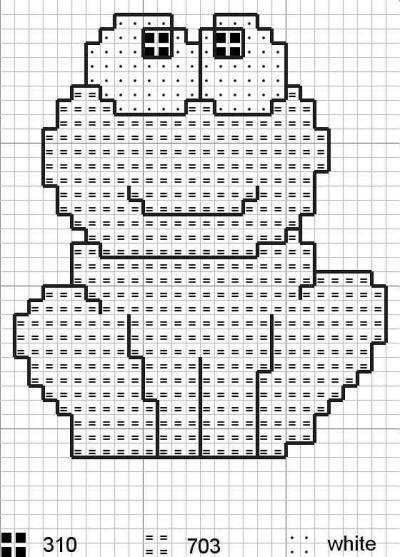
I would get a book at Hobby Lobby or somewhere that says for beginners. It is pretty simple to do and start with something small first. The squares on the cloth comes in several sizes. The smaller the number on the cloth, the larger the squares and the larger the picture. 11 count aidia is a good number. You could also get a small kit with thread and fabric included to start off.
By Donella
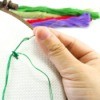
I started cross-stitching in 1978 and loved designing pieces for folks as well as doing other people's patterns. A few tips: try not to use an embroidery hoop - it often leaves a dirty crease in the fabric and it will stretch the threads it covers. Start out with fabric that is medium in weight as well as in 'count' (number of stitches in an inch). ALWAYS separate each strand of floss from the skein THEN combine them as needed...for instance use only 1 thread for 22-count fabric, but use 4 strands for 11-count fabric.
By Hope
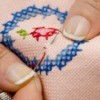
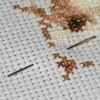
I didn't know this for awhile but you don't tie knots in the thread when cross-stitching. You hold out a piece of thread about 1/2 inch long in the back and stitch over it to hold the thread. When you end the thread, you slip the needle back through a few stitches to secure the thread (again, no knots). Stitch a whole row or preferably a whole section, by stitching only half the stitch and go the same direction (top to bottom or bottom to top) on each stitch. Then go back over the row/section you've done w/ the other half of the cross stitch (so you're making a row of slashes then going back and making them into X's) If you make the entire X each stitch, it looks sloppy. I found that it helps to follow the pattern in the order of the thread color listed. If the first color is way away from the center (the place you marked on both your cloth and the pattern), this is where the counting comes in. If you tend to work on a more complicated pattern a bit at a time, you can take a pencil and shade in the areas you've finished on the pattern so you'll remember what you've done.
By Nancy
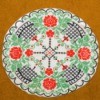
I agree with Donella, you can get some small easy kits at the dollar store. They have some for kids that you might even want to go for as they are extra simple. The key to cross stitch is centering the design on the cloth. I find the center square of my pattern and mark it with pencil, then I fold the cloth in quarters and press lightly. Where the fold lines meet is the center square, which I mark with a straight pin or washable fabric pencil in a light color. Remember to finish the edges of your fabric by either zigzaging the edges on a sewing machine, using a product called fray check on the raw edges, or just baste slightly inside the raw edge. This is all to keep the fabric from fraying as you work. You might like to try using vinyl Aida cloth or perforated paper for your first projects as the edges don't fray and you don't need to use a hoop for the project. Let us know how you are doing with it. Have fun! Maybe try the one in this post.
By Mary Lou

Post your ideas below.
Add your voice! Click below to answer. ThriftyFun is powered by your wisdom!
I have been cross stitching for about 30 years on and off. I had a stroke 4 years ago and had to learn to cross stitch with my non domimant hand. I bought a sit on frame at a craft show that has been my salvation. I was used to not using a hoop as I worked after having creases that I couldn't get out. But after the stroke I couldn't hold the material as I worked. I make presents every year for people now. There are several magazines to choose from that you can get from the bookstores. Some are more difficult than others. But once you get the fever for cross stitch there is no going back. DMC has a website with patterns and tips.
Hi,
I just learned cross stitching. I already stitched few small patterns, but what really bothers me is that, all of the back of my cross stitch work is messy. Is there a way I can make it neater? Especially when stitching a border pattern which requires moving further from an area to another (2-4 blocks away)?
There is a special "knot " for cross stitching. I learned it while quilting, it is quite flat and adequate for cross stitch. Hold a long piece of floss. Gather both ends. Put them thru your needle. Pull thru so you have a 2 inch tail and a loop. Begin in the back of your first stitch. Pull thru until there is only a small loop at the back.
Add your voice! Click below to answer. ThriftyFun is powered by your wisdom!