There's been a lot of discussion recently on many of the scrapbook boards about using Goo Gone or baby oil along with blending stumps to color stamped images for scrapbooking and card making. Many people use the Prismacolor colored pencils to do their coloring with. Some also use Koh-I-Noor color pencils, of which I own a few.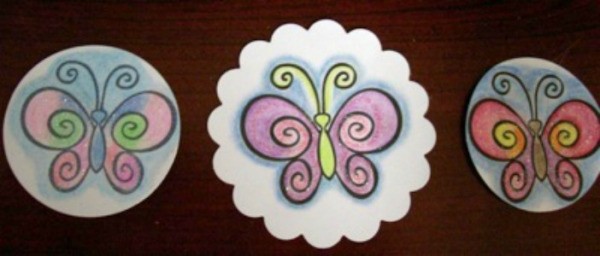
Today I experimented with my Crayola pencils, Rose Art pencils, and Crayola crayons. The Crayola actually worked reasonably well. While the Goo Gone did not spread the color of the RoseArt and other budget friendly pencils, it did soften their look greatly. So instead of just applying the color pencil to the edges of the stamp image and blending inward to stretch the color, I went ahead and colored the stamped image entirely then went over it with the Goo Gone and blending stump. It softened the color and smoothed out any pencil lines. It is a different look than with the softer Prismacolors, etc., but it still made a nice improvement. I also did the same with the Crayola crayons and was pleased with the smoothness created with the Goo Gone, also.
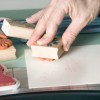
To use Goo Gone with blending stumps, pour a very tiny amount of the Goo Gone into a jar or container with air-tight, spill-proof lid. I used a small sponge to set inside the jar to hold the Goo Gone, and the sponge keeps you from getting too much on your blending stump. Color your stamped image. Then dip your blending stump tip into the Goo Gone, just barely wetting the tip. Then in circular motions, go over the color from your pencil to smooth it out. While the idea of the Goo Gone is not new; I have not seen anyone post about using crayons, so I thought I would share it.
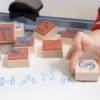
In the photo, the image on the left was made using regular Crayola crayons. The images in the center were made using Koh-I-Noor pencils. I added a little glitter using a quick glue pen to brighten it up a little. Some people prefer to use baby oil rather than Goo Gone, as it is safer and less odorous. Be sure to put the lid cover back onto your container of Goo Gone or baby oil and store in a safe place, away from children and pets.
By Chris from USA
This page contains the following solutions.
To make your own anti-static pad to eliminate embossing powder sticking to fingerprints, etc.; bundle some bicarbonate of soda (baking soda) into an old hankie or piece of material, secure with string and wipe over card, glass, plastic, or anything you want to emboss.
Here are the questions asked by community members. Read on to see the answers provided by the ThriftyFun community.
Can anyone recomend an inexpensive place to purchase rubber stamping supplies. I would like to make gift wrap with my 8 year old for the holidays.
I saw something where you took a potato and used a cookie cutter to make the shape of the stamp and then cut the rest off....other wise try the $1.00 store or big lots
Remember that you get the quality that you pay for. That said, you can make some nice images with the potato idea, also an apple or sponge cut into the desired shape. Try a thrift store, a dollar store, or eBay.
Good luck! I enjoy stamping and gift wrap is fun!
got almost 100 stamps for $15 at a garage sale. if you look at the back of rubber stamp magazines you will find ads for people selling stamps etc. printers usually have bits and pieces of paper that they will sell by the pound. good luck, it is an addictive hobby.
Biglots. I have gotten alot of really cute ones from there for little of nothing.
Micheals stores carry $1 rubber stamps. They are usually in a bin in the front of the store. I have not seen Christmas ones at my store yet but they did have Halloween so I am assuming they will have Christmas ones.
Check out these photos.
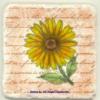
I'm a rubber stamper/scrapper. This is a scan of one of my hand stamped cards.