 You'll keep the floor neater during the next painting job if you glue a paper plate to the bottom of your paint can, instead of trying to move newspapers under the container every time you set it down.
By Ron from Cortez, CO
This page contains the following solutions.
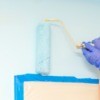
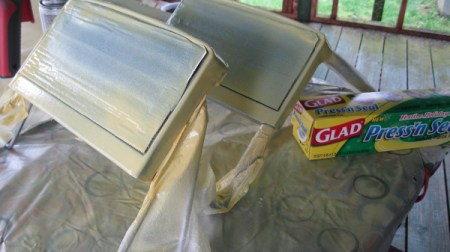
Some jobs need all kinds of 'taping off'. Try using Press 'n Seal instead of tape. It adheres to itself and is so easy to get where you want covered up. I'm repainting a step stool here, and it was so easy to cover all the legs and step attachments. A lot cheaper than a roll of blue tape, too!
I have been painting the house, so I have had to wash out my paint tray. I found a tip to avoid having to rinse out your tray for the next colour.
With spring right around the corner, here are some handy painting hints.
Painting the inside door moulding around the hinges is a job I've never relished because it's picky work. I always ended up getting paint on the hinges no matter how careful I was.
In each room I store a paint chip from the store for that room. Should I need to touch up the paint for that room or want to repaint it, I have all the information on that card.

When painting, don't take off door handles just cover them with tin foil. It makes the job a whole lot easier.
I have been painting the last couple of weeks and all the rooms are different colors. To save a lot of work on clean-up I put the painting tray in a plastic grocery bag.
When painting a room, if you find the touch-up tedious, use a tampon. This is how it works. Push a small portion from the applicator. Dip just the tip in the paint. Remove the drip. Blot on the mistake whereas your paint touched the ceiling or vise versa.
I'm certainly not an expert when it comes to painting but I have learned a few tricks that have been a help to me.

I attach a can opener, to the end of a paintbrush, that is removable. This makes things so much more simple instead of searching for the opener every time.

Keep a small container of your wall paint in your refrigerator for quick touch up jobs. The paint stays fresh and you don't have to drag out a heavy messy paint can for small jobs.
Before painting, clean walls with white vinegar and let dry before painting. Inexpensive and easy. Also put your paint brushes in white vinegar and rinse well and dry before using.
Want to save having to wash paint out of that paint tray or the cost of replacing one? How about the cost of liners?
Apply a coat of lemon oil to woodwork if you are painting around it. If any paint spatters onto the woodwork, it will wipe off without any trouble. You are also conditioning the woodwork at the same time.
When doing painting, staining, or polyurethane projects; I keep Wet Ones pop-up wipes handy to clean my hands, wipe off paint brush handles, or wipe up small accidents.
Here's a tip that I use all the time. Wear your clothes inside out! Sweats work the best.
When you're painting and you need to put your brush down it can be messy, not to mention losing it. Just use a hot glue gun and attach a magnet on to your brush handle.
When you need a small amount of paint for touch-up check the craft department. Walmart has every color and they cost about $1.
Keeping Paint Off Hinges. It can be difficult to put masking tape on hinges to keep paint off them. Instead, cover them with petroleum jelly.
Always use blue painter's tape, not regular masking tape to mask areas when you are painting. Blue tape peels off easily, masking tape often doesn't.
When painting, write down the brand of paint and color of paint and any numbers on the can that identify the type of paint. Keep this info in a binder or on your computer as a good reminder if you ever have to buy more.
If you are painting and don't want to get paint on your shoes or the floor throughout the rest of your house, tie plastic grocery bags over your shoes.
If you like a quick painting job, paint your entire room with a Flat Latex paint, trim and all...
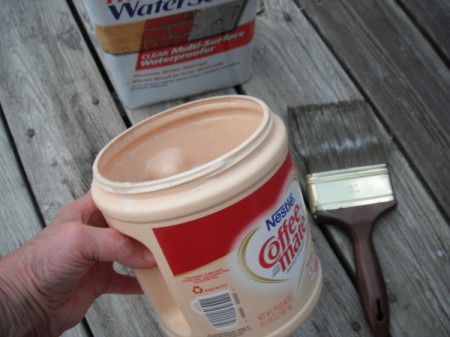
I used a 35.3 oz. Nestle Coffee-mate container to apply water proofing sealer to our deck. The container is comfortable to hold and it made the job much easier. After I finished, I put it in the trash.
When painting with toddlers, we put the paint in a plastic paint cup. I found there were no lids at the center where I'm working. I don't like washing the remaining paint out of the cups because it is so wasteful.
When we moved in to our new home, we wanted to get the painting done before moving all the furniture. We supplied the paint and the food. Friends and family had an enjoyable time and the painting got done in no time.
Do you ever notice how the trim next to the floor in your house collects so much dust and never seems to come clean? Try wiping all the dust, dirt, and food off the best you can.
Quick Paint Touch Ups. Did you already clean your paint brushes but notice you missed a spot? Don't dirty a paint brush for a small touch up. Just use a q-tip and toss it when you are finished.
Put plastic lids under each leg to help catch drips when painting. It's also good to put newspaper down, but the plastic lids will keep paint from soaking through the newspaper and staining the floor when applying paint to the legs.
I have been painting my living room and find that, very often, I am called away from my work by a telephone call or a child needing help. I keep a large plastic garbage sack nearby and, when I am called away, I place my paint pan, with roller and brush and all, inside the bag and twist it a few times to seal.
After cleaning a used paintbrush, put a rubber band around the bristles of the brush to help it keep its shape while drying.
A lot of the stores around here have started putting their meat in big plastic pans. Washed out these make great disposable paint pans.
Borrow your kid's skateboard when you are painting baseboards and lower walls. Just sit cross-legged on a skateboard and roll along with your paintbrush and a paint can. It's much easier on your back. By Katz
Here are the questions asked by community members. Read on to see the answers provided by the ThriftyFun community.
A while ago there was an article about how to tape off a closet door so it could be painted inside the taped area. I would appreciate seeing the article.
Hi,
#1 white interior semi gloss paint(great to wipe/ clean) on doors and frame trim
#2 buy either a small roller, or a really good/ wide brush. If you buy the bit more expensive paint, one dab ll do ya!
# maybe this should have been #1 most if not all stores will give you a Large free sample of all paints
The painting is pretty much self explanatory,
PLEASE BUY REAL PAINT TAPE and follow the instructions. If there are non, GOOGLE YOUR QUESTIONS