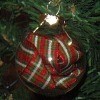
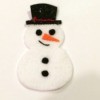
Tiny little snowmen bundled up in scarves and hats. Perfect for your Christmas tree.
Materials and Equipment:
- a large plastic bag or several sheets of newspaper
- small scraps of felt, various colors
- 2 small, white foam balls with a fiber covering, one about a 1/2 inch in diameter and the other slightly larger (available in craft stores)
- a piece of black construction paper
- one toothpick, with sharply pointed ends
- scissors
- craft glue
- glue spreader or Q-tip
- a lid from a used plastic container (such as a yogurt container)
- thread
- fine-tip felt pens, black and orange
Instructions:
- Before starting, clear the table and cover it with newspaper or a large garbage bag to avoid getting glue on the table.
- Pour a small puddle of craft glue onto the plastic container lid. Using the glue spreader, glue the smaller foam ball on top of the larger one. Press and hold the balls until they are firmly stuck together.
- Take out the scraps of felt. Select a color for the snowman's hat and one for his scarf. To make his hat, you need to cut a rectangle that is about an inch or two wide and a few inches long. For the scarf, you need to cut a rectangle that is an 1/8 of an inch wide or less, and a few inches long. These measurements will vary depending on the size of your foam balls.
- Wrap the long, thin piece of felt around the snowman's neck like a scarf and check that the size is correct. Then spread glue on one side of the scarf, along its entire length except for the ends. Press the scarf against the snowman's neck where the two balls join and hold until secure. Cross the ends of the scarf over in front of the snowman (see photo), and place a dab of glue where they cross to secure them.
- Take the larger rectangle of felt and wrap it around the snowman's head, making sure the size is correct. The felt should perfectly (or nearly) wrap around the circumference of his head. Adjust or re-cut the felt to size if necessary. Once you have the correct size, spread glue along one of the longer edges. Wrap the rectangle around the head of the snowman and press until firmly stuck.
- Cut a piece of thread that is several inches long. Tie it around the hat, creating a bunched effect at the top (see photo). Tie the thread securely in a double knot at the back of the hat, leaving two free ends of identical length. Tie these ends into a knot, creating a loop with which to hang the ornament on the tree.
- Cut a small rectangle of black construction paper. This will become the brush of the snowman's broom. Cut a toothpick in half. Spread glue on one side of the black rectangle you just cut and wrap it around the non-pointed end of the toothpick. Press until firmly stuck. Next, cut fronds into the end of the black paper to create a 'brush' effect. Press the pointed end of the toothpick into the bottom foam ball, just behind the edge of the scarf (see photo), creating the "broom".
- Using the fine-tip felt pens, add eyes, a carrot nose, a mouth, and buttons to your snowman.
- Hang the snowman on an evergreen bough and "let it snow, let it snow, let it snow!"

Add your voice! Click below to comment. ThriftyFun is powered by your wisdom!

Stacey Silva
Silver Feedback Medal for All Time! 453 Feedbacks December 21, 20050 found this helpful
Those are so cute!! I'll have to do that with my daycare kids!

suzanne
Silver Post Medal for All Time! 277 Posts April 26, 20060 found this helpful
ADORABLE
Add your voice! Click below to comment. ThriftyFun is powered by your wisdom!