Home |  Index |  Submit Request |  Share Photos |  Share Tips |  Active Topics |  New Feedback  |  Contact Us  |  Search
 User Login:  Username:    Password:      Forgot It?  | Register

 Popular Topics
 - Beauty
 - Budget and Finance
 - Christmas *
 - Cleaning
 - Consumer Advice
 - Craft Projects
 - Craft Tips
 - Food Tips
 - Garage Sales
 - Gardening
 - Gifts
 - Green Living
 - Home Improvement
 - Organizing
 - Parenting
 - Parties
 - Pest Control
 - Pets
 - Product Reviews
 - Recipes
 - Repair
 - Thanksgiving
 - Weddings for Less

More Topics

Google Search:

Web thriftyfun.com

About:
RSS Feed
About Us
Media
Advertising
Contact Us
Privacy Statement
Disclaimer

Macaroni (Pasta) Angel Ornaments

By Stella Rivet
1x1
Date: 12/01/2005 Topics: Christmas > Decorations > Ornaments | Craft Projects > Christmas > Ornaments | Photos > Crafts  
1x1
1x1
Post Feedback! | Email Friend | Print | Get Responses | Bookmark | del.icio.us | Link | Rate: Thumbs Up Thumbs Down
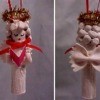
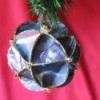
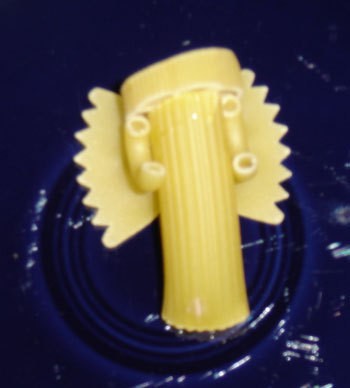
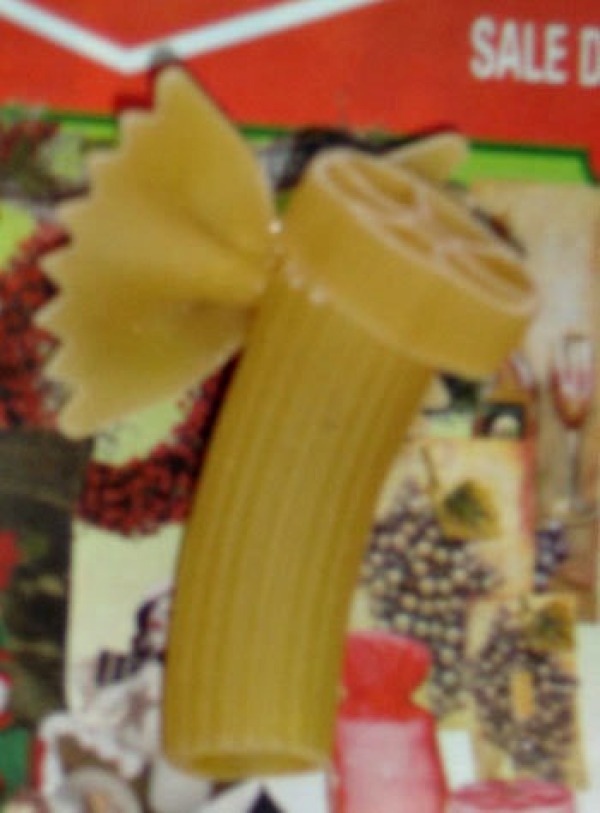
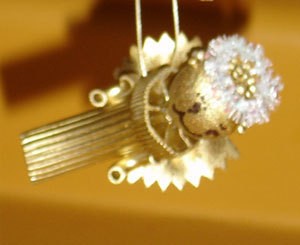
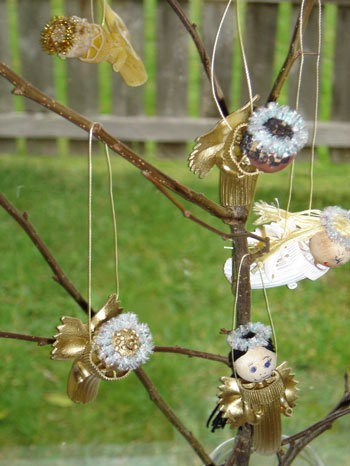
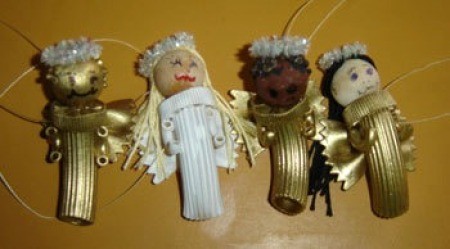
These are instructions for making macaroni angel Christmas ornaments. My mom Susan made these for all of her children and friends many years ago. I was a young child at the time and thought it was just about the coolest thing ever. Ornaments like these adorn our trees to this day.

Macaroni (Pasta) Angel Instructions

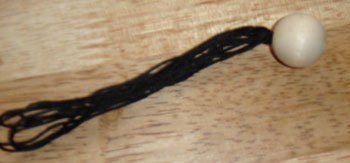
This project does take some time waiting for parts to dry. I would suggest doing a few at the same time, step by step, this way when you are done you will have more than one and can give them away to all your friends and family. 
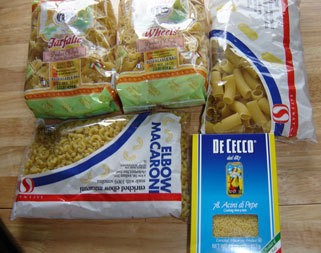
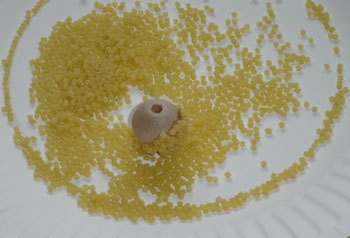
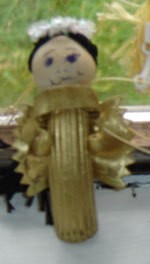
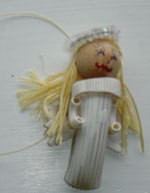
The cost of the supplies can be expensive because some of the pastas are unique but most are available in a good supermarket (you can cook all the leftovers!). You can make lots of angels or eat the leftover pasta. We've made these to look like different people.
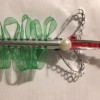
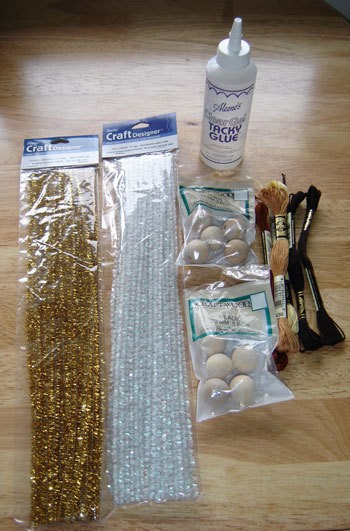
Supplies:

  • Wheel pasta (collar)
  • Bowtie/Farfalle Pasta (wings)
  • Elbow Macaroni (arms)
  • Rigatoni Pasta (body)(
  • Acini di pepe (small little balls) Pasta (hair)

Paint:

  • Gold tempura/acrylic paint
  • Brown tempura/acrylic paint
  • White tempura/acrylic paint
  • Black tempura/acrylic paint
  • Gold spray paint
  • White spray paint
  • Gold glitter paint (for accents)
  • Thin tip permanent marker or if your so lucky to have one, a wood burner
  • Gold and/or iridescent pipe cleaners
  • Clear glue
  • Hair colored embroidery thread (for long hair)
  • Natural Unfinished Wooden beads (20mm)

Macaroni (Pasta) Angel Instructions Macaroni (Pasta) Angel Instructions

Macaroni (Pasta) Angel Instructions

Angel Bodies (pasta):

Glue a wheel pasta on top of a rigatoni pasta. Let dry completely.

Attach two elbow macaroni to the sides of the rigatoni right under the wheel pasta as arms. Let dry completely.

Attach a bow tie pasta to the rigatoni on the opposite side as the arms. This will be the wings. Let dry completely.

Once everything is dry you can decide if you want to paint the body or if you want to keep in natural looking. It is recommended that if you want to keep it natural colored to spray it with shellac so it won't absorb moisture.

Macaroni (Pasta) Angel Instructions Macaroni (Pasta) Angel Instructions

Macaroni (Pasta) Angel Instructions

Angel Heads (wooden beads):

Paint the bead the color you would like, let dry.

For short hair, put glue on the bead where you would like hair (leave room for face) and roll in the anici di pepe pasta, let dry, then paint it the color desired. These look good all the same color (see little gold angel).

For long hair, put some glue inside the bead hole then take a few strands of embroidery floss and stuff it part way down into the hole, let dry. Then take glue and put it on the wooden bead where you would like the hair to fall, press the embroidery floss on to the glue, let dry.

Draw on a face with a thin tipped permanent marker or burn features on with a wood burner.

Cut down one of the pipe cleaners and attach the two ends together to make a circle. This will be the halo. Glue to the top of the head.

Macaroni (Pasta) Angel Instructions Macaroni (Pasta) Angel Instructions

Putting It All Together:

If you want the bodies to be a different color than the head, make sure to spray paint them before putting the angel together. If you want them all one color including the head, leave off the halo and spray paint the whole angel, flipping it over once it is dried on one side.

To attach the head to the body, take another short piece of pipe cleaner and put glue on one end and stick it into the middle of the wheel pasta. Put glue on the other end and place that end into the hole in the wooden bead, this will help secure the head in place. Now glue around the bottom of the wooden bead where the head touches the wheel pasta, for extra security.

Finishing Touches:

Now your angel is put together and can be embellished with glitter paint if desired.

Put a string through the wheel near the wings and tie the two ends together, to hang. Normally we use a very thin gold cord for the hanger, thin ribbon will also work.

Macaroni (Pasta) Angel Instructions

Macaroni (Pasta) Angel Instructions

You can make these look like your friends and family by adjusting the skin color, hair color, eye color etc. You can even write the name of the person on a piece of leather or fabric and glue to the lower part of the angel body.

Macaroni (Pasta) Angel Instructions

Macaroni (Pasta) Angel Instructions Macaroni (Pasta) Angel Instructions

Craft By Susan Sanders-Kinzel and Stella Sanders Rivét

Jump to Feedback | Post feedback
Related Links:
Previous: Home for the Holidays: What to do Before You Deck the Halls ThriftyFun Next: Cigarette Smoke Stains on Cabinets
1x1
 Feedback
1x1
1x1
1x1
1x1
 Sponsors
1x1
1x1

Post By Vickie Ford (Guest Post) (12/08/2006)
Our now 22 year old son did these many years ago in kindergarten, His were made of all gold. The faces were drawn with a permament fine point marker. I do these every five years for the children I teach in music. They think it is a very fineChristmas treat to take something from the tree! ""


Post By CraftyCritter (Guest Post) (12/02/2006)
VERY CUTE!!! My mom made our angels out of the compressed cardboard egg cartons and they looked very similar to these. Merry Christmas.


Post by Great Granny Vi (215) | (04/22/2006)
Profile |Contact
Hi Susan & Stella, I love that you did a great job of show -n -tell instuctions for the pasta angels.But you always do!
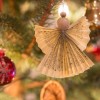
Here are some, the way I was taught . Thanks for sharing another way of doing them. HUGS, Great granny Vi

Editor's Note: Great Job GGVi. I love the little hymn books.

RE: Macaroni (Pasta) Angel Ornaments


Post By Jane Brinkman (Guest Post) (12/23/2005)
Greetings!
My cousins 'n I made macaroni angels 10+ years ago and each year we love thinking about the fun we had making them. One cousin wrote just yesterday, that a friend (whom she had shared this craft with) asked her 5 yr. old grandaughter to put the 30 new "macaroni angels" on a small tree for her. When finished...there they were, all clustered in one spot....leaving much of the tree bare. "Why didn't you spread them out a bit?" gra'ma asked. Because they're SINGING! They HAVE to be CLOSE together!"
That's so precious...it's my pleasure to pass it along
Blessed Christmas to ALL!
The Brinkmans in California!


Post By MM (Guest Post) (12/13/2005)
My mom had us making these 30 years ago. Every year we made a differant ornament for the tree. This year she celebrates her 80th birthday and my daughter is making 200 of them as favors for the party guests.


Post by wdyjsu (269) | (12/01/2005)
Profile |Contact
Those are so cute! It's amazing the kinds of crafts you can do with anything!


Post By Judy (Guest Post) (12/01/2005)
These are just precious! What a creative Mom you have! I'm going to try making these this year. Thank you so much for sharing this lovely craft!


1x1

Post Feedback:
Login using the form on the top of the page to post feedback if you have registered with ThriftyFun. If you have not yet registered, click here. It's FREE!. If you are not registered you can post feedback as a guest below. Please don't use your email address for your name because spam robots can dredge it from our site. Please do not post your feedback more than ONCE. We need to approve all guest feedback and it may take from minutes to hours for that to happen.
(1x1 graphic )
Your Name

Subject

Feedback

text tool text tool text tool text tool

Image Upload: Add an image to your post! Click the "Browse" button below and select an image from your hard drive. Please only select gifs or jpegs. If you have any problems, just email the image to images@thriftyfun.com


If you want to post your email address for responses from readers, obscure it in some way like put spaces between the name and @ sign and service address with (remove spaces) behind it or name (at) server (dot) com . This is for your protection from those creepy Robots.

(1x1 graphic )

© 1997-2008ThriftyFun.com - Design by Cumuli Design
Disclaimer: ThriftyFun.com cannot accept any responsibility for any injury or damage that you may cause to yourself, others, or property when following any advice given on this site. Read the full disclaimer. If you find any information on ThriftyFun.com or in our newsletters that is either erroneous and/or potentially harmful to others, please Contact Us, immediately.