ThriftyFun Logo
Home   Find   Ask   Share   Answer   Join   Index   Login  
 
 User Login:  Username:    Password:      Forgot It?  | Join ThriftyFun!

 - Beauty
 - Budget and Finance
 - Cleaning
 - Consumer Advice
 - Craft Projects
 - Craft Tips
 - Food Tips
 - Garage Sales
 - Gardening
 - Gifts
 - Green Living
 - Home Improvement
 - Organizing
 - Parenting
 - Parties
 - Pest Control
 - Pets
 - Product Reviews
 - Recipes
 - Repair
 - Weddings for Less

RSS Feed
About Us
Media
Advertising
Contact Us
Privacy Statement
Disclaimer

Craft Project: Drink Mix Pencil Tote

1x1
Date: 08/31/2009 Topics: Craft Projects > Recycled > Containers | Photos > Crafts  
1x1
Post Feedback | Get Responses | Bookmark | Link | Print | Print (With Feedback) | Rate: Thumbs Up Thumbs Down | Bookmark and Share
Craft Project: Drink Mix Pencil Tote
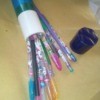
A nifty storage container made from an empty drink mix container. A great way for kids to carry or store pencils, pens or markers. Also a neat idea for storing craft supplies, small toys, sewing accessories, crochet hooks, etc.

Approximate Time: 25 minutes

Supplies:

  • round plastic or paper container
  • glue
  • paper or fabric
  • cording (string, narrow rope, ribbon)
  • scissors
  • ruler

Instructions:

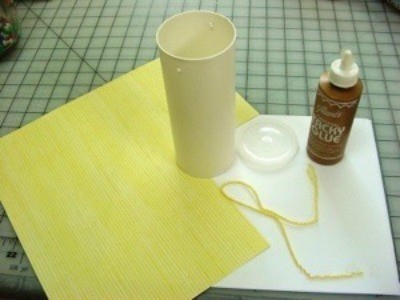
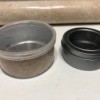
Remove label from plastic drink mix container. You can also use an empty Pringles chip container for this project. The chip container will obviously hold more items as well as taller items!

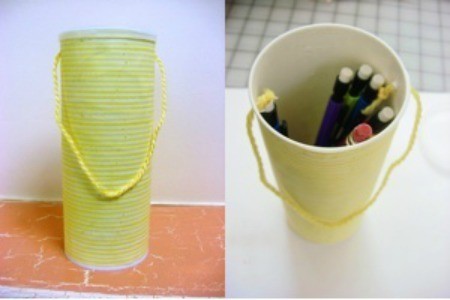
Punch 2 holes on each side of the container approximately 1/2 inch down from the top edge. Use a paper punch if the container is paper or pierce the side of the container with the point of a nail or sharp scissors.

Measure the length of the container as well as the circumference. Cut a piece of paper or fabric according to these measurements. Apply glue to the outside of the container and attach the paper/fabric covering. Be careful to smooth out any wrinkles before the glue dries.

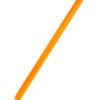
The paper will have covered the punched out holes so you will need to re-punch the holes by sticking a nail back through the opening. Once the holes are open again, insert the string, cording or ribbon through the hole. Best to insert the cording from the outside in. Tie a knot to secure, the knot will be on the inside of the container. Thread the loose end of the cording through the remaining hole, again from outside in and tie another knot.

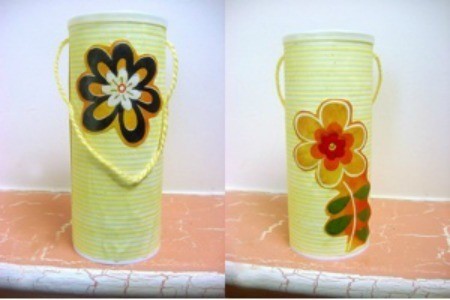
Place items inside the container and place the lid on top. The outside of the container can be labeled as to content or a child's name can be put on the outside to personalize.

These containers also can be used for the giving of small gifts. Cover with holiday gift wrap and place a bow on top! An inexpensive yet charming way to give a gift.

By Pam from McMinnville, TN

(1x1 graphic )
Previous: Rent a Cottage for a Summer Vacation ThriftyFun Next: Saving Summer's Bounty
(1x1 graphic )
1x1
1x1
 Feedback
1x1
1x1
1x1

No Feedback Yet

Be the first to post feedback! Click here to post feedback.

1x1
1x1
 Post Feedback:
1x1
1x1
1x1

Login using the form on the top of the page to post feedback (if you are a registered user). If you have not yet registered, click here to do so. It's FREE!.

1x1
(1x1 graphic )

© 1997-2009 ThriftyFun.com - Design by Cumuli Design
Disclaimer: ThriftyFun.com cannot accept any responsibility for any injury or damage that you may cause to yourself, others, or property when following any advice given on this site. Read the full disclaimer. If you find any information on ThriftyFun.com or in our newsletters that is either erroneous and/or potentially harmful to others, please Contact Us, immediately.