Home |  Index |  Submit Request |  Share Photos |  Share Tips |  Active Topics |  New Feedback  |  Contact Us  |  Search
 User Login:  Username:    Password:      Forgot It?  | Join ThriftyFun!

 Popular Topics
 - Beauty
 - Budget and Finance
 - Christmas *
 - Cleaning
 - Consumer Advice
 - Craft Projects
 - Craft Tips
 - Food Tips
 - Garage Sales
 - Gardening
 - Gifts
 - Green Living
 - Home Improvement
 - Organizing
 - Parenting
 - Parties
 - Pest Control
 - Pets
 - Product Reviews
 - Recipes
 - Repair
 - Thanksgiving
 - Weddings for Less

More Topics

Google Search:

Web thriftyfun.com

About:
RSS Feed
About Us
Media
Advertising
Contact Us
Privacy Statement
Disclaimer

Tapered Beeswax Candles

By Christine Weber
1x1
Date: 12/16/2005 Topics: Craft Projects > Candlemaking | Photos > Crafts  
1x1
1x1
Post Feedback! | Email Friend | Print | Get Responses | Bookmark | del.icio.us | Link | Rate: Thumbs Up Thumbs Down
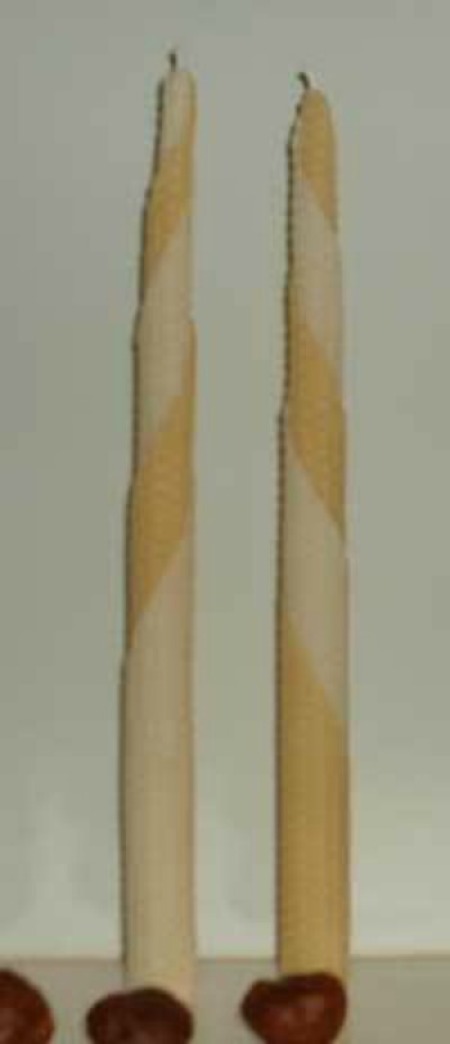
Tall, simple and elegant - these beeswax candles are lovely as a centerpiece for a Christmas tea or as a gift that is sure to be treasured.

Materials and Equipment:

  • two sheets of honeycomb textured beeswax, in different colors
  • several feet of candle wick
  • an exactoknife
  • a thick piece of cardboard or plywood to cut on
  • a ruler with a hard edge for cutting, two feet or longer
  • scissors
  • ribbon or raffia

Instructions:

1. These instructions make two candles. I chose complementary colors of cream and beige for the candles in the photo, but you can use whichever colors you like.

2. Before starting, clear the table and cover it with a thick piece of cardboard or plywood to protect it from cuts.

Tapered Beeswax Candles

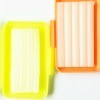
3. Cut each sheet of wax lengthwise on the diagonal. You should now have four triangles.

4. Take one triangle of each color and set the other two aside for later. Orient the wax so that the long edge is closest to you and the diagonal edge is away from you. Place the two triangles directly on top of each other. Then, stagger the top triangle by pushing it an inch forward, so that an inch of the bottom sheet is now visible.

5. Trim the top of each triangle by about an inch, so that you will have a flat even surface at the top of the candle. Trim the bottom of the triangles if you want shorter candles. The ones in the photo are about a foot long, and a few inches have been trimmed off the bottom to shorten them.

6. Cut a piece of wick that is just a touch longer than the length of the wax triangles. Press the wick onto the long edge of the wax triangle and roll the wax over the wick. Continue rolling the candle. You will be rolling the two triangles together, but they will be slightly out of sync because they are staggered. Press the wax tightly as you go.

7. Once the candle is as think as a standard tapered candle (about an inch across the bottom), cut the unrolled part of the wax off with the exactoknife and ruler. Press the ends of the wax flush against the candle. Keep the left over wax to melt down for other candles.

8. Repeat steps four through seven for the other two triangles. You will now have two tapered candles.

9. Wrap the candles together with ribbon or raffia and give as a gift.

Jump to Feedback | Post feedback
Related Links:
Previous: Chocolate Spoons Gift ThriftyFun Next: Poinsettia Magnets
1x1
 Feedback
1x1
1x1
1x1
1x1
 Sponsors
1x1
1x1

No Feedback Yet

Be the first to post feedback! Click here to post feedback.

1x1

Post Feedback:
Login using the form on the top of the page to post feedback if you have registered with ThriftyFun. If you have not yet registered, click here. It's FREE!. If you are not registered you can post feedback as a guest below. Please don't use your email address for your name because spam robots can dredge it from our site. Please do not post your feedback more than ONCE. We need to approve all guest feedback and it may take from minutes to hours for that to happen.
(1x1 graphic )
Your Name

Subject

Feedback

text tool text tool text tool text tool

Image Upload: Add an image to your post! Click the "Browse" button below and select an image from your hard drive. Please only select gifs or jpegs. If you have any problems, just email the image to images@thriftyfun.com


If you want to post your email address for responses from readers, obscure it in some way like put spaces between the name and @ sign and service address with (remove spaces) behind it or name (at) server (dot) com . This is for your protection from those creepy Robots.

(1x1 graphic )

© 1997-2008ThriftyFun.com - Design by Cumuli Design
Disclaimer: ThriftyFun.com cannot accept any responsibility for any injury or damage that you may cause to yourself, others, or property when following any advice given on this site. Read the full disclaimer. If you find any information on ThriftyFun.com or in our newsletters that is either erroneous and/or potentially harmful to others, please Contact Us, immediately.