To make this jewelry hanger for yourself or a gift, you will need the following supplies:
Materials
- found stick or twig
- scrap of fabric, roughly 12 by 18 inches, but size according to your needs
- leather lace, purchased or cut
- clear sealant, almost any kind will work
- leather scraps (often available very cheap)
Tools
- lacing needle: a leather tool, generally available from any leather store, or often in the leather area of a craft store (or the inevitable Walmart)
- scissors
- Fray Check for fabric (or white glue in a pinch)
- lace cutter (optional) to cut lace from leather scraps
- leather punch, the kind with four or five evenly spaced punches that punch a line of slits for lacing.
- wooden mallet to hit punch (a metal hammer will eventually ruin the punch)
Instructions
- To get started, choose your fabric. I often find a nice bit as a remnant in the upholstery section of the fabric store. What you are looking for is something sturdy enough to lay flat against the wall, but loose enough to allow an earring to conveniently poke through for hanging.
- Cut the fabric into a rectangle in whatever size you like.
- Put it on a bit of newspaper and apply the Fray Check to all edges to prevent them fraying out.
- Now, I like to either deliberately fray the bottom first to make a bit of a fringe, but you don't need to if you don't want to.
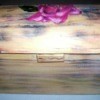
- While the fabric is drying, make sure that your stick is the correct length by checking it against your fabric. You want it to protrude a bit on both sides for the hanging of necklaces, etc., but not too far. Also, if there is a natural curve to the ends, make sure it points up, or everything will just fall off! Take either sandpaper (safer) or a pocket knife (my preference, but be careful) and remove most of the bark from the stick. I am deliberately sloppy with this as it looks more rustic and less "perfect" that way. Then you can stain the stick if you choose, or just spray or wipe a coat of clear sealant over it to keep it looking natural.
- Now, onto the leather. I try to find the irregular bits that leather shops cannot use for larger, "perfect" projects. I like the natural edges left through skinning and tanning, and I like to leave that edge on the bottom of the piece that holds the stick at the top. Lay the leather over the top of the fabric and adjust it until it has a pleasing look from the front, and there is enough leather to safely allow the lacing of the stick in place.
- Carefully turn the whole thing over, and mark with a pen or fineline marker the outline of the fabric onto the leather to show you where to cut it out. Most leather, especially lighter weight deer or goat skin will cut quite nicely with a decent pair of scissors.
- Cut out the leather.
- Now, on a disposable wood surface like a scrap of firewood or 2 x 4, punch a neat line all the way around the sides and top of the leather. Try to keep it 1/8th to 1/4 inch inside the edge so that it won't pull through. Practice on a scrap you are not using until you get the feel of the punch--also, you can always ask for a bit of advice at the leather shop if you have questions.
- Lay the leather over the fabric, and load a bit of lace into the lace needle. It does not go through an eye, rather it screws down into threads inside the needle to allow it to pull through cleanly. You want a nice width of lace that is narrow enough to go through the holes you have punched, but wide enough to be strong. The purchase of a lace cutter (usually around $10) is well worth the money, as you can cut amazing amounts of lace from scraps that you or snyone else would ordinarily throw away. That extra lace is great for projects, or even shoelaces!
- Start lacing the leather to the fabric by just whipstiching the edges. Keep the lace straight as you go to make a neat edge.
- Once the fabric and the leather are together, lay your stick over the top of the leather and arrange to suit your taste.
- Then take a pencil or something that won't particularly show up later, and mark areas you can punch a few holes to hold the stick on. Remove the stick and punch, then replace the stick and lace the stick into place.
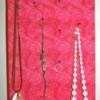
- I then tie a piece of lace from end to end on the stick to hang the thing from.
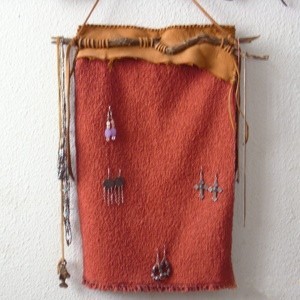
- Hang on wall and have a look, adjust anything as necessary. This project will hold many pairs of earrings, makes a great gift, and I have made and sold many of them over the years. There are so many suitable, beautiful custom upholstery fabrics out there now you can find one for any decor!
Source: My own need years ago to organize my earrings
By Gina Johnston from The Frozen North
Add your voice! Click below to comment. ThriftyFun is powered by your wisdom!

October 4, 20110 found this helpful
I love this idea. It is very clever and beautiful. Thank you
Add your voice! Click below to comment. ThriftyFun is powered by your wisdom!