Home |  Index |  Submit Request |  Share Photos |  Share Tips |  Active Topics |  New Feedback  |  Contact Us  |  Search
 User Login:  Username:    Password:      Forgot It?  | Register

 Popular Topics
 - Beauty
 - Budget and Finance
 - Christmas *
 - Cleaning
 - Consumer Advice
 - Craft Projects
 - Craft Tips
 - Food Tips
 - Garage Sales
 - Gardening
 - Gifts
 - Green Living
 - Home Improvement
 - Organizing
 - Parenting
 - Parties
 - Pest Control
 - Pets
 - Product Reviews
 - Recipes
 - Repair
 - Thanksgiving
 - Weddings for Less

More Topics

Google Search:

Web thriftyfun.com

About:
RSS Feed
About Us
Media
Advertising
Contact Us
Privacy Statement
Disclaimer

Mini Pumpkin Flashlight Lantern

1x1
Date: 10/30/2006 Topics: Craft Projects > Halloween | Halloween > Crafts | Photos > Holiday > Halloween  
1x1
1x1
Post Feedback! | Email Friend | Print | Get Responses | Bookmark | del.icio.us | Link | Rate: Thumbs Up Thumbs Down
Mini Pumpkin Flashlight

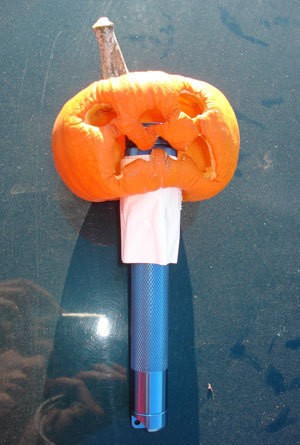
Perfect for Tricker or Treating in the dark with young ones and a fantastic craft for the family to make. A illuminated that glows with its grinning face.

Materials needed:

  • mini flashlight
  • mini pumpkin
  • carving knife
  • Tape
  • Elmers glue
  • 1 inch wire

Approximate expense: $3.00 if you already have the knife and flashlight.

Instructions:

1. Hollow out the mini pumpkin like you would a big one by cutting out the top and scraping the insides out.

2. Cut in a jack o' lantern face.

3. Cut a hole in the bottom.

4. Now wrap the tape around the flashlight just under the light if you turn it on up at the top by the lense tape right under it. Wrap enough tape on so the flash light fits into the pumpkin snuggly.

5. Put the flashlight in and glue along the rim of the pumpkin inside and out so it attaches the pumpkin to the tape. the tape not only allows the pumpkin to fit on your flashlight but makes it so you can save the condition of your flashlight for later use.

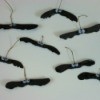
6. Now poke two holes one on the pumpkin shell and one on the lid with the stem.

7. Insert the wire through the holes and connecting the two ends together so the lid won't fall off.

8. Wait until the glue drys and then you're done. Turn on your flashlight and watch your lantern glow.

By Gloria from Bryson Hesperia, CA

Jump to Feedback | Post feedback
Related Links:
Previous: Making 40 Gallons of Tea ThriftyFun Next: Gibrien Sullivan (Toy Poodle)
1x1
 Feedback
1x1
1x1
1x1
1x1
 Sponsors
1x1
1x1

No Feedback Yet

Be the first to post feedback! Click here to post feedback.

1x1

Post Feedback:
Login using the form on the top of the page to post feedback if you have registered with ThriftyFun. If you have not yet registered, click here. It's FREE!. If you are not registered you can post feedback as a guest below. Please don't use your email address for your name because spam robots can dredge it from our site. Please do not post your feedback more than ONCE. We need to approve all guest feedback and it may take from minutes to hours for that to happen.
(1x1 graphic )
Your Name

Subject

Feedback

text tool text tool text tool text tool

Image Upload: Add an image to your post! Click the "Browse" button below and select an image from your hard drive. Please only select gifs or jpegs. If you have any problems, just email the image to images@thriftyfun.com


If you want to post your email address for responses from readers, obscure it in some way like put spaces between the name and @ sign and service address with (remove spaces) behind it or name (at) server (dot) com . This is for your protection from those creepy Robots.

(1x1 graphic )

© 1997-2008ThriftyFun.com - Design by Cumuli Design
Disclaimer: ThriftyFun.com cannot accept any responsibility for any injury or damage that you may cause to yourself, others, or property when following any advice given on this site. Read the full disclaimer. If you find any information on ThriftyFun.com or in our newsletters that is either erroneous and/or potentially harmful to others, please Contact Us, immediately.