ThriftyFun Logo
Home   Find   Ask   Share   Answer   Join   Index   Login  
 
 User Login:  Username:    Password:      Forgot It?  | Join ThriftyFun!

 - Beauty
 - Budget and Finance
 - Cleaning
 - Consumer Advice
 - Craft Projects
 - Craft Tips
 - Food Tips
 - Garage Sales
 - Gardening
 - Gifts
 - Green Living
 - Home Improvement
 - Organizing
 - Parenting
 - Parties
 - Pest Control
 - Pets
 - Product Reviews
 - Recipes
 - Repair
 - Weddings for Less

RSS Feed
About Us
Media
Advertising
Contact Us
Privacy Statement
Disclaimer

Craft Project: Remote Control Tote

1x1
Date: 05/09/2009 Topics: Craft Projects > Home Decor | Organizing > Miscellaneous | Photos > Crafts  
1x1
Post Feedback | Get Responses | Bookmark | Link | Print | Print (With Feedback) | Rate: Thumbs Up Thumbs Down | Bookmark and Share
Craft Project: Remote Control Tote
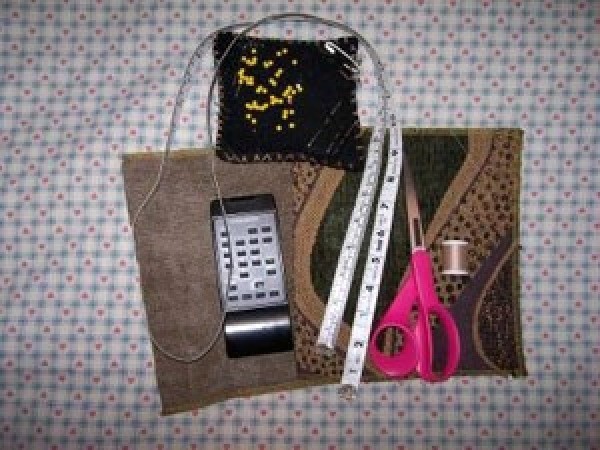
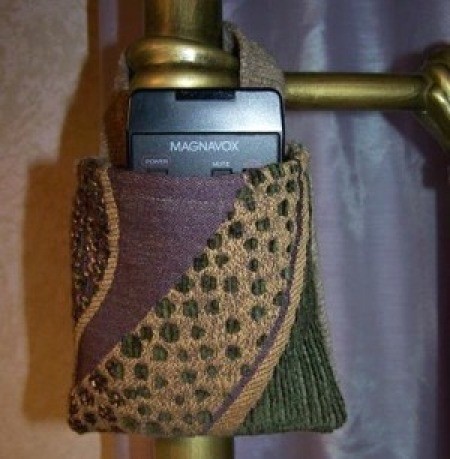
Handy tote to hang on the bedpost or doorknob so you know where to find your remote. I made one for my oldest grand daughter and now the little one wants one too.

Approximate Time: 1/2 hour or less

Supplies:

  • Remote for size
  • Scissors
  • Tape Measure
  • Sewing machine
  • Thread
  • Fabric
  • Pins

Instructions:

  1. First thing you do is gather all your supplies. (Picture 1)

  2. Measure how big it needs to be and cut 2 pieces of fabric the same size (front and back). Be sure to have it an inch or so bigger on both sides. For the length add about 2 inches.

  3. Put fabric right sides together and stitch around 3 sides using 1/4" seam allowance.

  4. Cut a piece of fabric about 2 inches wide and 10 inches long. Fold sides in and sew down the center. This is the handle.

  5. Fold about 1 to 1 1/2 inches down at the top and pin around. Position the ends of the handle in the back of the tote about 1 inch from the sides and pin in place. Sew around the top and as you are sewing sew the handles on. I always back stitch the handles for extra strength. (Picture 2)

  6. Turn right side out and use the point of the scissors to push the corners out.

  7. Now place your remote inside and hang on your bedpost or doorknob. Always put the remote back in it's tote when done watching tv in your room and you'll never loose it. (Picture 3)

  8. You can make them any size and any color. (Picture 4)

By Little Suzy from Millbury, OH

(1x1 graphic )
Previous: Recipe for Dollar Rolls ThriftyFun Next: Inexpensive Feltable Wool
(1x1 graphic )
1x1
1x1
 Feedback
1x1
1x1
1x1

By penny squeeker (7) Profile Contact
This is so clever! My top pet peeve is losing that remote control in the covers! I don't have the sewing talents that this gal has, so I made mine out of an old purse and hung it from my Victorian bed with a fancy lacy bow.
Thanks for sharing your great idea, I think this should be a top idea for gifts and showers! penny squeeker

RE: Craft Project: Remote Control Tote

Posted on 05/12/2009 | Report Spam or Abuse

1x1
1x1
 Post Feedback:
1x1
1x1
1x1

Login using the form on the top of the page to post feedback (if you are a registered user). If you have not yet registered, click here to do so. It's FREE!.

1x1
(1x1 graphic )

© 1997-2009 ThriftyFun.com - Design by Cumuli Design
Disclaimer: ThriftyFun.com cannot accept any responsibility for any injury or damage that you may cause to yourself, others, or property when following any advice given on this site. Read the full disclaimer. If you find any information on ThriftyFun.com or in our newsletters that is either erroneous and/or potentially harmful to others, please Contact Us, immediately.