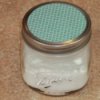
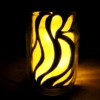
Create decorative soap dispensers by using mason jars and recycled pump dispensers from inexpensive store bought liquid hand soap plastic dispensers. Add themed fabric circles and ribbon to create a very pretty dispenser for liquid hand soap or lotions. Any glass jar or plastic ones for kids bathrooms work well and metal lids work best.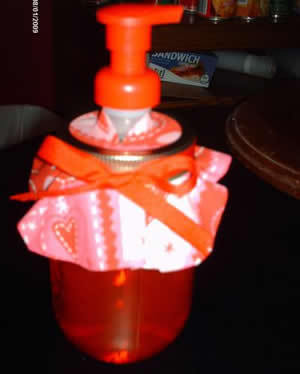
Approximate Time: 20 minutes or less
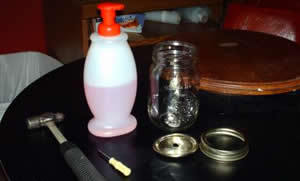
Save the liquid pump dispensers from the plastic containers you buy for liquid hand soap (sold at Wal-Mart or Dollar Tree for $1). Most come in lots of colors to match your theme. Take your jar's metal lid (here I have the seal and ring type lid but the one type screw on metal lid works the same way). In the center of the metal lid, punch a hole through the lid using a hammer and a nail. Then take your liquid soap dispenser pump and pull apart the tubing from it under side and push your upper larger part of your dispenser through the hole you just punched into the metal lid, making sure it fits snug (you may need to get your hole bigger as needed).
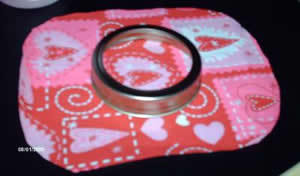
After you have made sure that is correct, take any theme fabric you like (here I used a pretty valentine cotton print). Lay your lid onto the fabric and cut out a circle fabric that is 2-3 inches wider than your lid. Then in the circle's center, cut an X slit so you can slip the fabric circle over the pump dispenser. If you were using the seal and screw lid as I did here, you would first put your seal lid on (this is the part I put my hole in for my pump dispenser) then you would put your fabric circle over it then screw on the other metal lid ring, which will automatically tightened up your fabric circle underneath.
Those dispenser tops come in many colors when you buy those for $1 at Wal-Mart or Dollar Tree so if you have a certain color or theme, you would like just try to pick your color the next time you buy those plastic disposable ones. You could do green with using St Patrick Day fabric circles as covers, any holiday theme, or sports themes. The plastic jars work best for kid's bathrooms for safety. And these make great gifts. After the Valentine's holiday has gone, I will replace my fabric circle on this one pictured here with a pink rose fabric, which is what my bathroom theme is.
By Julie from Tenn
Add your voice! Click below to comment. ThriftyFun is powered by your wisdom!
This sounds like a fantastic idea but I can't see the pictures.
Smucker's jelly and jam jars already have a gingham checked lid.... I'm gong to try this with one of them.
Heavens to Betsy! Another idea just popped into my head. Salad dressing bottles usually have a little cap inside with a hole that looks very much the same size as the tube on the soap bottle. They are plastic and once the paper label is scrubbed off most have a design of some sort worked into the glass or plastic. Another thing you might want to consider... Many moons ago when I was selling Avon I sold a lot of lotions with pumps in the most gorgeous bottles ever. perfect for hand soap if you can find them.
These are so cute and easy to make. Instead if a nail, I used a screwdriver (Phillips head) to puncture the hole. It was easier and the hole was bigger.
Thanks for this great idea.
Is the pump suppose to be loose on top? Is there a way to fix the pump to the bottom of the lid since you cannot screw the pump top on?
Thanks
Add your voice! Click below to comment. ThriftyFun is powered by your wisdom!