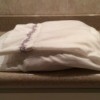
I place all of sheets together in one of the pillowcases, so the set is together and easy to grab. I store the clean sheets in the closet of the room they are going to be used in. So when I strip the bed, I just take a couple steps to grab the clean sheets. In the master bedroom I have a wicker chest that I store the sheets in, with a clove wrapped in a paper towel and stuck between each set.
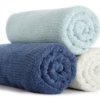
For the towels that I store in the linen closet, I fold them in a way that they fit nicely on the shelf. One section of shelf is left open, so the towels are rotated as we use them. The ones just washed go in the empty space.
By Lori
Add your voice! Click below to comment. ThriftyFun is powered by your wisdom!