By Doggy
Add your voice! Click below to comment. ThriftyFun is powered by your wisdom!
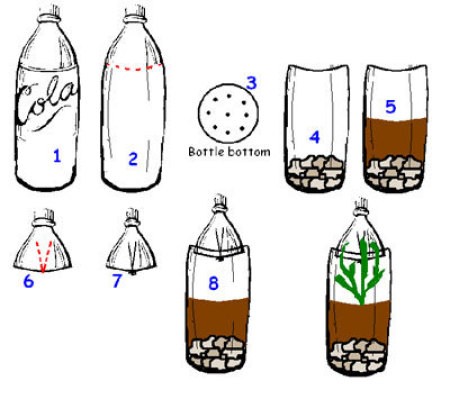
You didnt put in to cut the top of the bottle, but I am going to assume from the rest of the directions that you do. I love this idea. Have you done it with herbs. I really want to grow some herbs and I live on the fifth floor of an apt building and so I dont have a yard.
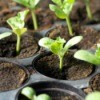
Right now, I'm starting coriander (the shoots just poked up today lol). I use it as a starter, and to root garden cuttings, but I imagine that you can grow just about anything that doesn't need to develop an extensive root system.
Sorry about omitting the cutting of the top portion of the bottle. I didn't notice the omission 'till it was too late. Yes, absolutely, cut the top portion of the bottle, leaving enough of the straight side to cut the 'V' and tuck into the bottom (assuming you want the top on).
Almost any container can hold a window garden, especially the deep plastic ones that meat comes in. (Wash thoroughly).
what a great tip I will try this with my mom who
was the best gardener she could revive plants and flowers that I nearly killed. She has alzhiemer's but
lots of good days and projects are fun for both of us.
Also this would be great to take to some Veterans at
the local VA Hosp to cheer up a room.
Thank you for the ideas...
Love this general idea! Having read something similar a few years back, I've evolved a variation on it that works pretty well:
- My cut across the bottle is made about 2/3 down from the top.
- I don't punch holes in the bottle's bottom, because I don't need drainage
for reasons noted below.
- Take empty toilet paper rolls, cut them into halves or even thirds to make
short tubes.
- Fit (usually) 4-5 tubes into each bottle's bottom, & stuff about 1/2 a tissue
into each tube's bottom.
- Fill each tube loosely with your choice of potting soil, tamping down
somewhat without making each "vessel" too dense. Water generously into
each bottle, knowing you can always pour out any excess. Let sit.
- When you're ready for the next step, place a few seeds on top of the soil in
each tube. Sprinkle a thin layer of soil on top (I pre-mix this soil with some
baking flour in some kitchen shaker device, so that I can be sure I've
covered all the seeds. Spray wet.
- Cover the bottom of each bottle w/ each top, as Doggy describes, place in a
- If there's no condensation, I'll often spray some water right through the top
open end where the cap would ordinarily go. Regardless, I use instinct to
spray every so often.
- As the seedlings begin to grow, I'll merely turn the bottles a little so that
the little guys start strengthening by rotating their directions towards the
sun.
- When the time approaches for transplants into the garden, about a week
before, I remove the bottle tops to allow air to circulate. Last year, I tried
using a small tabletop fan to increase the airflow. Just trying to avoid
having the plantlings become too leggy, again through strengthening them.
- My least favorite transition is hardening off the plants. Since all I'm ever
doing is misting (not watering) the plantlings, I haven't needed those
drainage holes in each bottom. This way I haven't had to use water catchers
of any kind underneath them. Anyway, I'll do my best each day to move the
entire lot outside for a while, so long as there's no rain. Remember, no
drainage holes means rain will flood your plants.
You likely caught the point of all this variation, if I've been clear. When your garden is ready to take the transplants, just make small loose holes in the ground for each tube. The plants' roots in each will probably have come through the tissue piece in the bottom. Plunk the whole tube in the ground, & lightly tamp in. If I have more than one plantling per tube, most times I'll separate them.
The tubes, in my experience, are already likely to be falling apart, but that's the whole reason for my variations: tubes & tissues will add compost to the plant. Meantimes, hopefully, the shock of transplanting from bottle to earth is minimized through less handling of the roots & delicate stems.
Just to add: I have 4 indoor-only cats, & having such mini greenhouses is my way of lessening their curious interactions w/ the new growths.
Doggy, your illustrations are superb. Thanks so much.
Nica
Add your voice! Click below to comment. ThriftyFun is powered by your wisdom!