Home |  Index |  Submit Request |  Share Photos |  Share Tips |  Active Topics |  New Feedback  |  Contact Us  |  Search
 User Login:  Username:    Password:      Forgot It?  | Join ThriftyFun!

 Popular Topics
 - Beauty
 - Budget and Finance
 - Christmas *
 - Cleaning
 - Consumer Advice
 - Craft Projects
 - Craft Tips
 - Food Tips
 - Garage Sales
 - Gardening
 - Gifts
 - Green Living
 - Home Improvement
 - Organizing
 - Parenting
 - Parties
 - Pest Control
 - Pets
 - Product Reviews
 - Recipes
 - Repair
 - Thanksgiving
 - Weddings for Less

More Topics

Google Search:

Web thriftyfun.com

About:
RSS Feed
About Us
Media
Advertising
Contact Us
Privacy Statement
Disclaimer

Easy Earrings from Vintage Buttons

By Jess Hampton
1x1
Date: 06/19/2005 Topics: Craft Projects > Recycled | Photos > Crafts  
1x1
1x1
Post Feedback! | Email Friend | Print | Get Responses | Bookmark | del.icio.us | Link | Rate: Thumbs Up Thumbs Down
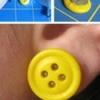
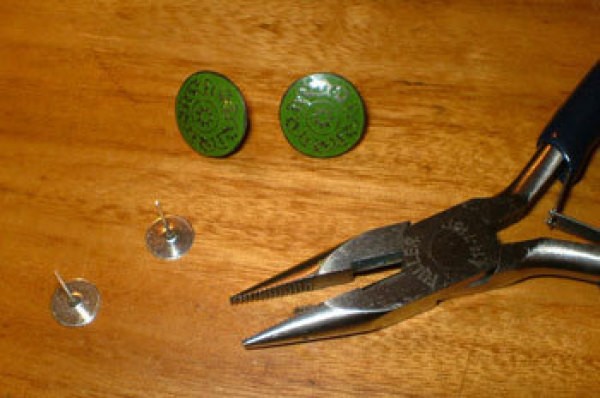
Do you have any beautiful, old buttons in your collection that either don't number enough for the front of a shirt, or just don't seem to match any fabric you have? You can turn them into unique earrings quite easily.

What you'll need:

  • Two buttons, preferably flat-front (not the kind w/two or four holes)
  • Craft glue
  • Needle-nosed pliers
  • Polymer clay or air-hardening clay
  • 2 earring posts & backings OR the posts and backings from a pair of earrings you're bored of

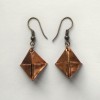
This is so easy and the end result is stunning! First, what you'll need to do is clip the back loop off of your buttons with needle-nosed pliers. Be careful to clip as close to the button's surface as possible.

You'll probably be left with two sharp nubs on the back of each button that you just can't get close enough to clip off. To glue the earring post onto the back of the button, you'll need a flat surface. The best way to solve this issue is to take a small amount of polymer clay (if you're using metal buttons) or air-hardening clay (if you're using plastic buttons, or buttons with plastic features) and smooth it onto the back of the button. Try and make as thin of a layer as possible, just enough to cover the sharp nubs. If you used polymer clay, bake the two buttons, clay side up, for 15 minutes at 350.

When the clay has cooled/dried, put a very small amount of glue on the back of each button and press the earring posts on. Earring posts bought at bead stores have a large, flat end, so this should be easy. Wait for the glue to dry -- and the earrings are finished!

About The Author:
Jess Hampton has been an active DIY devotee since she was 15. Now, 10 years later, she uses her creations to furnish a little house in Regina, where she works as a freelance editor and lives with her husband, cat and 2 rats.
Jump to Feedback | Post feedback
Related Links:
Previous: Daily Thrifty Tips - June 18, 2005 ThriftyFun Next: Cleaning Eucalyptus Branches
1x1
 Feedback
1x1
1x1
1x1
1x1
 Sponsors
1x1
1x1

Post by camo_angels (683) | (08/07/2006)
Profile |Contact
Thanks for sharing this....I don't have the money for buying new ones (I'll be cutting my hair short and need some new "big" earrings) and I love the ability to customize with outfits!


Post by DB48 (1) | (08/06/2006)
Contact
I have been making this type of earring from buttons for many years and want to share a tip with you. I use a tool that I bought in the crafts section at Walmart that cuts the shanks off of buttons. Then I use my Dremel drill to sand down any remaining nubs, and the sanding makes for a nice flat surface. The glue also adheres better to a rough finish versus a smooth one. I really love buying unusual things to make earrings from (buttons, embellishments, flowers, ...). Does anyone know where I can buy inexpensive earring posts? I can't find 6mm and 8mm flat posts. I don't want the expensive sterling silver or 14k gold; just the cheap kind. Thanks! Debbie


Post By Dawn (Guest Post) (06/20/2005)
I bet that earring wires could be threaded through the back button hole to make dangling earring as well. Good ideas!


Post By Michele (Guest Post) (06/19/2005)
You can also take the buttons with the 'nubs' as someone called them, and put them thru a ponytail holder for lil kids. Seen this on a craft show I think.


Post by lovethosehounds (58) | (06/19/2005)
Contact
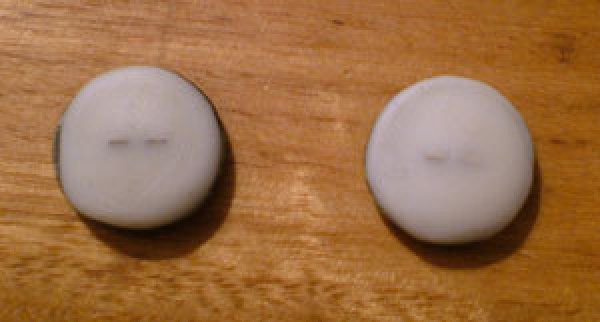
Hi - - I did this last winter with some buttons that I found at Wal-Mart. In fact, I've gone back several times and bought different buttons to make lots of different earrings. I just wanted to say that what I did to get rid of the nubs on back was to just use a nail file and file them down. It worked fine.


Post By Cherokee Council of America (Guest Post) (06/19/2005)
The earrings look great! The green color and design evoke an Indian theme and look to the project. Come and visit us online and learn more about us:
www.cherokeecouncilofamerica.com


Post by DolphinLuver77 (1) | (06/19/2005)
Contact
This is such a great idea. I enjoy crafts & sharing ideas. Thanks so much for posting this, I'm going to try making myself some earriings. Also this makes a neat gift to give. Have A Wonderful Day!
DolphinLuver77


1x1

Post Feedback:
Login using the form on the top of the page to post feedback if you have registered with ThriftyFun. If you have not yet registered, click here. It's FREE!. If you are not registered you can post feedback as a guest below. Please don't use your email address for your name because spam robots can dredge it from our site. Please do not post your feedback more than ONCE. We need to approve all guest feedback and it may take from minutes to hours for that to happen.
(1x1 graphic )
Your Name

Subject

Feedback

text tool text tool text tool text tool

Image Upload: Add an image to your post! Click the "Browse" button below and select an image from your hard drive. Please only select gifs or jpegs. If you have any problems, just email the image to images@thriftyfun.com


If you want to post your email address for responses from readers, obscure it in some way like put spaces between the name and @ sign and service address with (remove spaces) behind it or name (at) server (dot) com . This is for your protection from those creepy Robots.

(1x1 graphic )

© 1997-2008ThriftyFun.com - Design by Cumuli Design
Disclaimer: ThriftyFun.com cannot accept any responsibility for any injury or damage that you may cause to yourself, others, or property when following any advice given on this site. Read the full disclaimer. If you find any information on ThriftyFun.com or in our newsletters that is either erroneous and/or potentially harmful to others, please Contact Us, immediately.