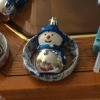
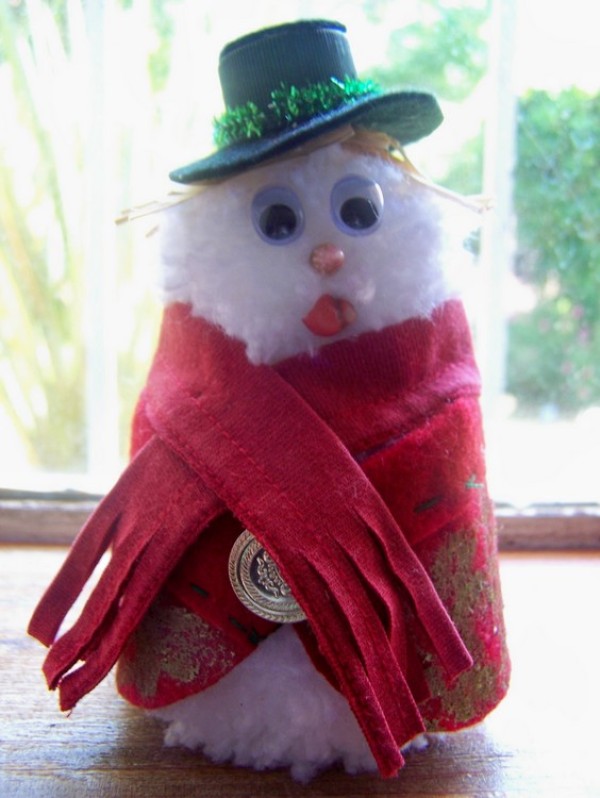
Make Jimmy, the swagger snowman, for your window sill and spread some Christmas cheer this festive season!
Approximate Time: 45 minutes
Supplies:
- piece of firm cardboard
- white wool
- felt in the following two colors: black and red
- one pair of wiggle eyes
- small brown trumpet shell for the nose
- small red shell for the mouth
- a few strands of raffia for the hair
- one small black bottle cap
- one green glitter pipe cleaner
- one golden button
- one old red T-shirt
- lumierre-colored acrylic paint
- thin paintbrush
- pair of standard scissors
- pencil
- pair of compasses
- needle and green thread
- quick-drying glue
- a sheet of newspaper
Instructions:
- From the cardboard, cut two matching circles sized 2.6 inches and draw a 1.3 inch circle in the middle of both of them. Cut the inner circles out and use these to make the bigger pompom for the snowman's body.
How to make pom poms.
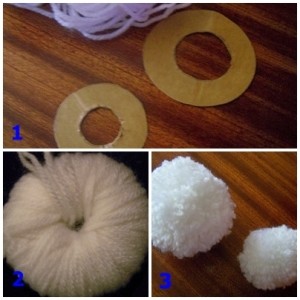
- From the cardboard, cut two matching circles sized 2 inches and draw a 0.7 inch circle in the middle of both of them. Cut the inner circles out and use these to make the smaller pompom for the snowman's head.
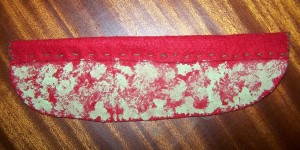
- Cut out the pattern for the cloak from the pattern sheet and trace it onto the red felt.
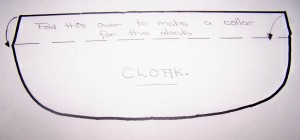
- Cut out the cloak. At the top, fold it over to make a collar. Use the needle and green thread and sew the collar in place with a running stitch.

- Use the paintbrush and green paint to add some detail to the cloak. Remove excess paint by dabbing it onto a sheet of newspaper before starting to paint. Lightly dab the brush in a circular motion all over the cloak, but do not add any paint to the cloak's collar.
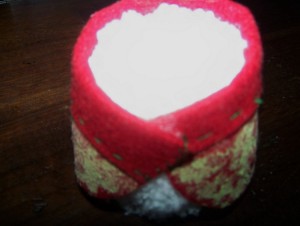
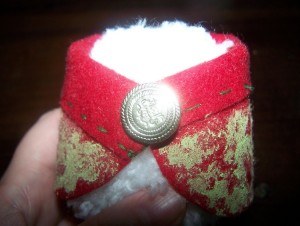
- Spread glue to the inside of the cloak and put it over the snowman's body.
- Glue the button in place where the two ends of the cloak meet at the front.
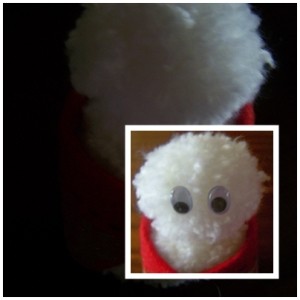
- Glue the snowman's head onto its body and add the wiggle eyes.
- Cut the raffia into small pieces and glue the hair in place.
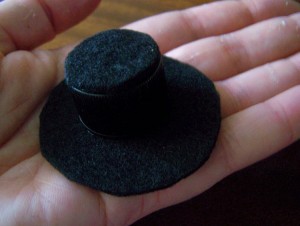
- Spread glue to the top of the bottle cap and cover it with black felt. Cut off any protruding edges.
- From the black felt, cut a circle that is bigger than the bottle cap and glue this to the bottom of the cap to make a rim for the hat.
- Glue the hat in position.
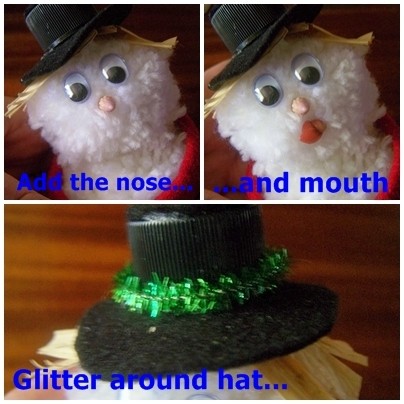
- Add the nose and the mouth.
- Cut a piece from the green glitter pipe cleaner that can be glued around the hat.
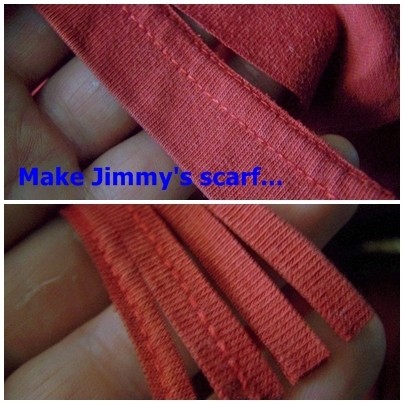
- From the old T-shirt, cut a section of the seam to make a scarf. At both ends of the strip cut from the T-shirt's seam, make small incisions, so that it will look as if the scarf has fringes.
- Wrap the scarf around the snowman's neck and voila! Jimmy is ready to swagger!
By Benetta from Pretoria, Gauteng