It's getting to be time for dyeing Easter eggs with the kids. Here are some techniques for getting some unique looking eggs for the baskets. Be sure to post your favorite tips here too.
Note: Make sure all of the eggs are hard boiled before you start dyeing them.
You can cover the eggs with rubber bands of various sizes. Dye the eggs, let them dry, move the rubber bands and dye again with another color. You can get striped eggs this way.
Melt candle wax or paraffin in a double boiler. (This requires strict adult supervision with children) Drizzle the wax onto the egg in a pattern, then once it is set, dye the eggs. Do not leave them in the dye too long or the wax will melt. You can repeat this process by scraping off the old wax and putting new wax on in different places.
Using a white or black crayon, draw your own designs on each egg. Your designs can be simple or elaborate. Put the names of each child on some of the eggs. Quite often, clear wax crayons are included in with dye kits. Then dye the eggs in bright colors.
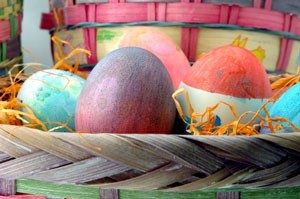
To make your eggs look like marble, add a touch of vegetable oil to the dye. The dye will only coat part of the egg, leaving nice marbleized streaks.
It is best to use any of these hot. In the case of the onion skins, boil them for at least 1 hour before using.
Some of these dyes may not be good for eating the eggs afterwards, like the onion dyes.
Add your voice! Click below to comment. ThriftyFun is powered by your wisdom!
Add your voice! Click below to comment. ThriftyFun is powered by your wisdom!