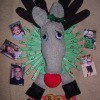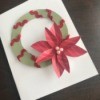
Here is a "deer" of a wreath that will bring you years of enjoyment. It's quite a simple craft and kids can join in on the making of it. An adult can make the deer while the kids paint and help assemble the wreath.
This wreath would make a wonderful gift for Grandparents who all love photos of their grandchildren! It can also be made to use at other times of the year by simply painting and decorating in different colors. For spring, add a flower to the antlers and paint the wreath using pastel colors. Or add a pair of sunglasses to the deer for summer, using a butterfly on his antlers.
Approximate Time: time will vary
Supplies:
- pair of men's adult gray tube socks with red cuff
- pair of adult jersey gloves
- stuffing
- pair of 1" wiggle eyes
- needle and thread
- sturdy cardboard
- paint- your choice of colors
- clothespins- 18
- glue
- wire
Instructions:
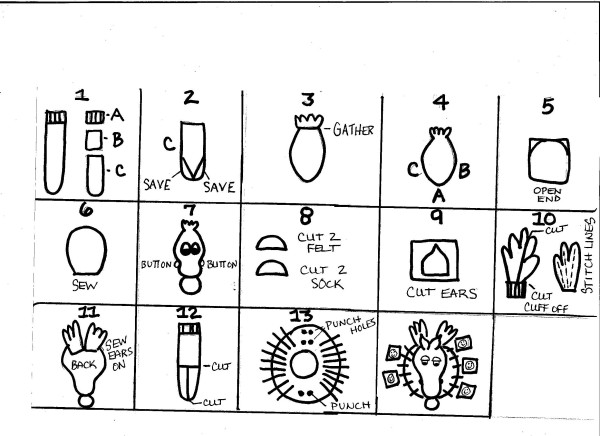
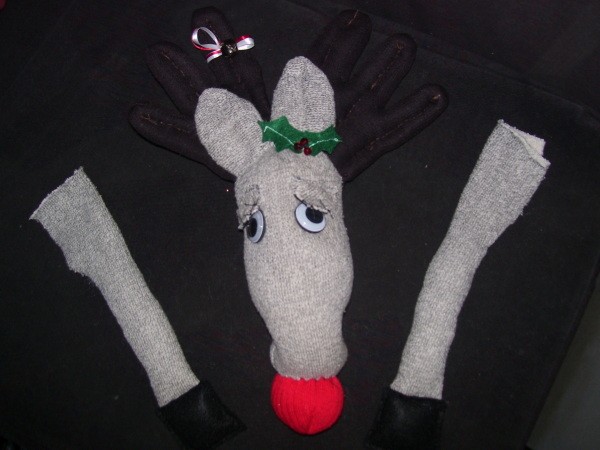
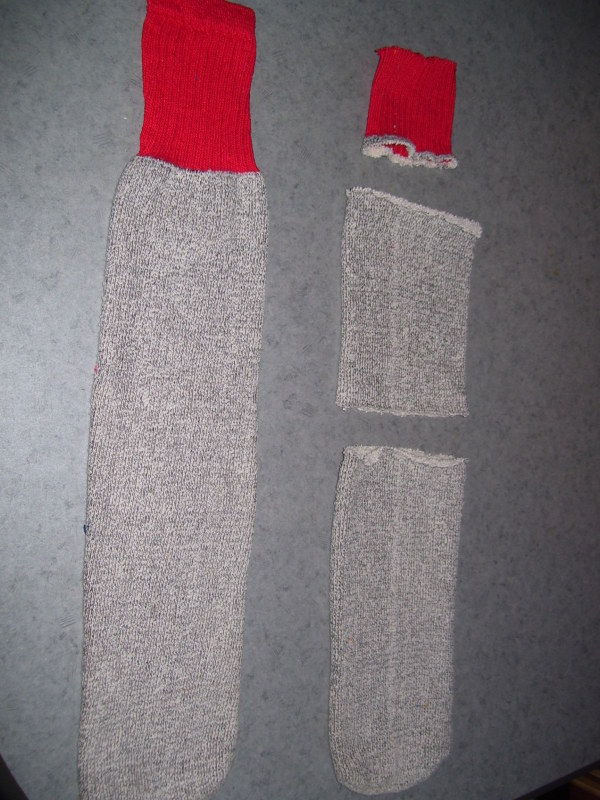
- For the head, take one sock and cut it into thirds, making the toe piece the longest. This will become the head (see diagram #1). Take bottom piece with toe (part C) and turn inside out. Measure up 2" from toe and make a dot with a marker. Do this on both sides. Line up ruler from center of toe to each dot and draw a line to form a "V" (see diagram #2). Sew these lines closed. Cut off excess close to stitch lines and save pieces for eyelids. Turn right side out and stuff firmly. Gather top and sew closed. Cut off excess on top of gather (see diagram #3).
- Using sturdy thread, knot ends. Enter at point "A" and come out at point "B". Go back in "B" and come out at point "C". Go back in "C" and come out at "A" (see diagram #4). Repeat, pulling thread as you go to make indentations.
- For the nose, take the cuff (part A) and turn inside out. Use marker and draw lines to round off corners on top edge. Pin closed and sew, following lines (see diagram #5). Stuff firmly. Gather and sew end closed (see diagram #6). Place gathered end into where you made indentation "A". Sew completely around nose to attach it to the head.
- For nostrils, sew a button into each indentation you made on the sides ("B" and "C"). Glue on google eyes.
- For eyelids, use a piece of paper and make a template.They are just circles cut in half and you want them slightly wider than the eyes. Using this template, cut 2 from black felt and 2 from the sock pieces you saved from step 2. Pin felt eye lid to the sock eye lid and stitch together. Place eyelid on eye with sock piece showing and stitch to head (See diagram #8).
- Make eyelashes with black thread along edge of lid and knot each one. Cut each to desired length.
- For the ears, take the middle section (part B) and cut one side open. Cut 4 ear shapes (see diagram #9). Put right sides together and sew to make 2 ears. Leave bottom edge open on both. Turn right side out and stuff lightly. Sew edge closed and stitch line up the middle of each. Sew to top of head in the center.

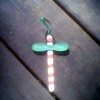
- For antlers, turn gloves inside out. Cut off cuffs. Pin between pointer finger and middle finger. Cut off thumb and pointer finger (see diagram #10). Sew edges closed, leaving bottoms open. Stuff. Sew bottom edge closed. Sew line up center of each finger stopping about 1" from top of each. Sew to back of head (See diagram #11).
- For legs, take the other sock and turn inside out. Measure up 5" from toe. Cut this part off. Draw a line down the center and cut. Sew long side on each closed, leaving shorter edges open. Cut 4" squares (4 of them) from black felt for hooves. Place one end of each leg between 2 black squares and sew sides and bottom. Fill hoof lightly with stuffing and stitch closed along top edges of felt hooves. Place a small amount of stuffing into each leg right above each hoof and leave the rest of the leg empty. You need them to lay flat behind the wreath (See diagram #12).
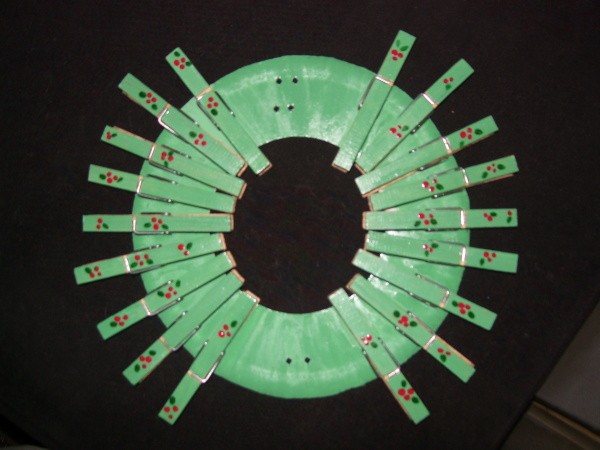
- For the wreath, cut a large circle from very sturdy cardboard. I made mine by gluing 2 sturdy paper plates (not the thin white kind) together. My wreath measures 8" across with a 4" center opening.
- Paint wreath your desired color. When dry, lay deer on wreath. Make a small dot on either side of head at the top and on either side of snout at the bottom. Remove deer and punch holes. Start by making 2 at the top for the hanger. Now punch 2 more holes below that. These will be used to attach the head to the wreath. Also punch 2 at the bottom, between your dots. (See diagram #13). Take a piece of wire and slide into top 2 holes. Twist into loop behind cardboard for hanger.
- Lay wreath down and start laying on clothespins. I used 9 on each side. Do not lay any in between your dots at top and bottom. This is the area that will allow the deer to lay flat on the wreath. Adjust your clothespins until you have an idea of how many you will need. Paint the tops in desired color. I added dots of red for holly berries and some green for leaves to decorate the tops of my clothespins after painting them. When clothespins are dry, arrange them on wreath. When pleased with placement, glue each one on, being sure that you have the clip end facing out. This is what will hold the photos.
- Attach deer to wreath with wire. Slide wire into one hole and then into deer, going behind some stuffing and then out the other hole. Twist tightly closed. Lay wire flat against back of wreath and cut off any excess. Lay a piece of tape over wire. Do the same for the two bottom holes.
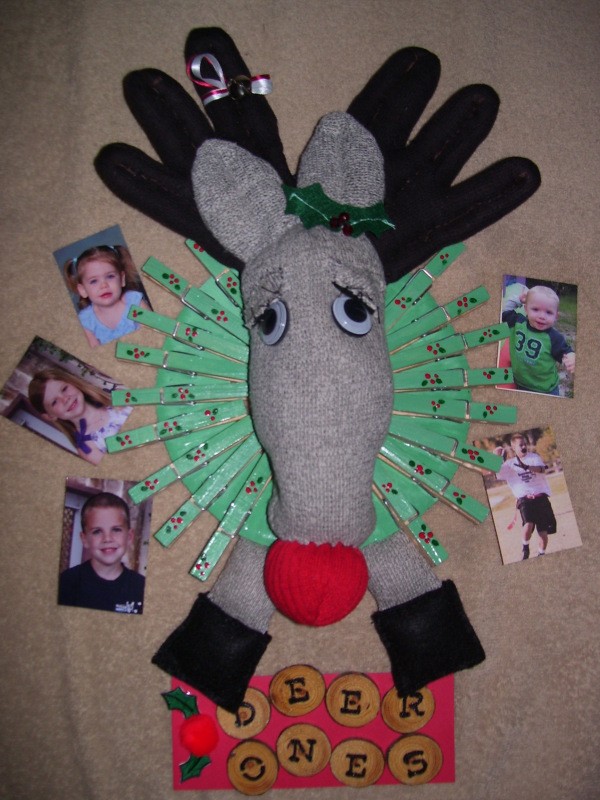
- If choosing to hang a sign with his hooves, cut a simple one from cardboard. I cut a rectangle from cardboard with tabs at the top. I punched holes in the tabs and sewed them to the back of each hoof. I covered the cardboard with cardstock. I had a supply of slices of wood cut from tree branches and painted a letter on each to spell out "DEER ONES", but you can write directly on your sign or use pre-cut letters of any sort.
- Clip photos into clothespins. Hang and ENJOY!
By Mary from Palm Coast, FL