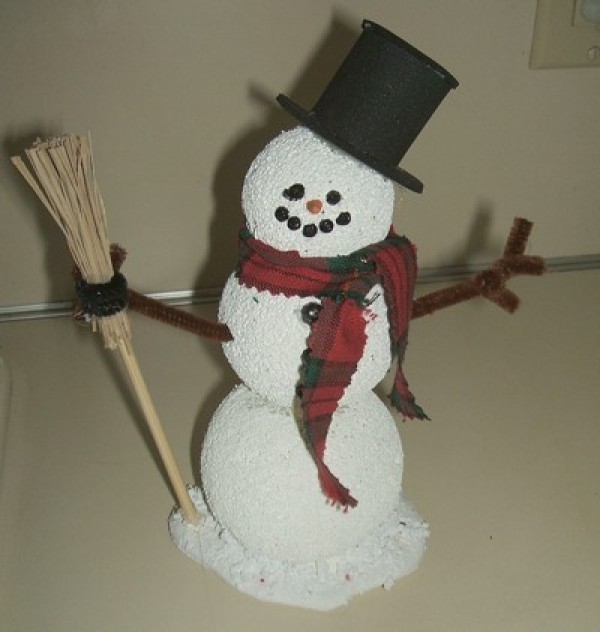
This easy-to-create snowman will add a whimsical touch to your holiday decor. In fact, you can leave him out all winter long.
Approximate Time: About 1 hour
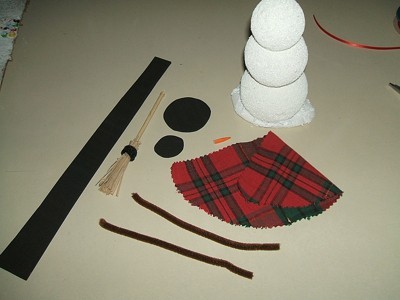
Supplies:
- Styrofoam balls (3-inch, 4-inch and 4.5-inch)
- cornstarch
- white craft glue
- Snow-Tex
- 7 black seed beads
- 3 small black beads
- 1 brown chenille stem
- black craft foam
- wooden skewer
- orange acrylic paint
- fabric scrap
- small paint brush
- ink pen or pencil
- scissors
- hot glue gun and glue sticks
- wire cutters
- serrated knife
- wax paper
Instructions:
- To create the base, mix enough cornstarch and white glue until it is the consistency of modeling clay.
- Form it into a 5 1/2 inch circle. It doesn't have to be perfectly round. Place on a piece of wax paper and allow to dry until hardened. (I let mine dry overnight.)
- In the meantime, you can begin building your snowman. Using a serrated knife, slice a small portion off of the 4 1/5 inch ball so that it will lay flat on the base once the base is dry.
- Slice a small portion off of the opposite side so that the 4 inch ball will lay flat on the 4 1/2 inch ball.
- Now, slice a small portion off of two sides of the 4 inch ball in the same manner.
- Next, only slice off one side of the smallest ball (the head) so that it lays flat on the middle portion.
- Glue the three Styrofoam balls together with the largest on the bottom and smallest on the top.
- From the pointed end of the skewer, paint about one inch of the wooden skewer orange. This will be his nose. Put aside to dry.
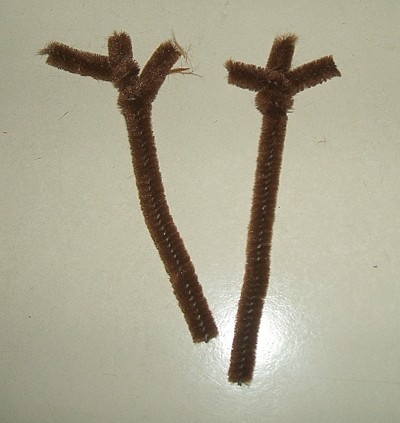
- While the skewer is drying, cut the chenille stem in half, and then cut two small pieces off of each one to form his "fingers." Wrap the ends of the 2 small pieces to each large piece to create his arms.
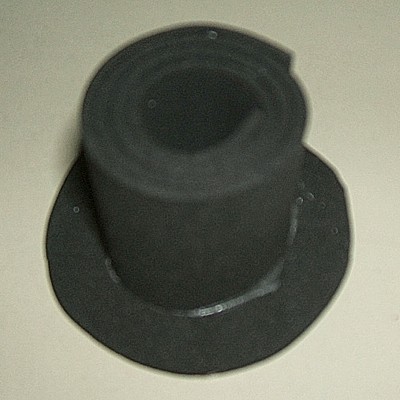
- To create the hat, cut a strip from the craft foam that measures 12 inches x 1 inch. Also, cut 2 circles from the craft foam, one that is 2 inches and one that is 1 1/4 inches. Roll up the strip of craft foam and glue the end down. Next, glue the roll to the center of the 2 inch circle, and glue the smaller circle on top. This will be the hat.
- For the scarf, cut a strip of fabric that is 12 inches x 1/2 inch.
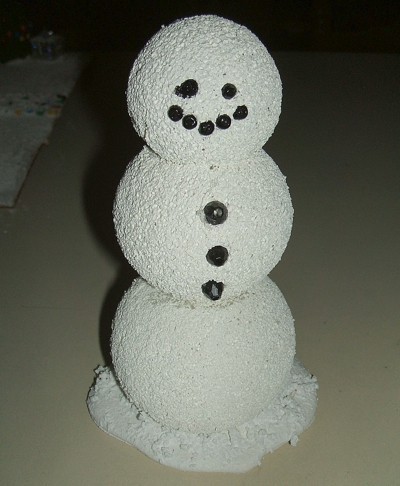
- For the eyes and mouth, press seed beads into the foam. Secure with glue, if necessary.
- Press the small black beads down the middle Styrofoam ball for buttons.

- Using wire cutters, cut the end off of the skewer and press into the head to create his nose.
- Insert the arms into each side of the middle of his body. (You may need to insert the skewer into the foam to create a hole for inserting each arm.)
- Tie scarf around his neck and glue hat on his head.
- When the base is dry, apply Snow-Tex, if desired to resemble snow.
- Glue snowman to base.
- If you wish, you can create your own broom using part of a wooden skewer, some raffia, and a chenille stem. Glue it to his hand and to the base.
By Rachel's Mom from Wilkesboro, NC