Craft Projects > Christmas > OrnamentsNovember 04, 2009

Craft Project: 3-D Paper Ornament

Approximate Time: 15 to 20 minutes

Supplies:

  • 4 inch square of paper, white or colored
  • Piece of thread for hanging
  • Scissors
  • Ruler
  • Glue gun
  • Hole Punch
  • Glitter glue if desired

Instructions:

  1. Fold the paper in half to make a triangle, then fold again.
  2. Starting from the folded edge, but parallel to the long side of the triangle, make 5 equal cuts, stopping about 1/4 inch from the opposite side. (See diagram.)
  3. Unfold the paper. Lift and curl the middle section up and around a pencil and glue the points together. Remove the pencil as soon as glue is dry.
  4. Curl the second set of points to the back and glue together, third set to the front, fourth to the back and fifth to the front, gluing each set of points in turn.
  5. Glue a loop of thread at the top for hanging.
  6. (If you want to make a star, glue six of these ornaments together at the tip.)


For the other ornaments, follow instructions below:
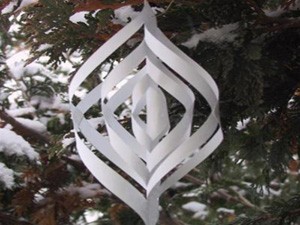
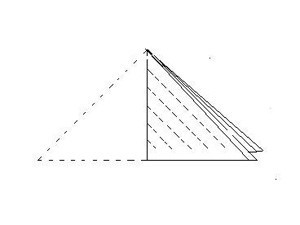
  1. Fold the paper in quarters and cut along fold lines, then fold each smaller piece in half lengthwise. Sketch a pattern such as a bell, Christmas tree or snowflake opposite the fold line. Cut out.

  2. Copy the design onto two more folded papers and cut out. Use hole punch to make designs and trim edges with glitter glue if desired.

  3. Run a very narrow bead of white glue along fold line of first cutout. Place second cutout on top. Repeat for third cutout. Press together and let dry. (Another method is to stack the cutouts and using matching thread, sew down the center using a long stitch on the machine.)

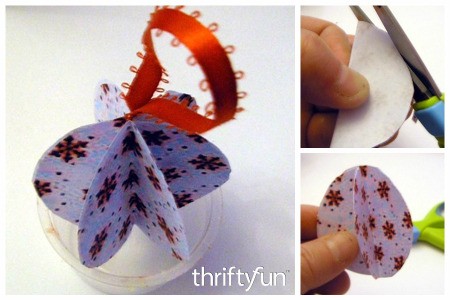
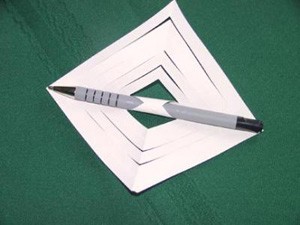
  4. Fan out sections as shown in photo. Use needle and thread to make loop for hanging.

By Preserver from Manitoba

By

Craft Project: 3-D Paper Ornament

Craft Project: 3-D Paper Ornament

Craft Project: 3-D Paper Ornament

Feedback

Read feedback for this post below.

By
11/05/2009

I have done this and it is awesome to see them hanging. The air hits them and they move around. I also used smaller paper and made mini ornaments. You can also lightly spray them and glue glitter on. Thanks for sharing your craft.

By
11/04/2009

Loved this made it as soon as I saw it.

By
11/04/2009

Awesome! Love 'em, now I'm gonna have to make some for my home and tree! My daughter would love that craft project!

Related

Post Feedback

Your thoughts are welcomed and appreciated. Enter your feedback here!

Feedback:

Image Upload:

Add an image to your post! Click the "Browse" button above and select an image from your hard drive. Please only select gifs or jpegs. If you have any problems, please contact us.


facebook like arrowLike ThriftyFun on Facebook

Browse Topics

Over 80,000 tips, recipes, questions & crafts.

Ask a Question

Submit a question to the TF community.

Subscribe to ThriftyFun Newsletters!

Email: