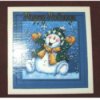
Christmas Cards Slipper
After you have crocheted around both pieces, match the middle hole at the bottom of the top (toe) piece to the middle hole on the sole piece and use this as your starting place to crochet the two pieces together. Matching the holes on both pieces as you work, crochet 2 stitches in each hole along the right side ending at the top of the toe piece. Beginning again at the middle hole at the bottom, matching holes as you work, repeat along the opposite side of the Slipper. Crochet a chain about 4 inches and thread it through the holes at the top (heel) of the slipper and tie at the back. This will be your "hanger"for the slipper. You could add some silk holly to the slipper if you like.
The instructions are also in a PDF file for which you may need Acrobat Reader to view. Download Acrobat Reader
Click Here to download the Christmas Card Slipper Instructions in PDF format.
My grandmother used to this all the time back in the 60's and 70's, she taught me how to do some of it but I havn't done any of it since the late 70's. I still have a basket and shoe (pencil holder)and a lamp shade from then. She also made Lamp Shades, different size baskets, napkin holders, guest towel holders and so on. Very nice to see that someone out there still does it.
My mother-in-law use to make these also back in the 70's. Good to recycle!
thanks - i had made these for years and then lost the pattern and was sure i would never find it, well now i have it again thanks to you. have any more ideas to use up christmas cards?
Can't get the pattern for the christmas card slippers - won't download?