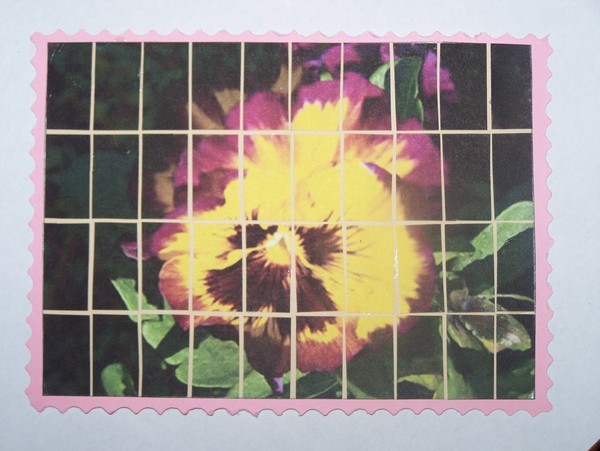
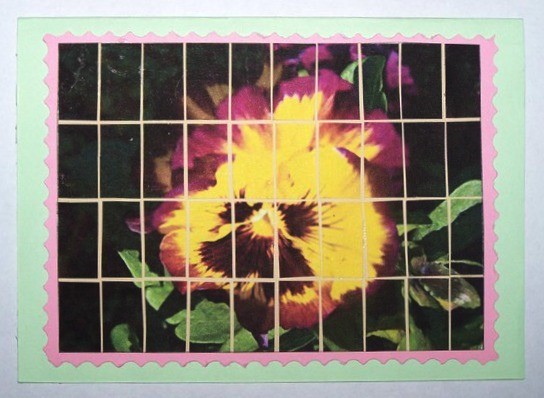
Using a photo of a flower cut into paper tiles, one can create a mock mosaic effect on a birthday card.
Approximate Time: 30 minutes
Supplies:
- one suitable photo of a flower
I used a photo of a pansy that I recently took at a local garden centre.
- 8.2 x 5.6 inches pastel green cardboard
- 5.2 x 3.6 inches pastel pink cardboard
- 5.2 x 3.6 inches flesh-colored cardboard
- pencil
- ruler
- pair of standard scissors
- pair of pattern edged scissors
- quick-drying glue
- one A4 sheet of white paper
- one pastel green envelope
Instructions:
- Fold green cardboard in half to create a card 4.1 inches x 5.6 inches ~ use the ruler to make the fold neat and smooth.
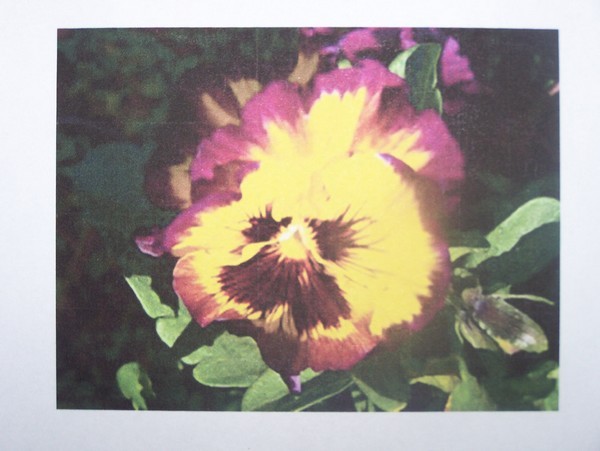
- If necessary, resize the photo of the flower on your computer and print it out.
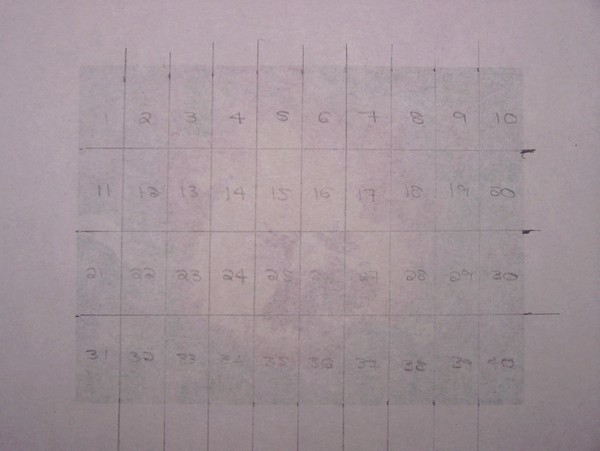
- On the backside of the printout of the flower, divide the printout into 10 equal columns and 4 equal rows. When drawing the lines, be careful not to press down too hard on the pencil ~ the pencil markings should not be visible on the front of the picture.
- Still on the backside of the printout, mark the paper tiles from 1-40 ~ this will make it easier not to get confused when gluing the tiles in position.
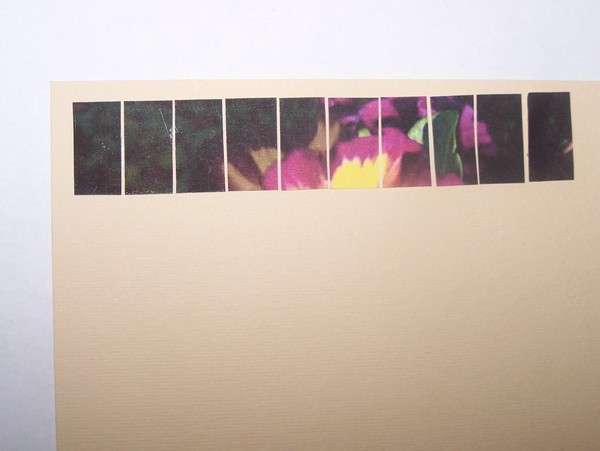
- Turn the printout around and cut out the first row of tiles, i.e. tiles 1-10.

- Start with tile 10, and glue it to the top left corner of the flesh-colored cardboard. Then, glue tile 9 to the right of tile 10, leaving a small space between the two tiles. The small line of flesh-colored cardboard between the two tiles represents the grout you would see between mosaic tiles.
- Then, glue tile 8 to the right of tile 9, again leaving a small space between the two tiles. Glue tile 7 to the right of tile 8, glue tile 6 to the right of tile 7, etc.
- Continue gluing the first row of tiles into position, each time leaving a small space between the tiles.
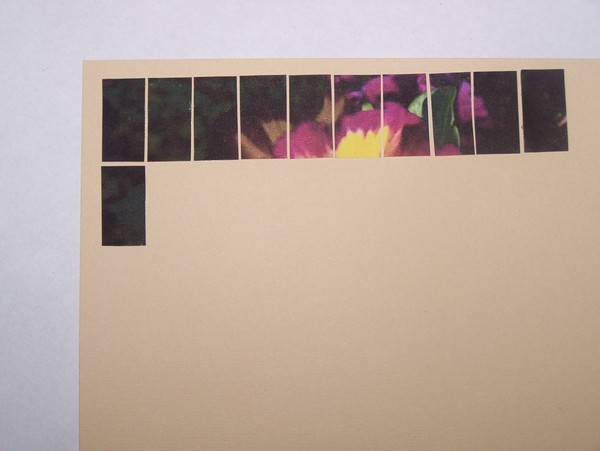
- Now cut the tiles for the second row, i.e. tiles 11-20. Glue tile 20 below tile 10, again leaving a small space between tile 10 and tile 20.
Then, glue tile 19 to the right of tile 20, again leaving a small space between the two tiles.
Glue tile 18 to the right of tile 19, tile 17 to the right of tile 18, glue tile 16 to the right of tile 17, etc.
- Glue the rest of the second row's tiles into position.
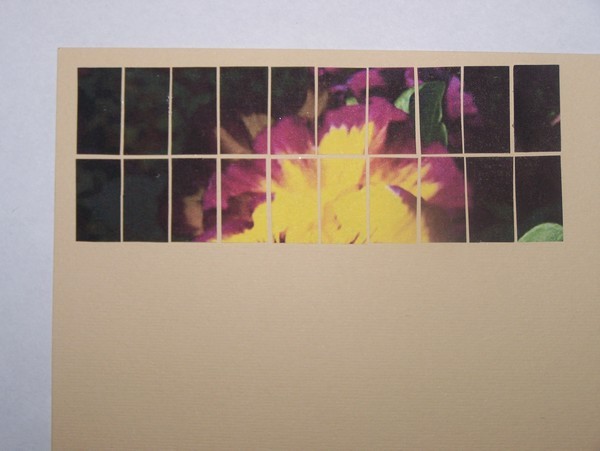
- Cut out the tiles for the third row, i.e. tiles 21-30.
- Glue tile 30 below tile 20 and glue the rest of the row into position.
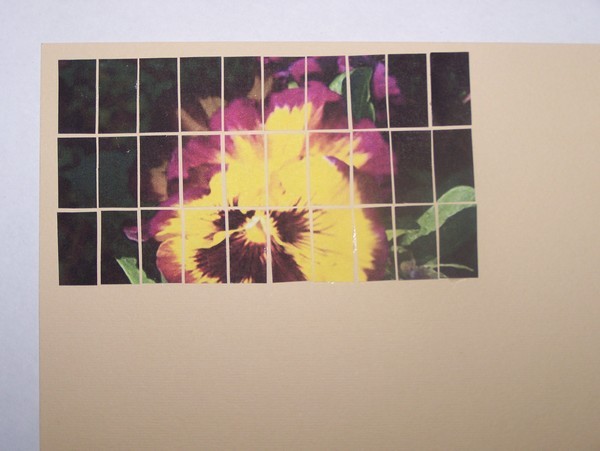
- Now cut out the tiles for the fourth row, i.e. tiles 31-40 and glue them into position.
- Neatly cut around the edge of the completed mosaic picture,
so that there will only be flesh-colored cardboard between the tiles and not around the edges of the picture.
- Cut around the edges of the pink cardboard with the pair of pattern edged scissors.
- Glue the mosaic picture to the front of the pink cardboard,
carefully ensuring that it is an equal distance from the edges.
- Glue the pink cardboard with the mosaic picture to the front of the card,
again ensuring that it is an equal distance from the edges.
- Print a message on the white paper, cut it to the correct size and paste it to the inside of the card.
By Benetta from Pretoria, Gauteng