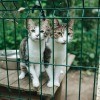
Home |  Index |  Submit Request |  Share Photos |  Share Tips |  Active Topics |  New Feedback  |  Contact Us  |  Search
 User Login:  Username:    Password:      Forgot It?  | Join ThriftyFun!

 Popular Topics
 - Beauty
 - Budget and Finance
 - Christmas *
 - Cleaning
 - Consumer Advice
 - Craft Projects
 - Craft Tips
 - Food Tips
 - Garage Sales
 - Gardening
 - Gifts
 - Green Living
 - Home Improvement
 - Organizing
 - Parenting
 - Parties
 - Pest Control
 - Pets
 - Product Reviews
 - Recipes
 - Repair
 - Thanksgiving
 - Weddings for Less

More Topics

Google Search:

Web thriftyfun.com

About:
RSS Feed
About Us
Media
Advertising
Contact Us
Privacy Statement
Disclaimer

Quick and Easy Temporary Kennel

1x1
Date: 05/14/2008 Topics: Home Improvement > Outdoor Structures | Pets > Cats  
1x1
1x1
Post Feedback! | Email Friend | Print | Get Responses | Bookmark | del.icio.us | Link | Rate: Thumbs Up Thumbs Down
Do you wish there was a safe, easy and thrifty way for your pets to enjoy the fine weather? How about an easy up and easy down small kennel? All you need are temporary fence posts, rabbit wire and zip-ties to make your own cat and critter kennel. Temporary fence posts can easily be sunk into ground that has few rocks using only your feet or a mallet. Temporary fence posts are made for construction areas to quickly, easily and cheaply put up fences.

They cost around $5 each and have places to hook wire to. You will need 4 - 6 of them depending on the size of your safety kennel. All supplies can be bought in the fencing area of Home Depot. Hardware cloth, rabbit or chicken wire can be cut with simple metal shears (I bought mine at a $1 store) or if you're going to be keeping an eye on your pet, you can use plastic hardware cloth that can be cut with scissors. The hardware cloth costs between $12 and $20 per roll depending on how large of a pet kennel you want to build. Don't forget with cats and other critters to buy enough to make a cover so they won't jump out. Simply place the fence posts in to the ground, then zip-tie the rabbit wire all around them and on top.

You can build this in under an hour and when autumn comes around, you can take it down in minutes. Everything rolls up and fits into a small space and you'll see no damage to the grass from the temp fence posts. If you want a more durable small-pet kennel, you can instead build it out of wire closet shelves. They come in 12 inch, 15 inch, and 20 inch widths. Home Depot will cut them to any length you need.

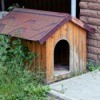
I zip-tied two 15 inch wide shelves together to make the roof of Smokey's outdoor kennel and it hooks to his cat door so he can go outside and bird watch any time he pleases. The cool thing is, if I ever take it apart, I can always use the wire shelves out in the garage! Don't forget to add an easy access door. Mine simply ties shut with a piece of nylon rope. Make sure to add a partial roof for shade and provide water. Your pet will have hours of fun especially if you provide a bird feeder close by, so your pet can watch the birds!

By Cyinda from near Seattle

Jump to Feedback | Post feedback
Related Links:
Previous: Pickled Radishes ThriftyFun Next: Tuna Chip Casserole
1x1
 Feedback
1x1
1x1
1x1
1x1
 Sponsors
1x1
1x1

No Feedback Yet

Be the first to post feedback! Click here to post feedback.

1x1

Post Feedback:
Login using the form on the top of the page to post feedback if you have registered with ThriftyFun. If you have not yet registered, click here. It's FREE!. If you are not registered you can post feedback as a guest below. Please don't use your email address for your name because spam robots can dredge it from our site. Please do not post your feedback more than ONCE. We need to approve all guest feedback and it may take from minutes to hours for that to happen.
(1x1 graphic )
Your Name

Subject

Feedback

text tool text tool text tool text tool

Image Upload: Add an image to your post! Click the "Browse" button below and select an image from your hard drive. Please only select gifs or jpegs. If you have any problems, just email the image to images@thriftyfun.com


If you want to post your email address for responses from readers, obscure it in some way like put spaces between the name and @ sign and service address with (remove spaces) behind it or name (at) server (dot) com . This is for your protection from those creepy Robots.

(1x1 graphic )

© 1997-2008 ThriftyFun.com - Design by Cumuli Design
Disclaimer: ThriftyFun.com cannot accept any responsibility for any injury or damage that you may cause to yourself, others, or property when following any advice given on this site. Read the full disclaimer. If you find any information on ThriftyFun.com or in our newsletters that is either erroneous and/or potentially harmful to others, please Contact Us, immediately.