Here are instructions for making a jig to help hold and cut bottles.
Materials:
- 5 ft. of number 2 (1 by 4) pine board (pick a good straight one)
- 8 1-5/8 or 2 inch deck screws
- wood glue
- stain
- polyurethane
- 1 wooden school ruler
Tools:
- sander
- clamp
- 1/8 drill bit
- electric drill/driver
- an electric saw of your choice
Directions
- Cut wood in following dimensions:
2 pieces, 18 inches long
1 piece, 12 inches long
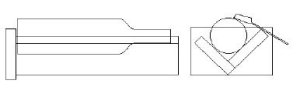
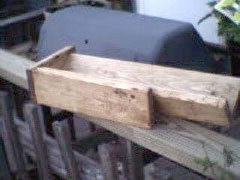
1 piece, 7 inches long - Glue and screw the two 18 inch pieces into a "V" Shape.Don't worry that one is going to be higher than the other.
The "V" shapeOn our first attempt, we put the taller board to the back in assembly.
- Glue and screw the 7-inch piece to the bottom. This is the bottle stop. Take special note that the bottom of the "V" and the bottom edge of the stop are even. This will assure good stability, I also left 3/4 of an inch between the front of the "V" and the front of the stop. This is done so that the 12 inch piece will also butt up against the stop and run across the front edge of the "V". A screw at a downward angle attaches the front plate to the "V", making sure not to stick out the inside of the "V". The 12-inch board is nailed to the shorter side to act as a hand rest for cutting the bottles.
- Sand all corners and edges to make it user friendly. Attach the wooden school ruler along front edge for making exact cuts. Stain if you like, but a coat or two of polyurethane should help make this a lasting project and easier to use. That's all there is, folks.
To Make The Tapper
Materials:
- 1 piece of 1/2 inch steel rod, cut to 14 inches
- 1 ground rod connector

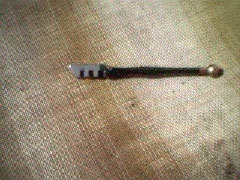
This is a picture of the tapper all together
- I put two small bends as shown to be able to reach the bottle sides without hitting the neck. I rounded the end of the rod so it will contact the bottle with no sharp edges. I did this with a bench grinder, but you could also file it round. To attach the ground rod, I replaced the short bolt with a longer one and slit the top to be able to solder in a washer so you could tighten without a wrench. This makes the tapper adjustable for any size bottle.
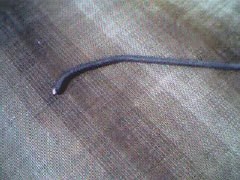

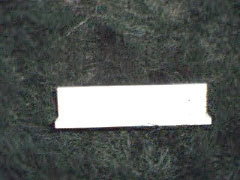
These are close-up pictures of bottle tapper parts.
Instructions for Using Bottle Cutting Jig:
Materials:
- one bottle cutting jig
- one glass cutter from hardware store, the kind used to cut flat glass
Lay bottle in jig, making sure that bottom of bottle is firmly against bottle stop. Score with bottle cutter, resting hand on the hand rest. Score and then rotate the bottle. Do not repeatedly score bottle as this is a waste of time and makes the bottle harder to cut. Repeat this until you are all the way around the bottle. Insert tapper and gently tap around the score line until you hear a small cracking sound. Continue until bottle is apart.
Note To Users: Be ready to tap the cut soon after scoring. Any lapsed time and, believe it or not, the glass will heal and be almost impossible to break.
By Debra and Leo Frick (Colorado)