Home |  Index |  Submit Request |  Share Photos |  Share Tips |  Active Topics |  New Feedback  |  Contact Us  |  Search
 User Login:  Username:    Password:      Forgot It?  | Join ThriftyFun!

 Popular Topics
 - Beauty
 - Budget and Finance
 - Christmas *
 - Cleaning
 - Consumer Advice
 - Craft Projects
 - Craft Tips
 - Food Tips
 - Garage Sales
 - Gardening
 - Gifts
 - Green Living
 - Home Improvement
 - Organizing
 - Parenting
 - Parties
 - Pest Control
 - Pets
 - Product Reviews
 - Recipes
 - Repair
 - Thanksgiving
 - Weddings for Less

More Topics

Google Search:

Web thriftyfun.com

About:
RSS Feed
About Us
Media
Advertising
Contact Us
Privacy Statement
Disclaimer

Personalized Badge Holder

By Shauna Smith Duty
1x1
Date: 09/14/2005 Topics: Craft Projects > Beadwork > Necklaces | Photos > Crafts  
1x1
1x1
Post Feedback! | Email Friend | Print | Get Responses | Bookmark | del.icio.us | Link | Rate: Thumbs Up Thumbs Down
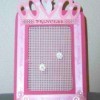
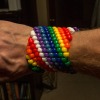
This personalized badge holder was created for nurses that work in a hospital. Not only does it have their name and professional title on it, but it's in neutral black and white to match practically any outfit. It also features charms attached that represent the wearer's personal interests; in this case, angels.

Personalized Badge Holder

What you'll need:

  • 26" of plastic stretchable beading cord or elastic miscellaneous fashion beads, charms, and letter beads
  • jewelry wire
  • wire snips

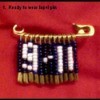
Sort the letters for your beaded badge recipient's name and professional title. Choose four to six charms that relate to the interests or hobbies of the recipient. On a towel, lay out your 26" cord. Beneath the cord, lay out the beads you'll use, in the pattern you desire. For the first and last 5" of the necklace, use plain beads. They will be hidden on the wearer's neck. Add the charms and fashion beads next, then the recipient's name. The center of the necklace will be where the wire badge holder hangs. Arrange the name and title so that they read right to left. The name should be on the left side of the necklace, and the title on the right. String the beads onto the cord or elastic, then tie the ends into a secure knot. Hide the loose ends by inserting them into bead holes.

For the badge holder, use your snips or pliers to bend a 4" piece of jeweler wire into a triangle. Attach the badge holder to the center of the necklace with a wire loop, and twist the ends together to secure it.

About The Author:
Shauna Smith Duty is a freelance writer with a penache for writing family and parenting articles. She composes articles for both print and web publications, reviews children's books and movies, writes short plays, and provides editing services. Visit her online at http://www.shaunasmithduty.com
Jump to Feedback | Post feedback
Related Links:
Previous: Daily Thrifty Tips - September 13 & 14 2005 ThriftyFun Next: 18" Crocheted Doll Sweater
1x1
 Feedback
1x1
1x1
1x1
1x1
 Sponsors
1x1
1x1

Post by Aussie-Vee (2) | (11/27/2005)
Contact
What a lovely idea, much nicer than the usual ones.


1x1

Post Feedback:
Login using the form on the top of the page to post feedback if you have registered with ThriftyFun. If you have not yet registered, click here. It's FREE!. If you are not registered you can post feedback as a guest below. Please don't use your email address for your name because spam robots can dredge it from our site. Please do not post your feedback more than ONCE. We need to approve all guest feedback and it may take from minutes to hours for that to happen.
(1x1 graphic )
Your Name

Subject

Feedback

text tool text tool text tool text tool

Image Upload: Add an image to your post! Click the "Browse" button below and select an image from your hard drive. Please only select gifs or jpegs. If you have any problems, just email the image to images@thriftyfun.com


If you want to post your email address for responses from readers, obscure it in some way like put spaces between the name and @ sign and service address with (remove spaces) behind it or name (at) server (dot) com . This is for your protection from those creepy Robots.

(1x1 graphic )

© 1997-2008 ThriftyFun.com - Design by Cumuli Design
Disclaimer: ThriftyFun.com cannot accept any responsibility for any injury or damage that you may cause to yourself, others, or property when following any advice given on this site. Read the full disclaimer. If you find any information on ThriftyFun.com or in our newsletters that is either erroneous and/or potentially harmful to others, please Contact Us, immediately.