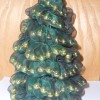
True to its name, a three-dimensional tree of thick green paper, covered with silver stars.
Materials and Equipment:
- a large plastic bag or several sheets of newspaper
- two pieces of thick, cardstock quality paper in green, at least 8 x 10 inches
- several sheets of plain standard-size paper
- a standard-size piece of red construction paper (or cardstock quality paper)
- a package of silver or gold foil stickers shaped like stars (at least 25 stars)
- scissors
- a ruler
- a pencil
- an eraser
- craft glue
- glue spreader or Q-tip
- a lid from a used plastic container (such as a yogurt container)
- a sewing machine (optional)
- green thread (optional)
Instructions:
- Before starting, clear the table and cover it with newspaper or a large garbage bag to avoid getting glue on the table.
- Take a piece of the plain, standard-size paper and fold it in half lengthwise. Trace the outline of half a Christmas tree onto one side of the folded paper. The center of the tree should run along the fold so that once you cut out the design and unfold it, you will have a full tree. Cut along the outline. Unfold the tree to make sure it is the shape you desire. If it isn't, take another piece of paper and try again. This is a practice run, so feel free to try a few different designs out.
- Once you're happy with your design, fold one piece of the green cardstock quality paper in half lengthwise. Place the plain paper cut-out you just created over the folded edge of the green paper and trace its outline with a pencil. Cut along the outline. Unfold the tree form and lay it on the table.
- Repeat step three for the other piece of green cardstock quality paper.
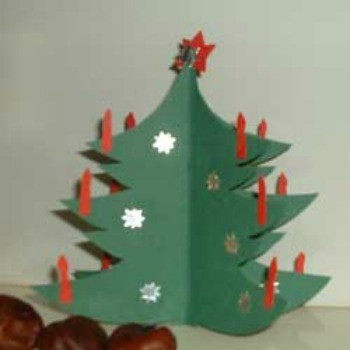
- Take the red construction paper and cut out small cylindrical candle shapes, about an inch high. They don't have to be perfect, just close enough to convey the idea of candles. Pour a small puddle of glue onto the plastic container lid. Spread glue along the bottom half of each 'candle' and paste them on the boughs of each Christmas tree (see photo).
- Take out the package of foil stars and stick them randomly on the back and front of each Christmas tree, about five per side. Save two stars for later.
- If you have a sewing machine, use green thread and sew the two trees together back-to-back along their creases. If you don't have a sewing machine, apply glue sparingly along the fold of each tree and stick together. Allow to dry. Fan the tree out into a three-dimensional shape. It should be able to stand on its own on the table.
- Draw two star shapes on the red construction paper and cut them out. Spread glue on the back of each star and paste them back-to-back on the top of the tree. Stick a silver star sticker on top of each star.
- Place on a desk or give to a friend who is not having a Christmas tree this year. It's also a great gift for a friend who is in the hospital over the holidays!
Add your voice! Click below to comment. ThriftyFun is powered by your wisdom!

Stacey Silva
Silver Feedback Medal for All Time! 453 Feedbacks December 21, 20050 found this helpful
What a grand idea!! That would really make a cute centerpiece for the table at Christmas dinner!! I love that!
Add your voice! Click below to comment. ThriftyFun is powered by your wisdom!