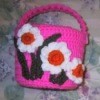
Home |  Index |  Submit Request |  Share Photos |  Share Tips |  Active Topics |  New Feedback  |  Contact Us  |  Search
 User Login:  Username:    Password:      Forgot It?  | Register

 Popular Topics
 - Beauty
 - Budget and Finance
 - Christmas *
 - Cleaning
 - Consumer Advice
 - Craft Projects
 - Craft Tips
 - Food Tips
 - Garage Sales
 - Gardening
 - Gifts
 - Green Living
 - Home Improvement
 - Organizing
 - Parenting
 - Parties
 - Pest Control
 - Pets
 - Product Reviews
 - Recipes
 - Repair
 - Thanksgiving
 - Weddings for Less

More Topics

Google Search:

Web thriftyfun.com

About:
RSS Feed
About Us
Media
Advertising
Contact Us
Privacy Statement
Disclaimer

Craft Project: Crocheted Easter Bunny Basket

By Harlean Greathouse
1x1
Date: 03/17/2008 Topics: Craft Projects > Crochet | Easter > Easter Baskets | Photos > Holiday > Easter  
1x1
1x1
Post Feedback! | Email Friend | Print | Get Responses | Bookmark | del.icio.us | Link | Rate: Thumbs Up Thumbs Down
Crocheted Easter Bunny Basket
This adorable Easter Basket is crocheted over a 2 or 3 liter soda bottle.

Approximate Time

Supplies:

  • Paper Punch
  • Crochet Hooks Size F and Size J
  • Hot Glue Gun
  • Sharpie Marker
  • 4 ply yarn 4 oz. Main color
  • 4 ply yarn 2 oz. contrasting color
  • Small amount of felt: blue and white for eyes
  • Polyester stuffing or strips of Quilt batting
  • Pom Poms 1 black 1/2 inch for nose
  • Pom Poms 2 white 1 inch for face
  • Pompom 1 white 2 inch for tail
  • Optional Flower Stamens to use for whiskers

Instructions:

With a sharpie, mark bottle 4 inches up from the bottom. Cut. Also cut one piece from below the shoulder of the bottle 1/2 inch wide for the handle. Round the ends. With a paper punch, punch holes about 1/4 inch apart around the edge of the bottle and down the middle of the handle.

Handle:

With MC and F hook, make 2 SC in each hole along first side, 8 SC in end hole, 2 SC in each hole along opposite side and 8 SC in second end hole. SK ST to join.

Basket:

With MC and F hook, make 2 SC in each hole around, working clockwise. Join with SL ST. Change to J hook, turn and work counter-clockwise. Mark beginning and work rest of basket without joining at ends of rounds.

First Round: SC in each SC around.

Second through 12th round: Working in back loop of stitch only, SC in each SC around.

NOTE: Pull work down to make sure it covers the bottle. If necessary, add additional rounds until it does. At this point, pull work down over bottle and stuff lightly with polyester stuffing, or hold a few strips of Quilt Batting (cut about 4x16 inches) around the bottle as you pull the work down.

Next Round: (Work in both loops of stitch for remaining rounds) *SC in first 3 STS. Skip 4th ST. Repeat from * around.

Next Round: *SC in first 2 STS. skip 3rd ST. Repeat from * around, continuing until opening is closed, then fasten off.

Ears:

With MC and J hook, CH 13. DC in 4th chain from hook. DC in next 2 CH. HDC in next 3 CH. SC in next 3 CH. 3 SC in last CH. Working along opposite side of chain, 3 SC in same CH as last 3 SC. SC in next 3 CH, HDC in each of the next 3 STS. SC in each of the next STS, CH 2 and fasten off in same CH as last DC.

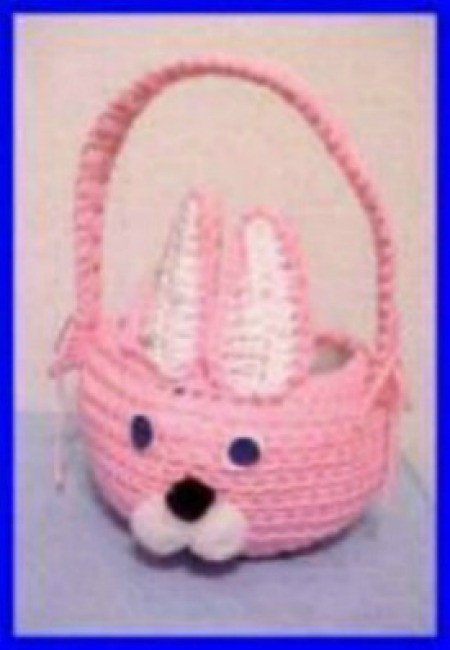
Repeat with MC for second ear. Also make 2 pieces with CC. Holding one of each color back to back with the CC facing you, using MC, crochet pieces together by making a SC through each ST of both pieces. Stuff lightly.

Cut 2 eyes as per pattern above right (see PDF).

Fasten 2 inch pompom to basket at beginning of Round 1. Glue ears upright over edge of basket opposite side from the tail. If you prefer you may sew them in place. With a length of MC yarn, tie handle to basket positioning each end midway between ears and tail. Using photo as a guide, glue face on front of basket. Add Easter grass to basket.

Click Here for a PDF of these instructions

By Harlean from Arkansas

Jump to Feedback | Post feedback
Related Links:
Previous: Painting a Home Radiator ThriftyFun Next: Craft Project: Cardboard Tube Bunny
1x1
 Feedback
1x1
1x1
1x1
1x1
 Sponsors
1x1
1x1

No Feedback Yet

Be the first to post feedback! Click here to post feedback.

1x1

Post Feedback:
Login using the form on the top of the page to post feedback if you have registered with ThriftyFun. If you have not yet registered, click here. It's FREE!. If you are not registered you can post feedback as a guest below. Please don't use your email address for your name because spam robots can dredge it from our site. Please do not post your feedback more than ONCE. We need to approve all guest feedback and it may take from minutes to hours for that to happen.
(1x1 graphic )
Your Name

Subject

Feedback

text tool text tool text tool text tool

Image Upload: Add an image to your post! Click the "Browse" button below and select an image from your hard drive. Please only select gifs or jpegs. If you have any problems, just email the image to images@thriftyfun.com


If you want to post your email address for responses from readers, obscure it in some way like put spaces between the name and @ sign and service address with (remove spaces) behind it or name (at) server (dot) com . This is for your protection from those creepy Robots.

(1x1 graphic )

© 1997-2008ThriftyFun.com - Design by Cumuli Design
Disclaimer: ThriftyFun.com cannot accept any responsibility for any injury or damage that you may cause to yourself, others, or property when following any advice given on this site. Read the full disclaimer. If you find any information on ThriftyFun.com or in our newsletters that is either erroneous and/or potentially harmful to others, please Contact Us, immediately.