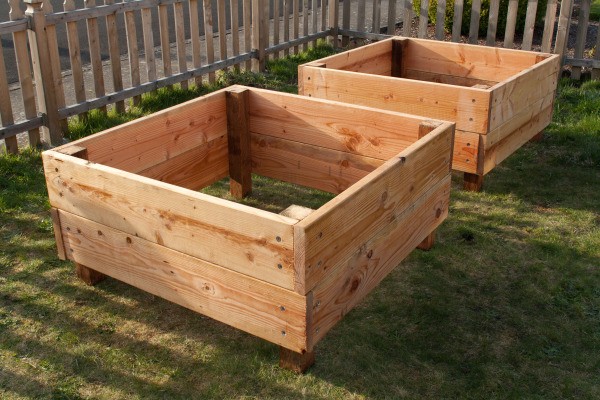
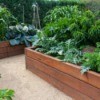
We were able to put these two 4 foot square raised garden beds together this weekend. It was an easy project for the kids to help with; and they will be able to plant whatever they want in them this spring.
Advertisement
The best part about assembling them in this way is that there is no real need for precision. If you drill the holes off by a bit or a couple of the boards aren't exactly 4 feet long, it isn't a big deal. The bed will still be plenty stable and hold enough dirt to make a great garden plot.
Making the garden beds 4 feet square would work well for anyone utilizing the square foot gardening method. They are easy to reach across and tall enough that they are more comfortable to work in than a shorter bed.
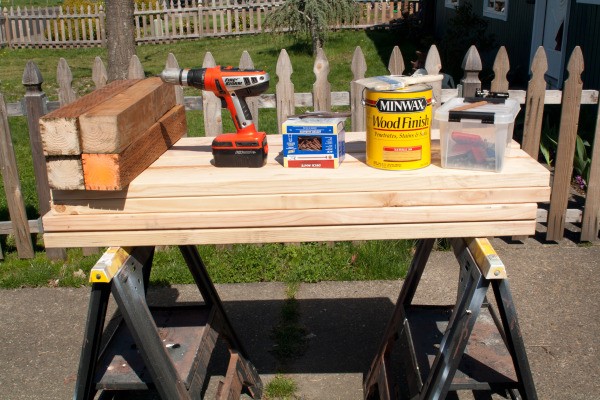
Supplies
This is what you will need to put together one 4x4 foot garden bed.
8 2x10 (inch) boards cut to 4 feet long
4 4x4 (inch) boards but to 2 feet long
32 3.5 inch deck screws
32 1/4 inch washers
1/2 gallon of wood stain (1 gallon was enough to stain 2 beds)
drill and drill bits
measuring tape
Advertisement
pencil
Total spent for 4 garden beds:
$16.08 ' 16 4x4s, cut to 2 feet in length
$81.76 ' 32 2x10s, cut to 4 feet in length
$29.98 ' 5lb box of 3.5 inch deck crews
$18.90 ' 6 packages of 25 count washers
$56.96 ' 2 gallons of Minwax wood stain
$3.97 ' 1 wide paint brush
Total = $207.65 or $51.91 per garden bed
Instructions:
Cut your boards down to the proper length. The 4x4s are 24 inches and the 2x10s are 48 inches.
I bought the lumber at Home Depot, and they will cut it down to size for free. They used to charge $1 per cut, but seem to have stopped doing that. I am not sure if that is a national policy or just local, but it sure saved me a lot of time and money.
Advertisement
The longer boards tend to be cheaper per linear foot. So, for the 2x10s we purchased 12 foot boards and had them cut into thirds, making them all basically 4 feet long.
Thrifty Tip: Check the bargain wood bin that is usually back by the cutting center. We found a bunch of four foot pressure treated 4x4s, that they were just getting ready to mark as discounted. They marked each as $4.01 then cut them down into the 2 foot sections we needed.
When I got to the cashier though, I noticed the 8 foot pressure treat 4x4s were $7.97 each, thus making my wood from the bargain bin more expensive. It was only $.04 a board, but I still asked the cashier how something from the bargain bin would cost more. She agreed with me and cut the price to $2.01 each. So all told, I got sixteen 2 foot long pressure treated 4x4s for about a dollar a piece ($16.08). Now that's a bargain!
Advertisement
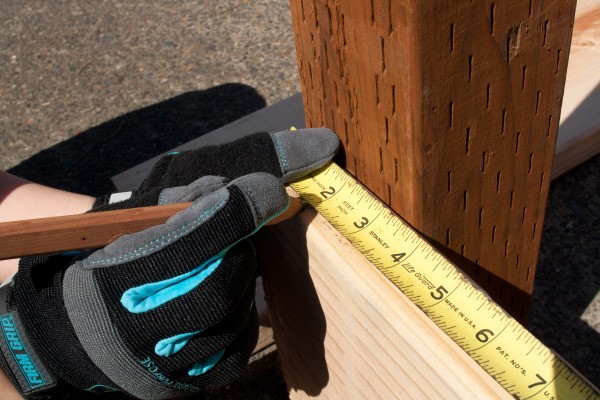
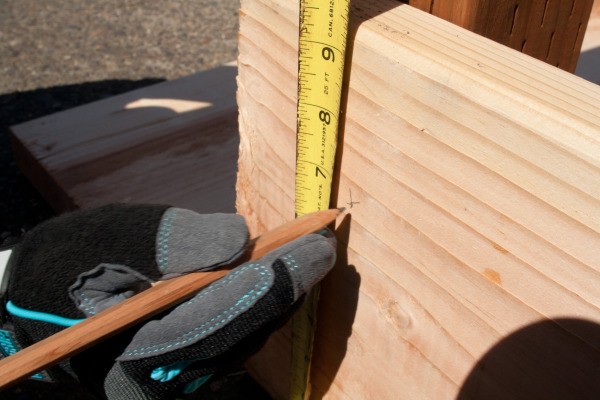
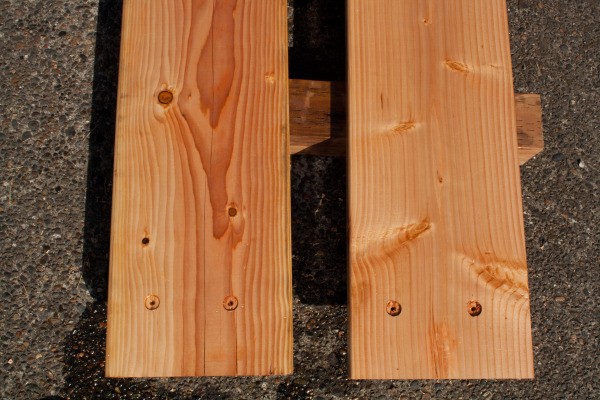
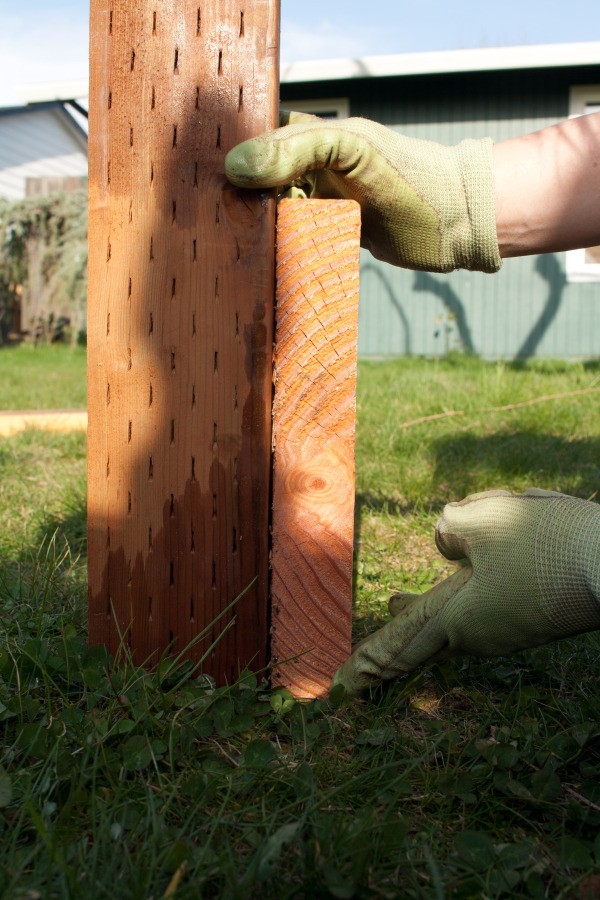
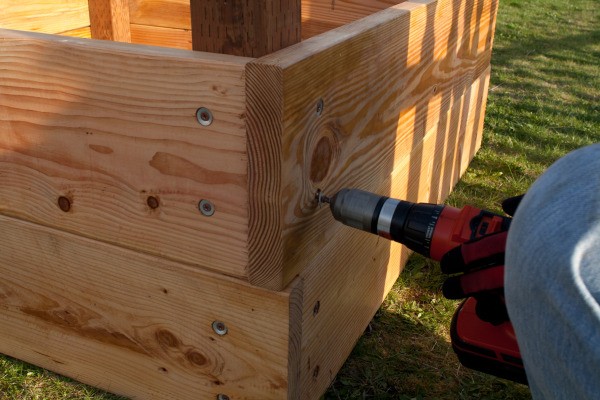
Measure 2 inches in from one end of the board on all of the 2x10s and mark them there. This is where the screws will line up with the center of the 4x4s from the end of the 2x10.
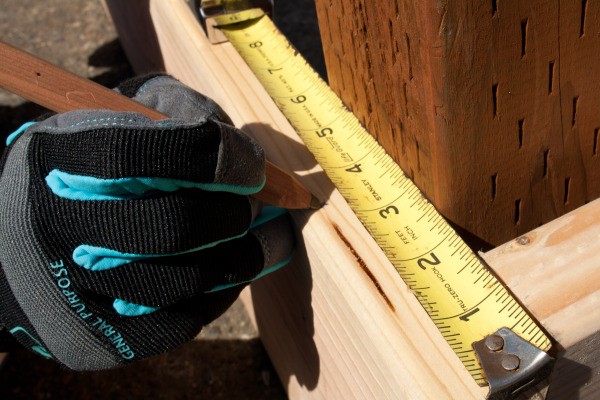
Measure 3.5 inches in from the opposite end on all of the 2x10s and mark them there. This is where the screws will line up with the center of the 4x4s when it is butted up against the other 2x10.
At the 2 inch and 3.5 inch marks, measure across the board and mark it at 3 inches and 7 inches on both ends.
Advertisement
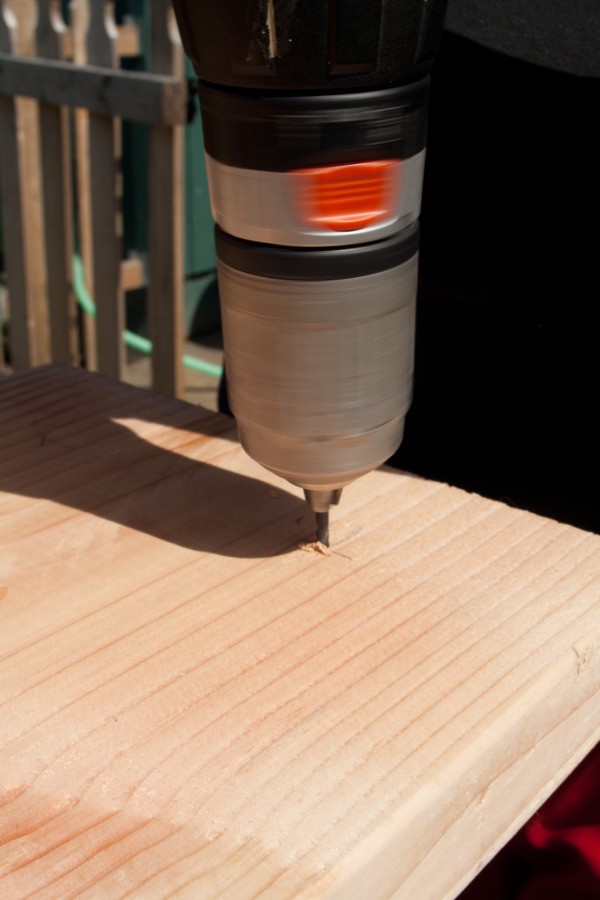
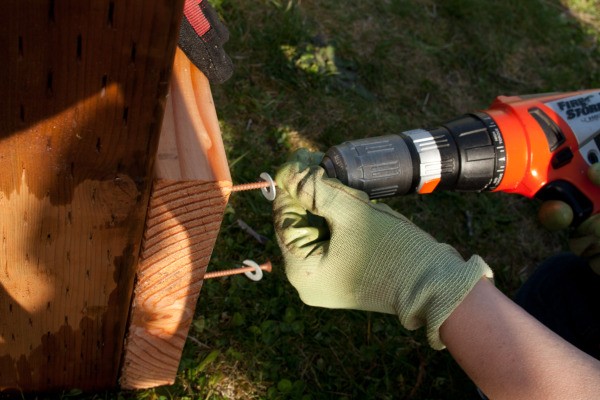
Pre-drill the 4 marked spots on each board with a bit slightly smaller than the diameter of the screws you will be using.
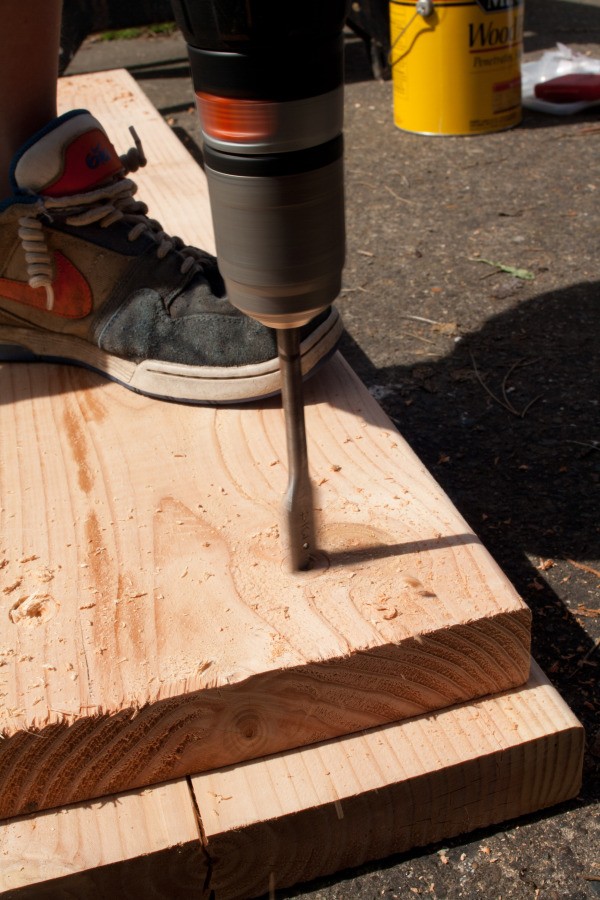
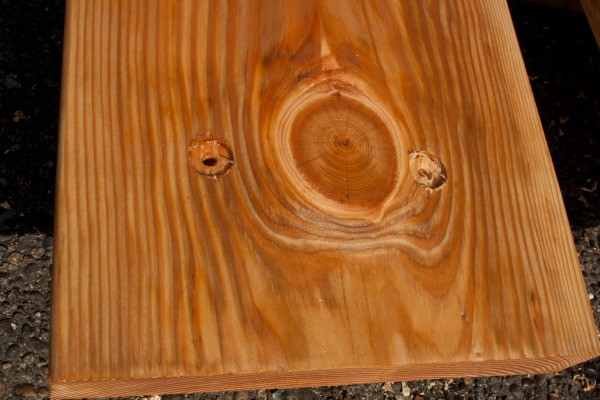
At each of the 4 holes, use a 3/4 inch boring bit to create a counter sink for the washer and screw head.
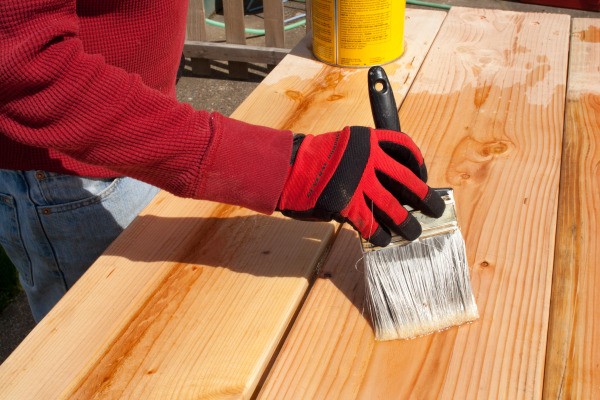
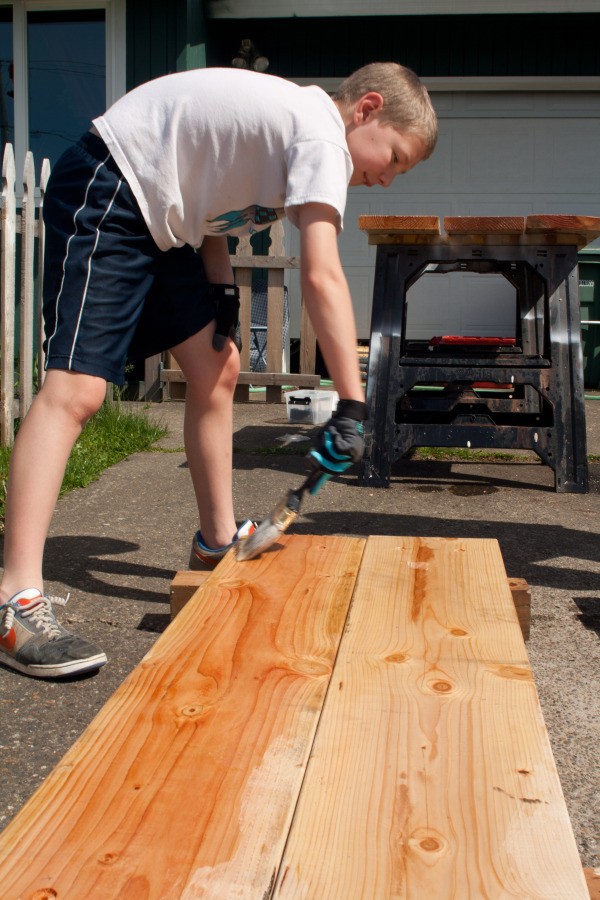
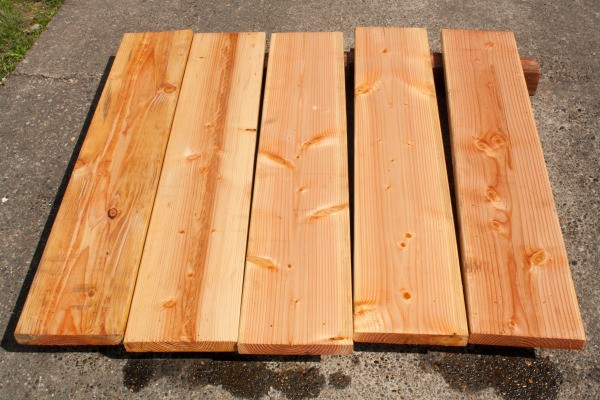
Stain the 2x10s with a wood sealant. Be sure to soak the screw holes and end of the boards well. I like the natural wood look so I used a light stain to bring out the natural color of the douglas fir panels. This step is not 100% necessary, but it will make your garden bed last much longer.
Advertisement
When the stain has had a chance to soak in on the first side, flip the board over and stain the second side.
Since I had managed to get pressure treated 4x4s, I only stained the cut ends on those boards. So if you have regular 4x4s, you should stain those at this time as well.
Once the stain is dry, you are ready to assemble. These beds will be heavy, so assembling them near their final destination will save you some backache.
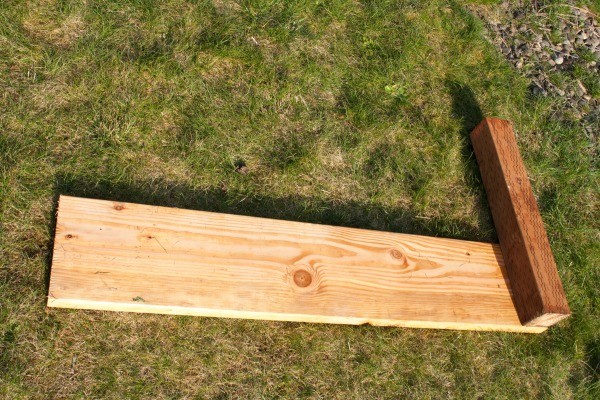
Start by putting whatever is the ugliest end (there is always an ugly end) of one of the 4x4s facing upward, as this is the part that will be in the ground and not visible later.
Next, line up the end of the 2x10 with the holes drilled at two inches in and square it up with the edges of the 4x4. The easiest way to do this is to lay the two 4x4s on the ground and then lay the 2x10 on top of it.
Drive the screw, with washer, into the 4x4 through the holes you pre-drilled.
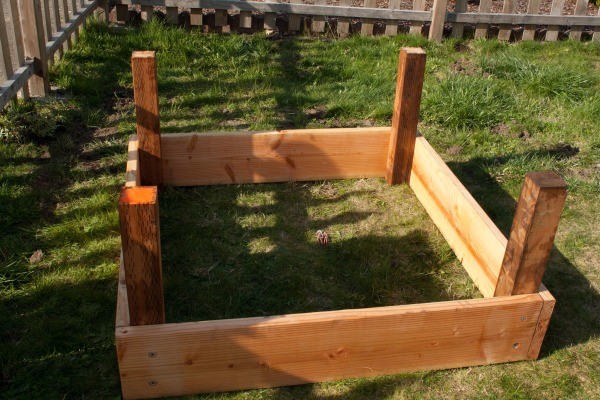
Putting together all four corners as pictured below was easiest and fastest way we found to put these beds together.
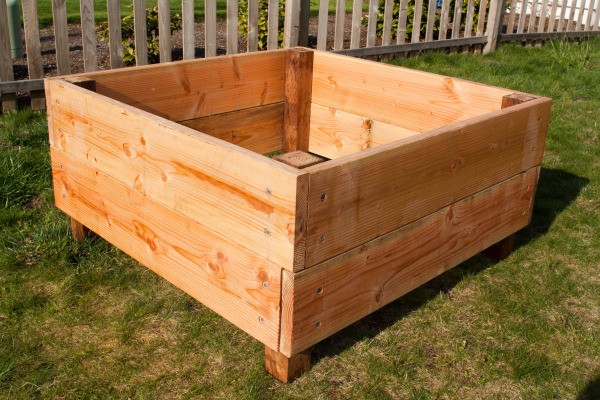
Once you have all the 4x4s attached so they are flush on the end of the 2x10s, the 3.5 inch ends will all line up with the 4x4 on the other side. Assemble the 4 pieces into a square and you are done with the hard part.
To add stability to the structure, you can offset the first board of the second level. This way, the end with the holes drilled at two inches lines up with the edge of a 4x4 that was attached at 3.5 inches on the first level. However, it is plenty sturdy if you don't wish to offset them. See photo below.
Once all the boards are attached, flip it over and you are ready to put it in place!
We purchased enough lumber to put four of these beds in our front yard. As you can see, the first two came together very easily in 1 day. I will write an update next week when I have them all ready to fill with soil.
First off I have a question, why is your raised bed raised off the ground? Next, one should never use pressure treated wood or an oil based stain on any wood that you might grow vegetables in. They both contain poisons and it will leach into the soil and then to the vegetables. Thanks but no thanks, if you wanted longevity, better to have made it with redwood, cedar or Trex. Even cement blocks work great.
I assume those beds get set so the sides are at least flush, if not below the surface... right? Also, is there a follow up article? Would love to see these beds in action!
gggd Silver Answer Medal for All Time! 425 Answers
February 6, 20220 found this helpful
I don't know if you ever thought of this but, it is never a good idea to use pressure treated wood or regular wood that has been stained for a raised garden box that you will grow edibles in. Pressure treated wood and most stains or wood sealers are full of toxins. I certainly wouldn't be eating anything grown in that type of box. You are better off using redwood that is naturally more rot resistant. OR use spruce, pine or fir, knowing it will have a shorter but safer life span.