Home |  Index |  Submit Request |  Share Photos |  Share Tips |  Active Topics |  New Feedback  |  Contact Us  |  Search
 User Login:  Username:    Password:      Forgot It?  | Join ThriftyFun!

 Popular Topics
 - Beauty
 - Budget and Finance
 - Christmas *
 - Cleaning
 - Consumer Advice
 - Craft Projects
 - Craft Tips
 - Food Tips
 - Garage Sales
 - Gardening
 - Gifts
 - Green Living
 - Home Improvement
 - Organizing
 - Parenting
 - Parties
 - Pest Control
 - Pets
 - Product Reviews
 - Recipes
 - Repair
 - Thanksgiving
 - Weddings for Less

More Topics

Google Search:

Web thriftyfun.com

About:
RSS Feed
About Us
Media
Advertising
Contact Us
Privacy Statement
Disclaimer

Attaching Seeds To Planting Paper

By Ellen Brown
1x1
Date: 10/19/2006 Topics: Gardening > Seeds | Readers Request > Gardening  
1x1
1x1
Post Feedback! | Email Friend | Print | Get Responses | Bookmark | del.icio.us | Link | Rate: Thumbs Up Thumbs Down

Question:

I would like to make my own plantable paper and put my own wildflower, or lavender seeds on the paper. How do I keep the seeds from falling off?

MaryLynn from Saskatoon, SK

Answer:

MaryLynn,

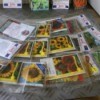
If the seeds are added during the papermaking process, they will become imbedded in the layers of pulp as the paper dries. Here are some directions for making plantable paper.

Directions:

  • Tear Paper into nickel-sized pieces, or use a paper shredder and place in blender (to half full). Make sure to remove any staples! You can also add bits of hemp or other natural fibers that may be safely composted once planted. Fill the blender with warm water. Blend for about 60 second on low to medium speed. Continue to increase the speed until no paper flakes remain and pulp appears smooth.

  • Now make a mold by tightly tacking screen or mesh onto a frame of the desired size.

  • Fill the washtub about half full of water and pour in pulp from blender. Add in at least 3 blender loads of paper-more if desired (the more pulp, the thicker the paper). Add in flower or vegetable seeds. Small, flat seeds like forget-me-not, hollyhock, chili pepper and tomato seeds work wonderfully. Stir the mixture.

  • Slip the frame into the washtub, gently moving it from side to side to get the pulp around to the top of the frame level and to the desired thickness. Let the layer of pulp settle and slowly lift the frame up so it is above water level. Let it drain for a moment and check to see if it is level. Fill the turkey-baster with pulp from the washtub and use it to fill in any uneven spots or gaps in the pulp.

  • After removing the frame from the water, let it drain. When it stops dripping, carefully lay the frame (pulp side down) onto a fabric square or an old dishcloth. Use the sponge to press out as much water as possible (wring excess water back into tub).

  • This step may take some practice to master so be patient. Holding the fabric square flat, slowly lift up and remove the frame. The wet paper should remain on the fabric. If the paper sticks to the screen, you may have pulled too fast or not pressed enough water out of the paper. Once you successfully remove the frame, gently smooth out any noticeable air bubbles or rough edges.

  • Keep repeating steps 4-6 and stack the fabric squares (or dish towels) on a cookie sheet. When finished, place a piece of cardboard on top of the last piece and use bricks or another cookie sheet to press out the remaining water in the stack.

  • Gently separate sheets and dry them on a clothesline or out in the sun for 12-24 hours. When they are dry, gently separate the paper from the fabric squares (or dish towels).

For great gifts, use cookie cutters or stencils to trace holiday shapes. Cut them out and attach a ribbon for thoughtful gifts that last beyond the holiday season. Other uses for home made paper include scrapbooks, stationary and note cards, journal or photo album covers, lampshades, etc. Don't forget to include the planting instructions!

Ellen

About The Author: Ellen Brown is our Green Living and Gardening Expert. Click here to ask Ellen a question! Ellen Brown is an environmental writer and photographer and the owner of Sustainable Media, an environmental media company that specializes in helping businesses and organizations promote eco-friendly products and services. Contact her on the web at http://www.sustainable-media.com

Jump to Feedback | Post feedback
Related Links:
Previous: Growing Lilacs in the Mountains ThriftyFun Next: Days When You Don't Feel Like Cooking
1x1
 Feedback
1x1
1x1
1x1
1x1
 Sponsors
1x1
1x1

Post by Harlean from Arkansas (314) | (08/23/2007)
Profile |Contact
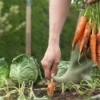
I have never planted flower seeds on paper, but I used the toilet paper with white glue method when I planted my carrots this year. The seeds are so tiny that they are hard to sow by hand. I just dipped a toothpick in white glue, and picked up a seed and deposited it on the paper. I cut the paper into 1 inch strips, and I placed the seeds 1 inch apart on the paper. No thinning necessary, and I got a very nice crop. I also did my radishes that way. I don't like thinning plants, so it worked very well for me.
Harlean from Arkansas


Post by FrisbeeMoose (2) | (10/19/2006)
Profile |Contact
I have found that seeds stick to paper towel naturally when you wash them and put them on paper towel to dry. The paper adheres to the seeds & does not seem to interfere when planting. I have experienced this with tomato, cucumber and tomatillo seeds - they are wet when harvested, or wet from rinsing for harvesting!


Post By Lynda (Guest Post) (09/07/2006)
Why not attach with whatever to wrapping paper TISSUE which comes in it's own clear plastic sack for temporary storage, allowing for advanced application?( I'd use a spice jar with holes on inside lid to apply the seeds). Perhaps you could also research organic pest control liquids, fungicides,
and seed boosters/tonics containing molasses?(I believe), from Jerry Baker perhaps? then apply to paper first with one of the suggested methods, then apply again when seeds are being attached to the tissue? I haven't done this but thought about it so that the seeds would have less trouble getting root growth through the paper during early sprouting?

A man from Australia just suggested on his garden
site that newspaper makes good COVER around new plants, but not necessarily seed. Also, I read that
the depth of the planting depends upon the thickness of the seed. The more thin the seed, the more shallow it's planted, and vice-versa. Have you used the roll-out seed paper before? The idea sounds great. God bless you.


Post By carla bledsoe (Guest Post) (09/06/2006)
i've read in gardening books that white school glue works for this. a stripe of it on toilet paper, add seeds and let dry. i always wanted to try it but haven't taken the time. they also recommend flour and water paste but it does crumble when it gets dry. good luck


Post By (Guest Post) (09/06/2006)
A wash of white glue or wheat paste and water (or flour) will biodegrade as well as hold the seeds in place.


1x1

Post Feedback:
Login using the form on the top of the page to post feedback if you have registered with ThriftyFun. If you have not yet registered, click here. It's FREE!. If you are not registered you can post feedback as a guest below. Please don't use your email address for your name because spam robots can dredge it from our site. Please do not post your feedback more than ONCE. We need to approve all guest feedback and it may take from minutes to hours for that to happen.
(1x1 graphic )
Your Name

Subject

Feedback

text tool text tool text tool text tool

Image Upload: Add an image to your post! Click the "Browse" button below and select an image from your hard drive. Please only select gifs or jpegs. If you have any problems, just email the image to images@thriftyfun.com


If you want to post your email address for responses from readers, obscure it in some way like put spaces between the name and @ sign and service address with (remove spaces) behind it or name (at) server (dot) com . This is for your protection from those creepy Robots.

(1x1 graphic )

© 1997-2008 ThriftyFun.com - Design by Cumuli Design
Disclaimer: ThriftyFun.com cannot accept any responsibility for any injury or damage that you may cause to yourself, others, or property when following any advice given on this site. Read the full disclaimer. If you find any information on ThriftyFun.com or in our newsletters that is either erroneous and/or potentially harmful to others, please Contact Us, immediately.