Home |  Index |  Submit Request |  Share Photos |  Share Tips |  Active Topics |  New Feedback  |  Contact Us  |  Search
 User Login:  Username:    Password:      Forgot It?  | Register

 Popular Topics
 - Beauty
 - Budget and Finance
 - Christmas *
 - Cleaning
 - Consumer Advice
 - Craft Projects
 - Craft Tips
 - Food Tips
 - Garage Sales
 - Gardening
 - Gifts
 - Green Living
 - Home Improvement
 - Organizing
 - Parenting
 - Parties
 - Pest Control
 - Pets
 - Product Reviews
 - Recipes
 - Repair
 - Thanksgiving
 - Weddings for Less

More Topics

Google Search:

Web thriftyfun.com

About:
RSS Feed
About Us
Media
Advertising
Contact Us
Privacy Statement
Disclaimer

Attaching Ribbons to Cards

1x1
Date: 07/08/2005 Topics: Craft Tips > Paper | Readers Request > Crafts  
1x1
1x1
Post Feedback! | Email Friend | Print | Get Responses | Bookmark | del.icio.us | Link | Rate: Thumbs Up Thumbs Down
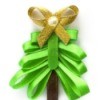
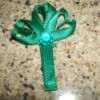
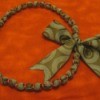
I am making cards that have a ribbon on the side to attach the blank paper insert. The ribbon is tied and stays in place relatively well but I was thinking of putting hairspray over the ribbon to keep it firm. Has anyone got any advice or other suggestions. Taa.

Renee
Jump to Feedback | Post feedback
Related Links:
Previous: Games and Movies for a Luau Party ThriftyFun Next: Keeping Field Mice Out of a Vacant House
1x1
 Feedback
1x1
1x1
1x1
1x1
 Sponsors
1x1
1x1

Post By Vivian Perez-Espinosa (Guest Post) (09/21/2005)
Hello Renee, I own a scrapbooing store in South Florida and we are currently using alot of ribbon on our pages. We like the "X" from xyron, it can be found at many scrapbooking stores or at Michaels craft stores. It is very simple to use and you may find it is the best thing ever for making a sticker out of small things. Best of luck to you!


Post by emain (15) | (07/12/2005)
Contact
I'd suggest spray starch too.


Post by Fluffy (3) | (07/10/2005)
Contact
Spray starch may be an option also.


Post By Sharon,Ky (Guest Post) (07/10/2005)
A reader not long ago suggested a web site that gave different "wordings" for invitations.Maybe it can be found in the archives.It also explained how to tie a ribbon on an invitation.Using a hole punch,make 2 holes less than 1/2" apart.Cut thr ribbon the length you want it. Thread your ribbon to the BACK through each hole.To make the left loop thread the RIGHT side of ribbon to the FRONT using the LEFT HOLE.Then take the ribbon you've threaded back to the FRONT using the RIGHT hole.This will make a loop on the left and an end on the right.Follow this same procedure RIGHT hole to LEFT HOLE.This makes a PERFECT BOW. I hope I have explained this well enough that you can understand my directions.If not hopefully they can dig up the old article.Don't do anything until you try this method.It looks really professional.


Post By mairmie. (Guest Post) (07/10/2005)
iron ribbons between two sheets of wax paper; using a warm never HOT iron.


Post by Katie A. (146) | (07/09/2005)
Blog! |Contact
I'd say if the ribbon is staying relatively well, leave it alone. If the card is just to look at (a letter or an announcement/invitation) it's not going to get lots of actual "use" where you'd want to reinforce it. I think the hairspray is unnecessary and will show.


1x1

Post Feedback:
Login using the form on the top of the page to post feedback if you have registered with ThriftyFun. If you have not yet registered, click here. It's FREE!. If you are not registered you can post feedback as a guest below. Please don't use your email address for your name because spam robots can dredge it from our site. Please do not post your feedback more than ONCE. We need to approve all guest feedback and it may take from minutes to hours for that to happen.
(1x1 graphic )
Your Name

Subject

Feedback

text tool text tool text tool text tool

Image Upload: Add an image to your post! Click the "Browse" button below and select an image from your hard drive. Please only select gifs or jpegs. If you have any problems, just email the image to images@thriftyfun.com


If you want to post your email address for responses from readers, obscure it in some way like put spaces between the name and @ sign and service address with (remove spaces) behind it or name (at) server (dot) com . This is for your protection from those creepy Robots.

(1x1 graphic )

© 1997-2008ThriftyFun.com - Design by Cumuli Design
Disclaimer: ThriftyFun.com cannot accept any responsibility for any injury or damage that you may cause to yourself, others, or property when following any advice given on this site. Read the full disclaimer. If you find any information on ThriftyFun.com or in our newsletters that is either erroneous and/or potentially harmful to others, please Contact Us, immediately.