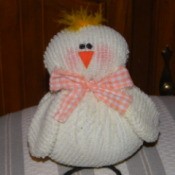
Turn an old yellow bedspread into a whole flock of chicks for Easter or spring decorating. My bedspread was already yellow, but you could easily dye a white one using RIT dye. A 1-foot wide by 2-foot long section is plenty for one chick.
Advertisement
Approximate Time: 2 hours
Supplies:
newspaper
compass
scissors
yellow chenille bedspread
orange felt
straight pins
sewing machine
thick macrame jute
measuring tape
embroidery needle
crochet thread
stuffing
hot glue gun
powder blush
paintbrush
two black snaps, 4/0
sewing needle and black thread
yellow feathers
fabric scraps
Instructions:
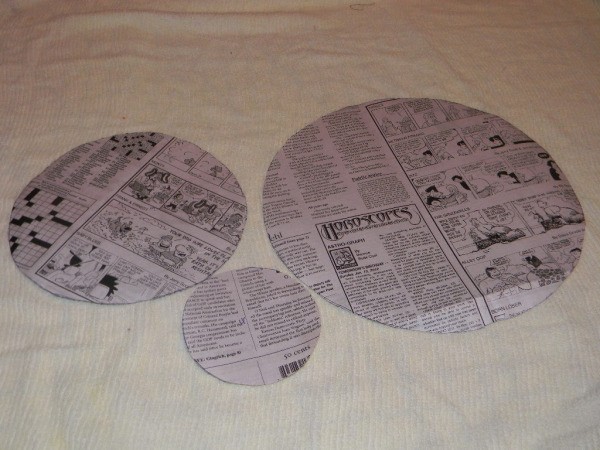
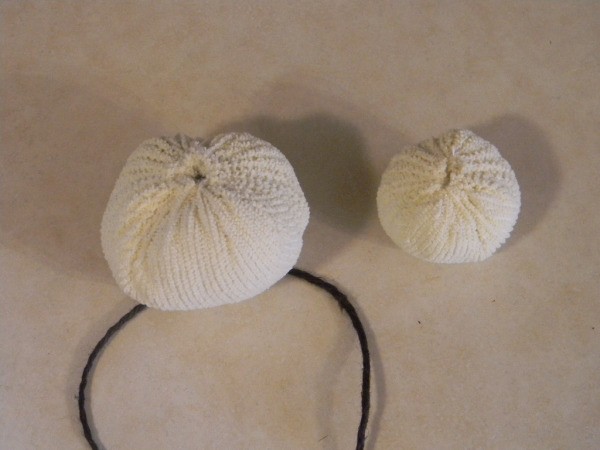
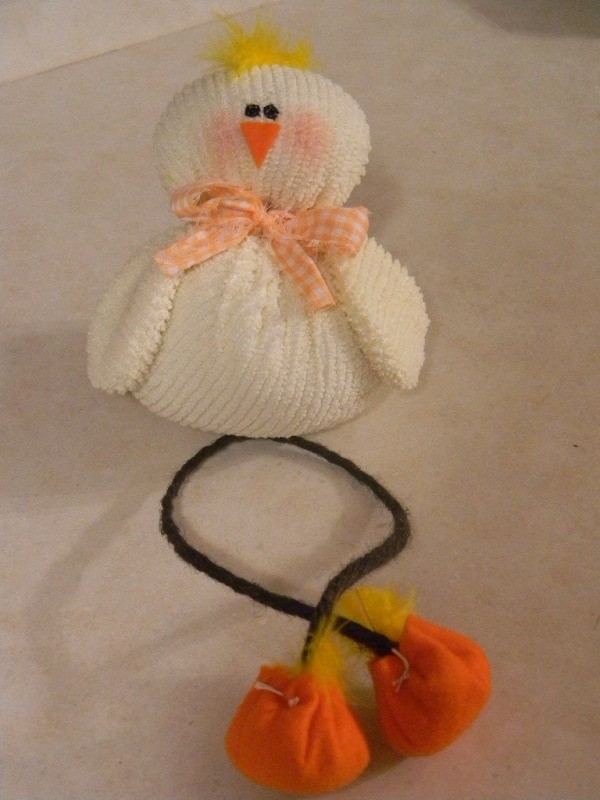
Trace an 11-inch, 8-inch and 4-inch circle on newspaper using a compass. Cut out the circles. The 11-inch circle is the pattern for the chicken's body, the 8-inch circle is the pattern for the chicken's head and the 4-inch circle is the pattern for the chicken's feet and wings.
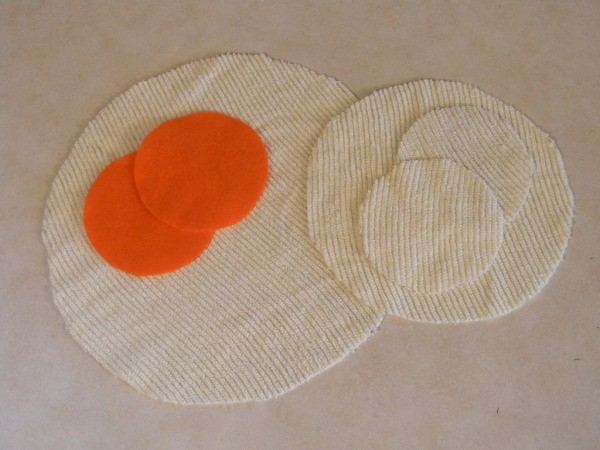
On a single layer of yellow chenille bedspread, trace a body, a head, and two wing circles. Cut out the circles. Trace two feet circles on orange felt and cut out.
Advertisement
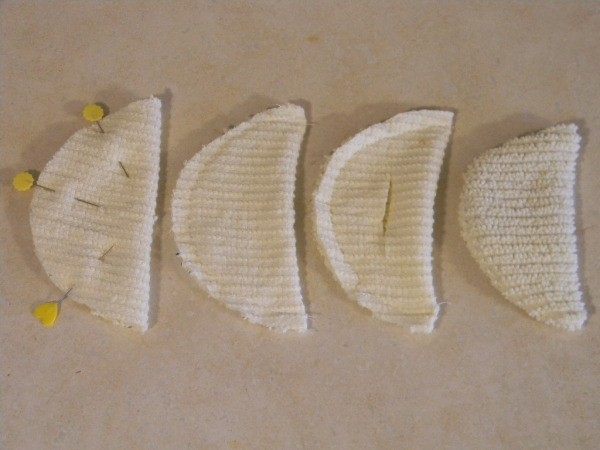
Fold one chenille wing circle in half with the right sides together. Pin the curved edges. Sew along the pinned edge. Repeat with the remaining wing circle. Cut a 2-inch slit in the center on one side of each of the stitched wings. Turn the wings right side out through the slit. Press the edges of the wings with your fingers.
Fold the chenille body circle in half, and in half again. Place a pin at the point that is the center of the circle. Unfold the circle and place on your work surface with the right side facing up. Cut an 18-inch long strand of thick macrame jute. Fold the jute in half to locate the center. Pin the center of the jute to the pinned center of the body circle. Sew across the pinned center to attach the jute. The jute is the chicken's legs.
Advertisement
Using crochet thread and an upholstery needle, sew a running stitch around the edge of the body circle 1/2 inch from the edge. Pull the thread to gather the circle to form a pocket. Stuff the pocket firmly. Pull the thread to gather the opening closed. Knot and cut the thread.
Sew a running stitch around the chenille head circle. Gather, stuff firmly and close. Knot and cut the thread.
Sew a running stitch around the edge of one felt foot 1/4-inch from the edge. Gather and stuff. Squeeze hot glue inside the opening. Insert the end of one jute leg. Gather the foot closed around the jute leg. Knot and cut the thread. Repeat with the remaining foot and leg.
Advertisement
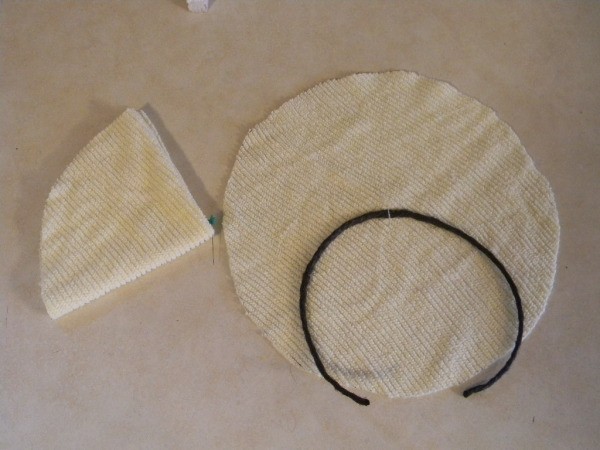
Position the head with the gathered side facing down. Choose a side for the face. Using a paintbrush and powder blush, apply two 1/2-inch cheeks to the face. Cut a 1/2-inch triangle from orange felt. This is the beak. Using craft glue, attach the beak to the center of the face with the point pointing down. Pull the halves of two 4/0 black snaps apart. Choose either the two backs or the two fronts for the eyes. Sew the eyes above the beak using black thread.
Apply hot glue to the gathered side of the body. Place the gathered side of the head over the glue on the body and squeeze. Hold until the glue has cooled.
Position the wings on the chicken body with the curved edges facing each other and the open slits against the body. Place the upper points of the wings just below the head and spaced 2 inches apart. Pin these points to hold. Swing the bottom tips outward so that the center curve of the wings are 3 inches apart. Hot glue the wings to the body to secure.
Advertisement
Glue a tuft of yellow feathers to the top of the head and the top of the feet.
Rip a 1-inch wide by 18-inch long strip of fabric. Wrap the strip around the neck and tie into a bow. Trim the ends.
 Turn an old yellow bedspread into a whole flock of chicks for Easter or spring decorating. My bedspread was already yellow, but you could easily dye a white one using RIT dye. A 1-foot wide by 2-foot long section is plenty for one chick.