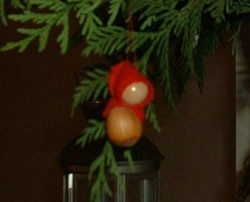
Few can resist these tiny ornaments - cheerful ladies with red head kerchiefs and hazelnut skirts dancing on an evergreen bough.
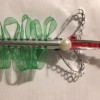
Materials and Equipment:
- a large plastic bag or several sheets of newspaper
- a hazelnut
- a small wooden ball, about a 1/2 inch in diameter
- a square of red felt, about 6 x 6 inches
- a piece of red embroidery floss, about 10 inches long
- craft glue
- super glue
- a lid from a used plastic container (such as a yogurt container)
- a glue spreader or Q-tip
- fabric or pinking shears
Instructions:
- Before starting, clear the table and cover it with newspaper or a large garbage bag to avoid getting glue on the table.
- Glue the wooden ball to the top of the hazelnut. Make sure the ball is not directly on the nut tip, but is placed forward, so it looks like a head slightly nodding down (see photo). Hold in place until glue is dry and the ball is firmly stuck. If the ball is not sticking properly, you may need to use super glue.
- Take out the red felt. Cut out a semicircle with your fabric or pinking shears. This is going to become the head kerchief. If using pinking shears, the flat edge of the semicircle should not be pinked. The flat edge should be about 4 inches long, but you will have to determine the correct size for your wooden ball, as sizes will vary. Before applying glue, do a test by placing the semicircle over the wooden ball/hazelnut form like a head kerchief (see photo). Pinch the felt around the 'neck' where the ball and the nut meet. Cut the felt to size if it is too large or cut a new piece if it is too small.
- When you have the size correct, pour a small puddle of craft glue onto the plastic container lid. Spread craft glue on the wooden ball where the head kerchief will sit. Don't place any glue on the hazelnut. Place the felt on the wooden ball and press it down against the glue until it is firmly stuck.
- Take the piece of red embroidery floss and tie it around the 'neck' of the figure, cinching the head kerchief in as you do so. Make sure there are two even ends of floss left hanging, and tie a secure not. Turn the knot to the back of the figure.
- Tie a knot at the top of the two loose ends, creating a loop to hang the figure on the tree.
- Place your Red Riding Hood ornament on the tree and watch for wolves!
Add your voice! Click below to comment. ThriftyFun is powered by your wisdom!

Stacey Silva
Silver Feedback Medal for All Time! 453 Feedbacks December 21, 20050 found this helpful
Oh that is darling! I am more and more amazed each day at the crafts that are made - they're so cute!!

suzanne
Silver Post Medal for All Time! 277 Posts April 26, 20060 found this helpful
ADORABLE
Add your voice! Click below to comment. ThriftyFun is powered by your wisdom!