ThriftyFun Logo
Home   Find   Ask   Share   Answer   Join   Index   Login  
 
 User Login:  Username:    Password:      Forgot It?  | Join ThriftyFun!

 - Beauty
 - Budget and Finance
 - Cleaning
 - Consumer Advice
 - Craft Projects
 - Craft Tips
 - Food Tips
 - Garage Sales
 - Gardening
 - Gifts
 - Green Living
 - Home Improvement
 - Organizing
 - Parenting
 - Parties
 - Pest Control
 - Pets
 - Product Reviews
 - Recipes
 - Repair
 - Weddings for Less

RSS Feed
About Us
Media
Advertising
Contact Us
Privacy Statement
Disclaimer

Simple Wedding Scrapbook Pages

By Kelli Mahoney
1x1
Date: 08/03/2005 Topics: Craft Projects > Paper > Scrapbooking | Photos > Crafts  
1x1
Post Feedback | Get Responses | Bookmark | Link | Print | Print (With Feedback) | Rate: Thumbs Up Thumbs Down | Bookmark and Share
Scrapbooking can be fun, but when you have all that stuff from a wedding, it can get overwhelming. However, that "stuff" can make for more interesting pages. Some avid scrapbookers will tell you to make sure you seal off anything that is not on archival paper, but if you make copies of all of your photos, you can put is all on one page without worries.
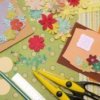
Materials:

  • Fancy scrapbook page (mine has a cream floral pattern on tan)
  • Double sided scrapbook tape
  • Design scrapbook scissors with elegant edge
  • Scissors
  • Tan or cream Scrapbook paper
  • Doilies
  • Wedding photos, program, seating card, and other items.

Directions:

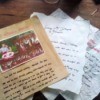
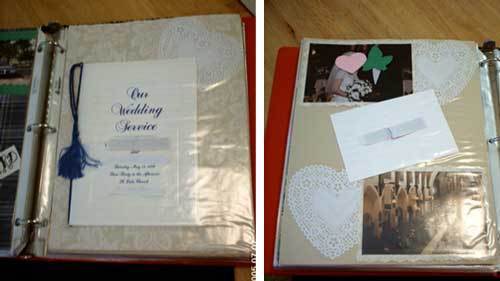
Use the fancy page as your base, and lay out your items on each page. I like to put the program on the first page, as you then do not need to create a title for the page. In this case, I added a doily, because the program was too large to also add a photo. Then place your photos, doilies, and other items as they fit on a page. They do not have to be in chronological order.

For each photo, tape them onto the tan or cream paper, and then cut around them with the design scissors in order to create a frame. This adds a touch of elegance to the page, but it does not take a lot of time. Use the double-sided tape to fasten everything to the page. I like to put the Thank You note at the end, too, but you don't have to put the pictures in chronological order. Put them in the order you like.

In the end, you'll have pages as elegant as the event.

(1x1 graphic )
Previous: Sock Can Pin Cushion ThriftyFun Next: Wedding Table Coverings
(1x1 graphic )
1x1
1x1
 Feedback
1x1
1x1
1x1

No Feedback Yet

Be the first to post feedback! Click here to post feedback.

1x1
1x1
 Post Feedback:
1x1
1x1
1x1

Login using the form on the top of the page to post feedback (if you are a registered user). If you have not yet registered, click here to do so. It's FREE!.

1x1
(1x1 graphic )

© 1997-2009 ThriftyFun.com - Design by Cumuli Design
Disclaimer: ThriftyFun.com cannot accept any responsibility for any injury or damage that you may cause to yourself, others, or property when following any advice given on this site. Read the full disclaimer. If you find any information on ThriftyFun.com or in our newsletters that is either erroneous and/or potentially harmful to others, please Contact Us, immediately.