I want to make window Cornices using Styrofoam. Could someone tell me how to do it?
Rona
Add your voice! Click below to answer. ThriftyFun is powered by your wisdom!
I have seen this done on HGTV, though I haven't done it myself. Actually, I had forgotten about it until I read this. I might try it too! Just simply get the foam the length you need and two more pieces for the sides. Glue the three pieces together. Then just simply wrap the material around in the pattern you prefer. This should be easily mounted. They also showed doing it with padding used for quilting. That was very pretty. Hope this helped.
Hi There,
I'm not sure if you have already made your styrofoam cornice because it has been awhile since you posted this message but I thought I'd let you know. I tried to make styrofoam cornices myself a couple of months ago and could not get them to look as nice as the professional cornices I had seen before. I then found pre-molded cornices on the internet and bought one and I LOVE it! I'm actually planning on buying more because they were so easy to decorate with fabric! I didn' have to use any batting and because of the way the styrofoam was molded it looked like a professional had made it.
Erica,
Are you sure thats the website? Nothing comes up for me. Im looking just what you mentioned. Hope you can help
I have made styrofoam cornices using the large sheets of insulation styrofoam from Home Depot. You can use any of them as long as they are about 1" or more thick. I cut the front and sides to make the cornice shape and attach them with hot glue and pins. Glue a strip of green foam 2-3 inches shorter than the cornice all the way across the center of the styrofoam including the sides. Over this attach a doubled piece of batting pinning this to the back top and bottom, allow 4-6 inches for wrapping around to the back.
I don't understand the part about the wood or the foam. Can you provide more details?
Thanks
QVC has two 40" cornices for 32.00 38.00 with shipping.
Ebay has them for 13.00 plus 15.00 shipping.
They are great, I did one in 15 minutes.

www.windowbonnets.com/
video.yahoo.com/
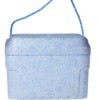
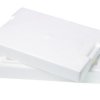
www.qvc.com Video showing much easier and less expensive method. www.qvc.com/
See front of my first project in prior feedback. This is the back of the same project. Simple tuck sides in down center back of unit.
The difference between them is qvc's lay flat, whereas windowbonnets have sides. qvc's did the trick for me.
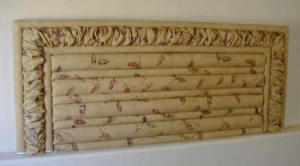
Also headboards are available at www.cornicekits.com/
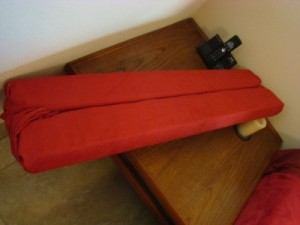
Here is a picture of the headboard, can be done in various fabrics.
Add your voice! Click below to answer. ThriftyFun is powered by your wisdom!