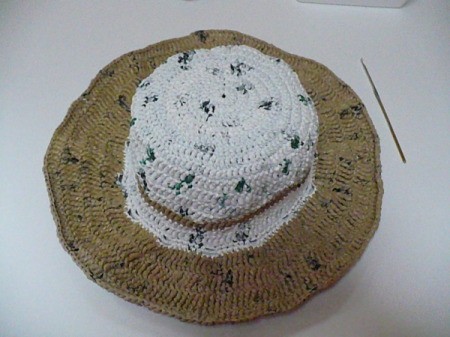
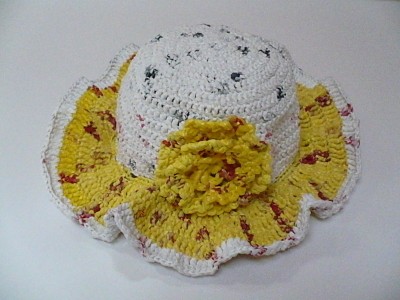
Summer is coming! Before you go out, don't forget the sunscreen lotion and the brim hat to protect your skin and hair from the Sun. Remember: Safety First! Enjoy!
In this summer hat I made, I used sc, dc, tr, and trtr.
Approximate Time: 3 to 4 hours
Supplies:
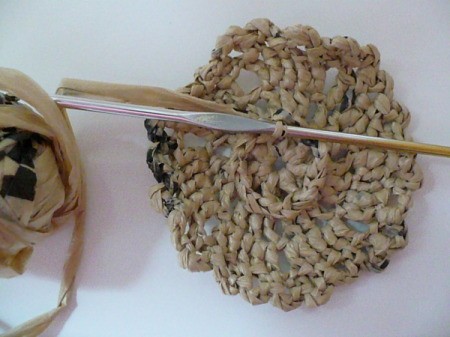
plarn (grocery plastic bag cut into strips)
size E crochet hook
sack needle
scissors
Instructions:
Start from the top of the hat
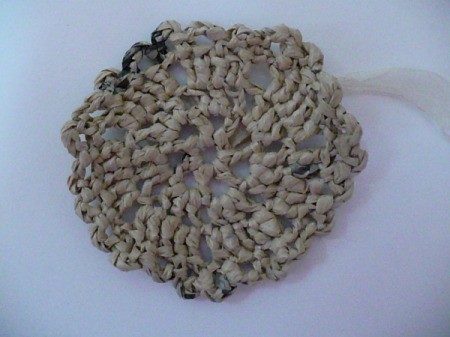
Crown:
Start ch 5, sl st to join to make a ring.
Round 1: *ch 2 (this is counted as 1 dc), 11 dc in ring (12 dc total), sl st to the top of *.
Round 2: *ch 2, 2 dc in each st up to the last st (24 dc total), sl st to the top of *.
Round 3: *ch 2, 2 dc in the first st, dc in the next st, alt up to the last st, sl st to the top of *. (37 dc total)
Round 4: *ch2, 1 dc in the next st, 2 dc in the next st, dc in each st in the next 2 st, 2 dc in the next st, dc in each st in the next 2 st, alt up to the last st, sl st to the top of*. (50 dc total)
Round 5: *ch 2, dc in each st in the next 3 st, 2 dc in the next st, dc in
each st in the next 3 st, alt up to the last st, sl st to the top of *. (61 dc total)
Round 6: *ch 2, dc in each st in the next 5 st, 2 dc in the next st, alt up to the last st, sl st to the top of *. (72 dc total)
Round 7: *ch 2, dc in each st in the next 6 st, 2 dc in the next st, alt up to the last st, sl st to the top of*. (82 dc total)
Round 8: *ch 2, dc in each st in the next 7 st, 2 dc in the next st, alt up to the last st, sl st to the top of *. (94 dc total)
Round 9: *ch3, tr in each st up to the last st, sl st to the top of *.
(94 tr total)
Round 10 to 13: repeat round 9.
Round 14: *ch3, tr in each st in the next st, 2tr in the next 24 st, alt up to the last st, sl st to the top of *. (102 tr total)
Round 15: repeat round 14.
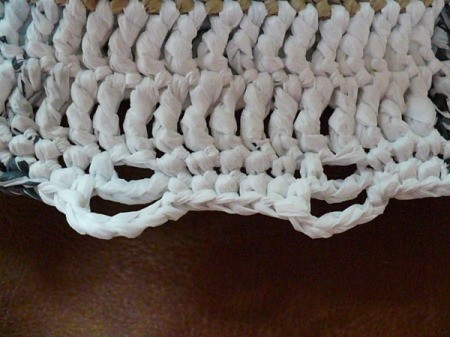
Round 16: (this gives the "wavy effect" of the brim) *ch 2, sc in each st in the next 6 st, ch 3, skip 1 st then proceed sc in each st in the next 6 st, do this alt up to the last st, sl st to the top of *.
Round 17: *ch 2, sc in each st in the next 6 st, ch 5 then proceed sc in
each st in the next 6 st (overleaping those ch 3 you made in round 16), do this alt up to the last st, sl st to the top of*.
Brim
Round 18: *ch 4, trtr in each st up to the last st, sl st to the top of *.
(160trtr total)
Round 19: *ch 4, trtr in each st in the next 9 st, 2 trtr in the next st, do it alt up to the last st, sl st to the top of *. (176trtr total)
Round 20: *ch 4, trtr in each st in the next 10 st, 2 trtr in the next st,
alt up to the last st, sl st to the top of *. ( 192 trtr total)
Round 21: *ch 3, tr in each st in the next 11 st, 2 tr in the next st, do it alt up to the last st, sl st to the top of *. Fasten off and
weave in ends.
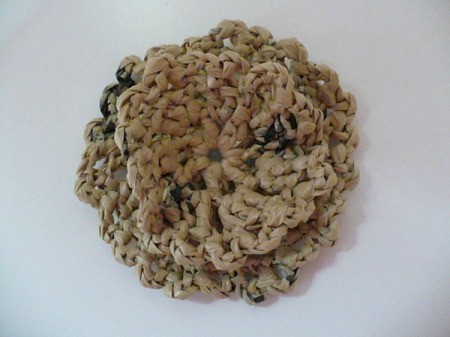
Floral Decoration:
First Layer:
Start ch 5, sl st to join to make a ring.
Round 1: *ch 4, dc, ch 2, dc, ch 2, dc, ch 2, dc, ch 2, dc, ch 2, dc, ch 2, sl st to the second ch of *. ( Makes 7 petal holes)
Round 2: *ch 2, 2 dc in the 1st petal hole, ch1, 3 dc in the next petal hole, ch 1, 3 dc in the next petal hole, do the same pattern up to the last petal hole, sl st to the top of *.
Round 3: *ch 2, 2 dc in each st in the next 2 st, ch 2, skip 1 st, 2 dc in the next st, 2 dc in the next st, ch 2 skip 1 st then proceed, 2 dc in the next st, dc in the next st, 2 dc in the next st (do this alt up to the last st), sl st to the top of *.
Round 4/edging: ch 3, (skip1 st) sc, ch 3 (skip 1 st) sc, do it alt up to the last st. Fasten off and weave in ends.
Second Layer:
Join to the ring of the first layer of the flower.
Round 1: To make petal holes for the second layer:
insert your crochet hook to the center hole of the first layer of
the flower then to one of the petal hole, hook your plarn then
yarn over, *ch 4, dc to the next petal hole, ch 2, dc to the next
petal hole, ch 2, dc to the next petal hole, ch 2 (do this up to the
last petal hole of the first layer flower), sl st to the second ch
of *.
Round 2: *ch 2 (counted as 1 dc), 2 dc to the first petal hole, ch 2, 3 dc in the next petal hole, ch 2 do this up to the last petal hole, sl st to the top of *.
Round 3/edging: ch 3, (skip 1 st) sc, ch 3 (skip 1 st), sc, do it alt up to the last st. Fasten off and weave in ends.
*Sew the flower in to the hat using sack needle and plarn as thread.